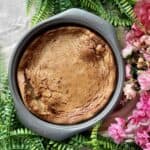
EASY Chinese New Year Cake (Baked Nian Gao)
This EASY Chinese New Year Cake Recipe, or Baked Nian Gao, is sweet, sticky, and gooey with that mochi-like consistency when piping hot. (It's also delicious pan-fried.) Traditionally, Nian Gao is steamed but that takes forever, and you have to add the right amount of water for the New Year Cake to come out right. Baked Nian Gao is so much quicker and more forgiving and the crisp exterior-soft interior is scrumptious! Plus everything is readily available, no need to head for the Asian markets! (Dairy-free version tested.)
Servings: 8 people
Calories: 380kcal
Equipment
- 1 Large bowl
- 1 Whisk or fork
- 1 9-inch cake tin (non-stick)
Ingredients
- 7.9 oz glutinous rice flour 225g. Most Chinese people use Thai glutinous rice flour (sticky rice flour) but you can also use Mochiko Flour/ sweet rice flour. DO NOT use regular rice flour as a substitute for glutinous rice flour. I'm too lazy to sift and never received any complaints.
- 1 Cup sugar 7 oz or 200g. Use light brown or dark brown sugar.
- ⅙ teaspoon salt you can omit if you don't like salt in your desserts but it's a flavor enhancer.
- 1 inch ginger peeled and grated. (Use the juice too.) Optional.
- 9.3 oz coconut cream 265g.
- 3 oz water 85g. Omit if using coconut milk. I will update with the exact quantity to substitute after testing.
- 0.7 oz oil 20g. Use sesame oil or a neutral vegetable oil. Do NOT use olive oil. Substitute: melted butter
- 2 eggs beaten
Instructions
- Preheat the oven to 350F/ 177C/ 167 C fan.
- Mix the dry ingredients (glutinous rice flour, sugar, salt. If adding ginger or other spices such as cinnamon, you can add it now.)
- Stir in the coconut cream, water, and oil or melted butter till you don't see any flour. (The batter will be a bit lumpy, don't worry.)
- Slowly fold in the beaten eggs.
- Pour into an oiled 9-inch cake tin. Bake for 50 minutes or till cooked through. (The inside will look wet and underbaked, but it should have formed a cohesive translucent dough, instead of being a wet batter. Refer to the Step-by-Step for a photo of what the cooked batter looks like.)
- Once baked and golden brown, remove from the oven and allow to cool for about 10 minutes before removing from tin and cutting.
Video
Notes
Storage
Traditionally, sweet rice cake can be stored for a while. However, I've reduced the sugar so I don't keep it for more than 1-2 days. I highly recommend eating it when hot though!
Reheating
The cake turns hard when cold, so you'll need to reheat it by pan-frying or in the microwave. I do not recommend steaming, as that'll soften the delicious crust!
You could also go the traditional route, and dip in egg, then deep-fry (not tested yet.)
Note: the nutritional information is an estimate automatically calculated using the WPRM recipe maker and I am not responsible for its veracity.
Nutrition
Calories: 380kcal | Carbohydrates: 71g | Protein: 3g | Fat: 10g | Saturated Fat: 6g | Polyunsaturated Fat: 1g | Monounsaturated Fat: 2g | Trans Fat: 0.01g | Cholesterol: 41mg | Sodium: 81mg | Potassium: 41mg | Fiber: 2g | Sugar: 47g | Vitamin A: 59IU | Vitamin C: 0.04mg | Calcium: 10mg | Iron: 0.3mg