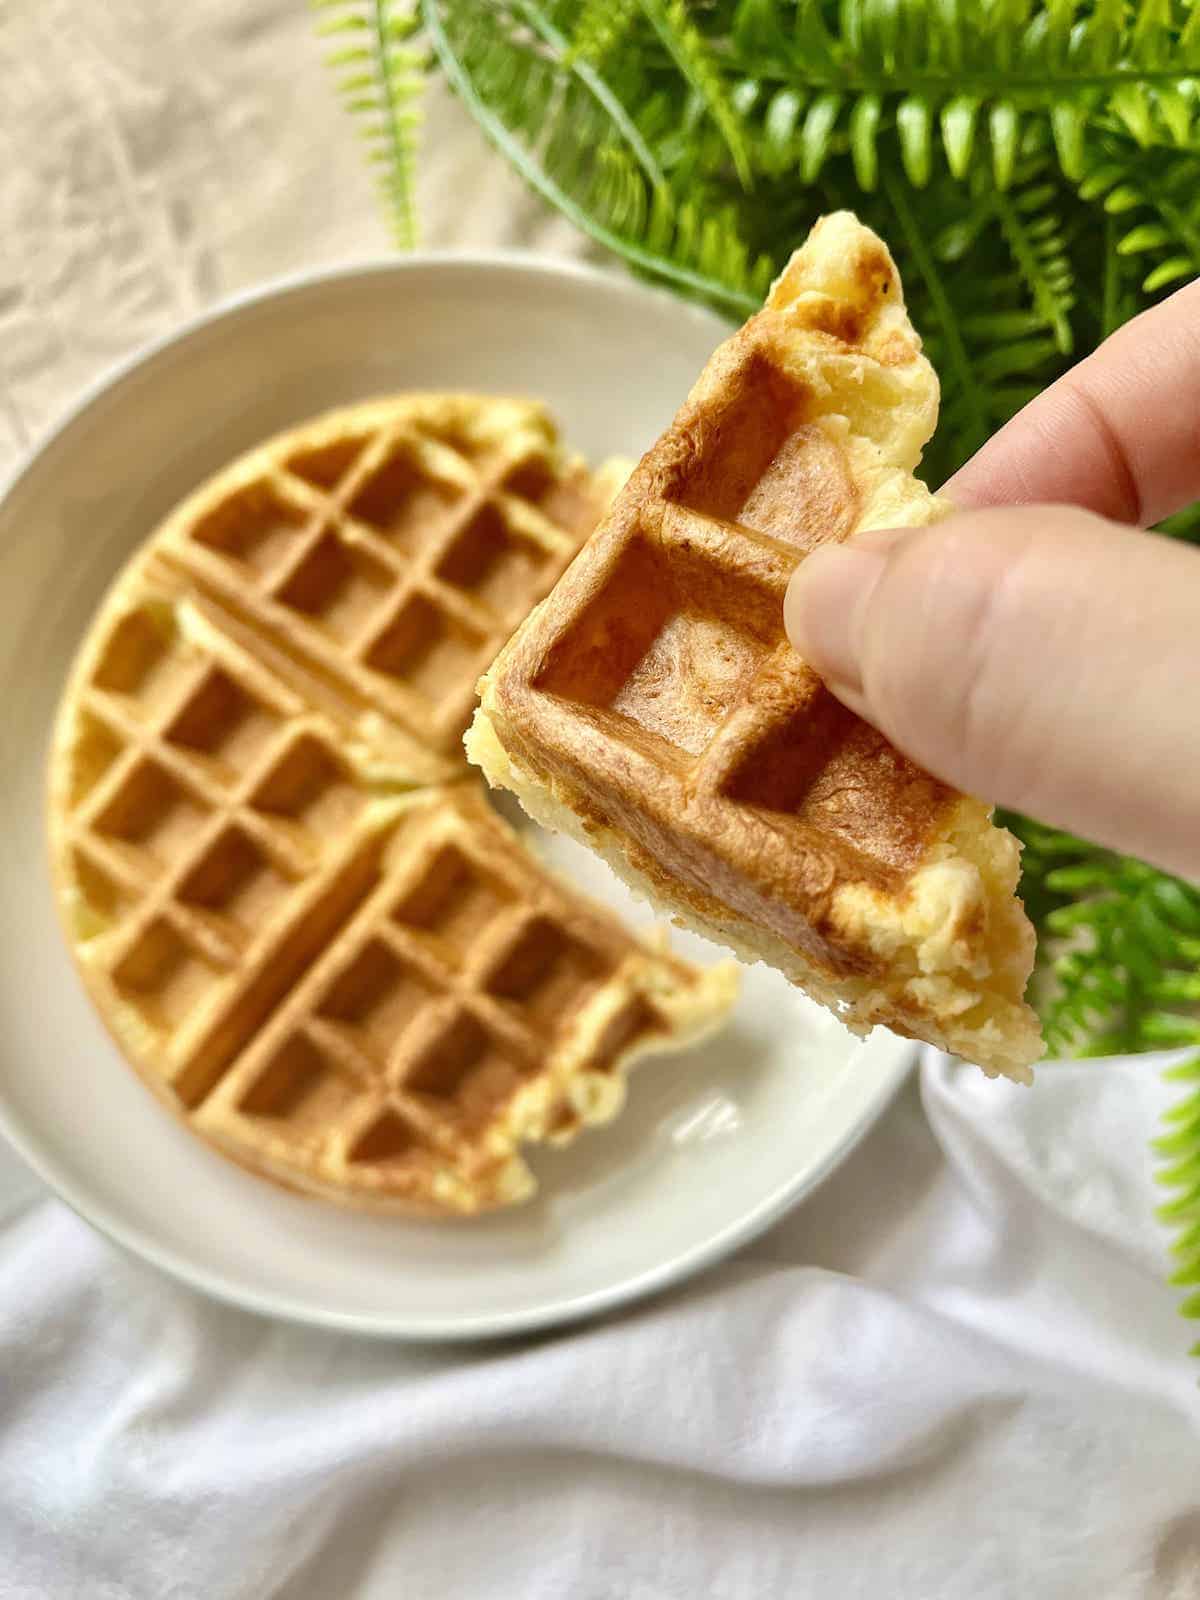
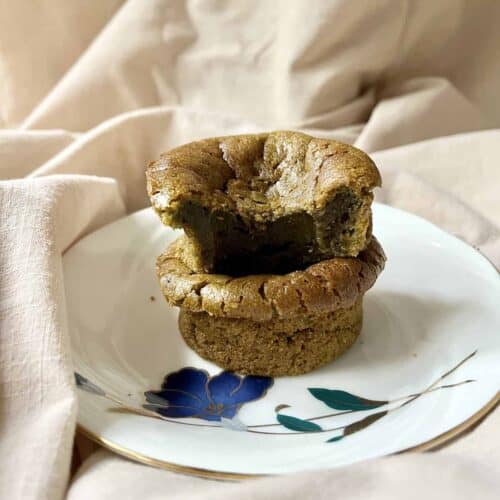
This delicious Cheese Mochi Waffles Recipe- also known as Moffles!- is crisp on the outside and soft and oozy on the inside! Thanks to the glutinous rice flour, these waffles stay crispy and don't become soggy as easily. On the table in 15-20 minutes, they're perfect for breakfast or brunch! (This recipe works with both a traditional and vertical waffle maker. It is NOT just putting a mochi in a waffle machine!) (Gluten-Free)
Jump to:
⭐ Why This Recipe is a Star
- Delicious: Unlike regular Belgian waffles, Cheese mochi waffles stay crisp for a long time! They're soft inside, with a chewy texture like mochi muffins and mochi bread, Mochi Bread and Brazilian Cheese Bread (pão de queijo.) 1 of my favorite Asian breakfast recipes!
- Quick and easy: A mix and cook recipe, these cheese waffles are on the table in 15-20 minutes. The ingredients are simple too, with no need to head to Asian grocery stores.
- Versatile: My step-by-step photos use a Cuisinart Vertical Waffle Machine but you can use a traditional flat iron too. Moreover, they're perfect for breakfast and brunch, or even lunch and dinner! (Just switch up what you serve the waffles with.)
🥘 Ingredients
You'll only need a few simple ingredients for this easy recipe for chewy mochi waffles:
- glutinous rice flour: You can also use sticky rice flour, mochiko flour (もち粉) or sweet rice flour. If on a budget, use Thai glutinous rice flour. It's available in the Asian markets and is cheaper.) These flours give the waffle and many other Asian desserts its chewy texture. Do not use regular rice flour, bread flour or all-purpose flour! (Gluten-free despite the name.)
- grated parmesan: do not substitute with shredded cheddar or shredded mozarella as it makes the waffles too soft.
- salt: a little salt can enhance the flavor
- whole milk: use full fat regular milk. I have not yet tested the recipe with dairy-free milks such as almond milk, soy milk or coconut milk.
- neutral vegetable oil: we want something that will complement or not interfere with the taste of the cheese so don't use olive oil!
- large egg: beat well and whisk into the milk
- baking powder and baking soda
- ground black pepper: helps to give the cheese flavor more depth. You can also use chili powder or gochugaru.
- non-stick vegetable oil spray: Spray a neutral flavoured oil on your waffle machine- or lightly baste it with melted butter if you have more time- even if it's non-stick. (Makes clean-up faster and extends the life of your waffle machine.)
- Truffle oil: I highly recommend giving your cooked waffles a light spray of truffle oil (or add a few drops of truffle oil on top.) Do not use truffle oil to oil your machine before cooking as heat can destroy the delicate truffle flavor.
Variations
Glutinous rice waffles can be made in multiple flavors, such as:
- pandan mochi waffle: use pandan extract or pandan milk (and no cheese)
- black sesame moffle: use black sesame powder
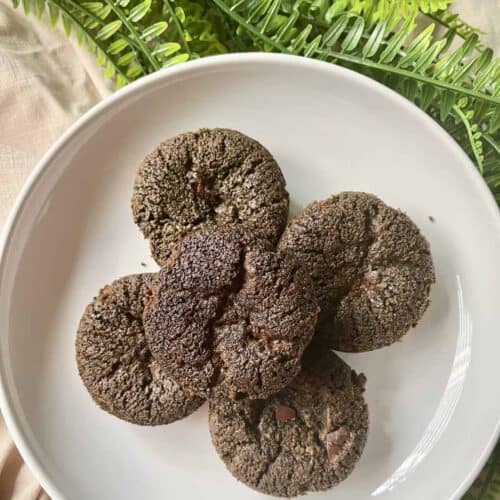
- chocolate moffle: you'll need vanilla extract and cocoa powder for an easy version or melted chocolate for a more lux tasting waffle
- ube mochi waffle: use ube powder or ube extract. (Another good natural purple coloring is Purple Sweet Potato Powder.)
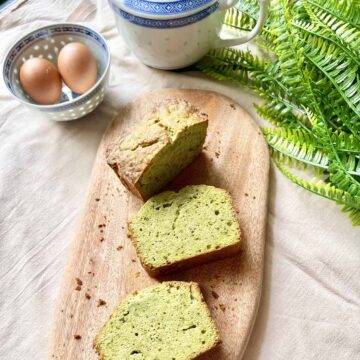
- matcha mochi waffles: add matcha powder. Green tea powder also works if you want to save money (but note it's not the same as matcha.)
- hojicha waffle: You'll need hojicha powder- click here to see how hojicha differs from matcha. Serve with a Hojicha Latte on the side!
🔪 Step-by-Step Instructions
Using a Vertical Waffle Machine
Note: it's almost identical for a traditional horizontal waffle machine, just that your batter will be thicker. If you're using a vertical machine, this squeezy pancake batter bottle is super useful- less messy than a scoop, and with a swirl ball inside to keep everything well-mixed.
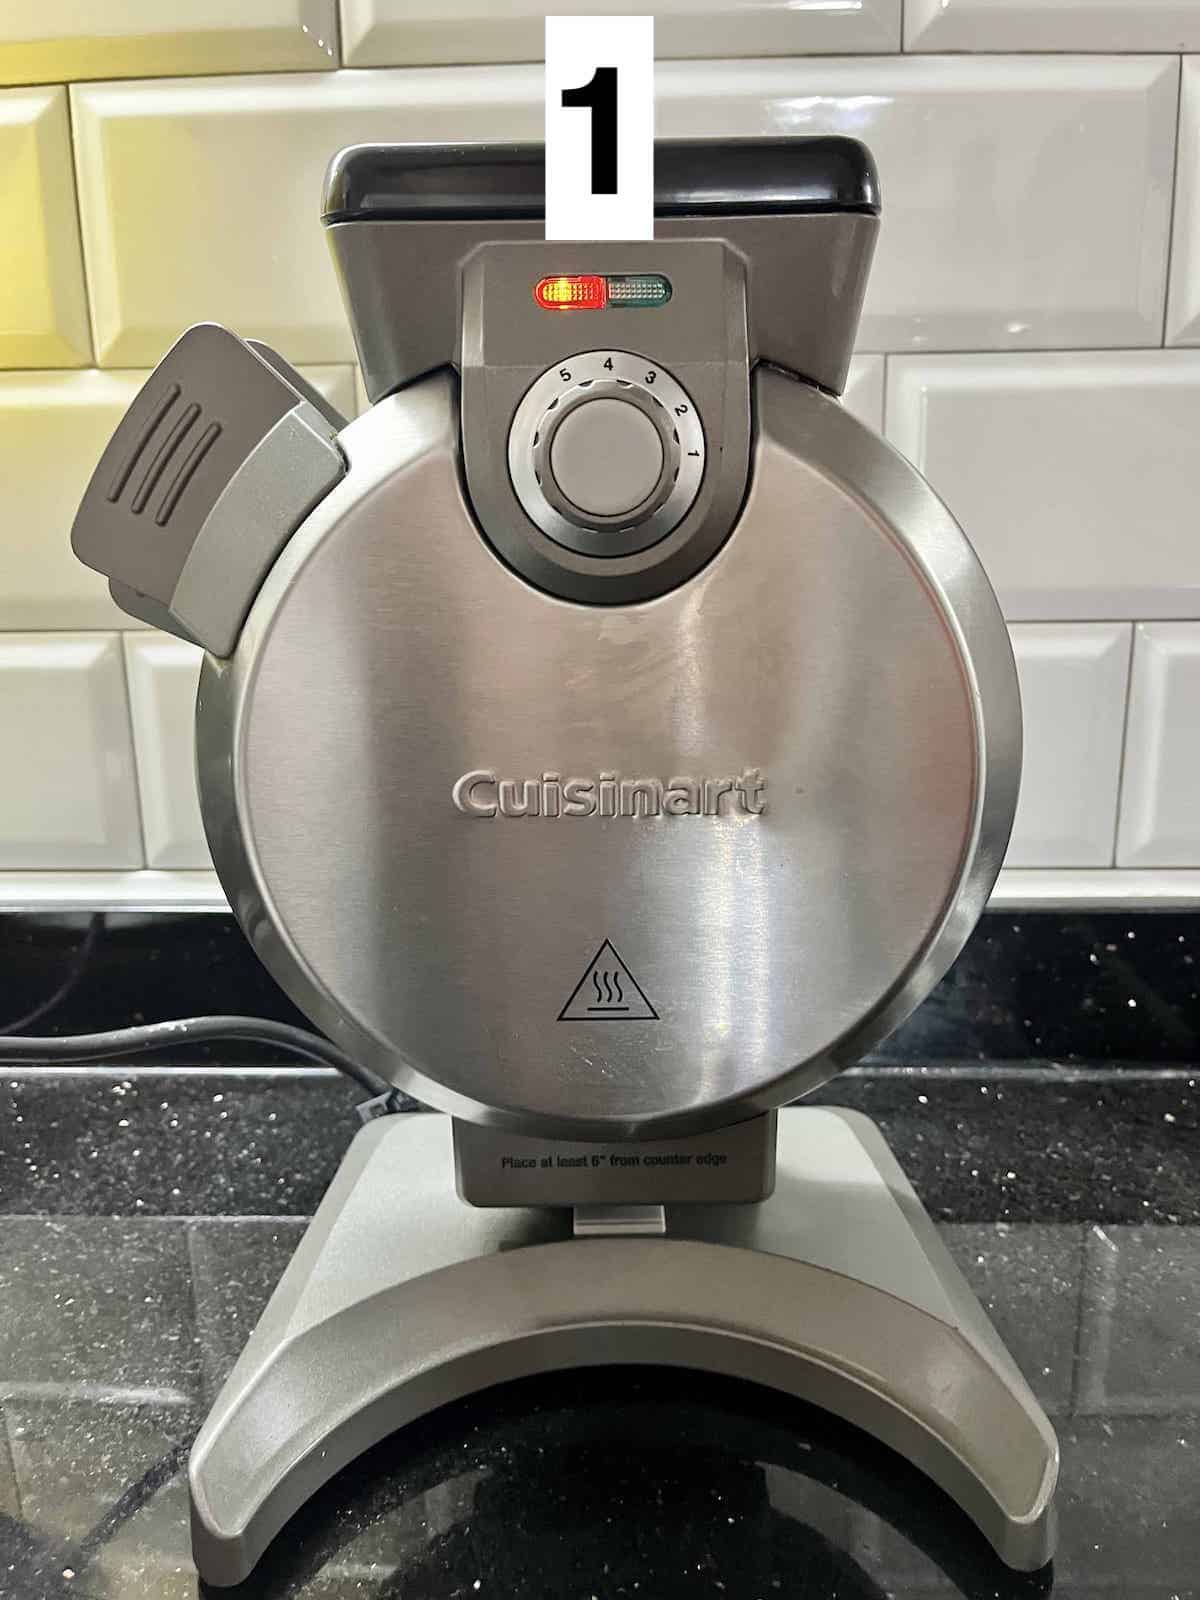
- Pre-heat your machine. I cook my waffles on 3 or 4 (medium heat) but you can choose your preferred level of toastiness. (If you use a lower heat level, the waffles won't stay crisp for as long.)
Note: for Cuisinart, you'll know the machine is pre-heating if the red light is on. If there is no light, the machine is not on.
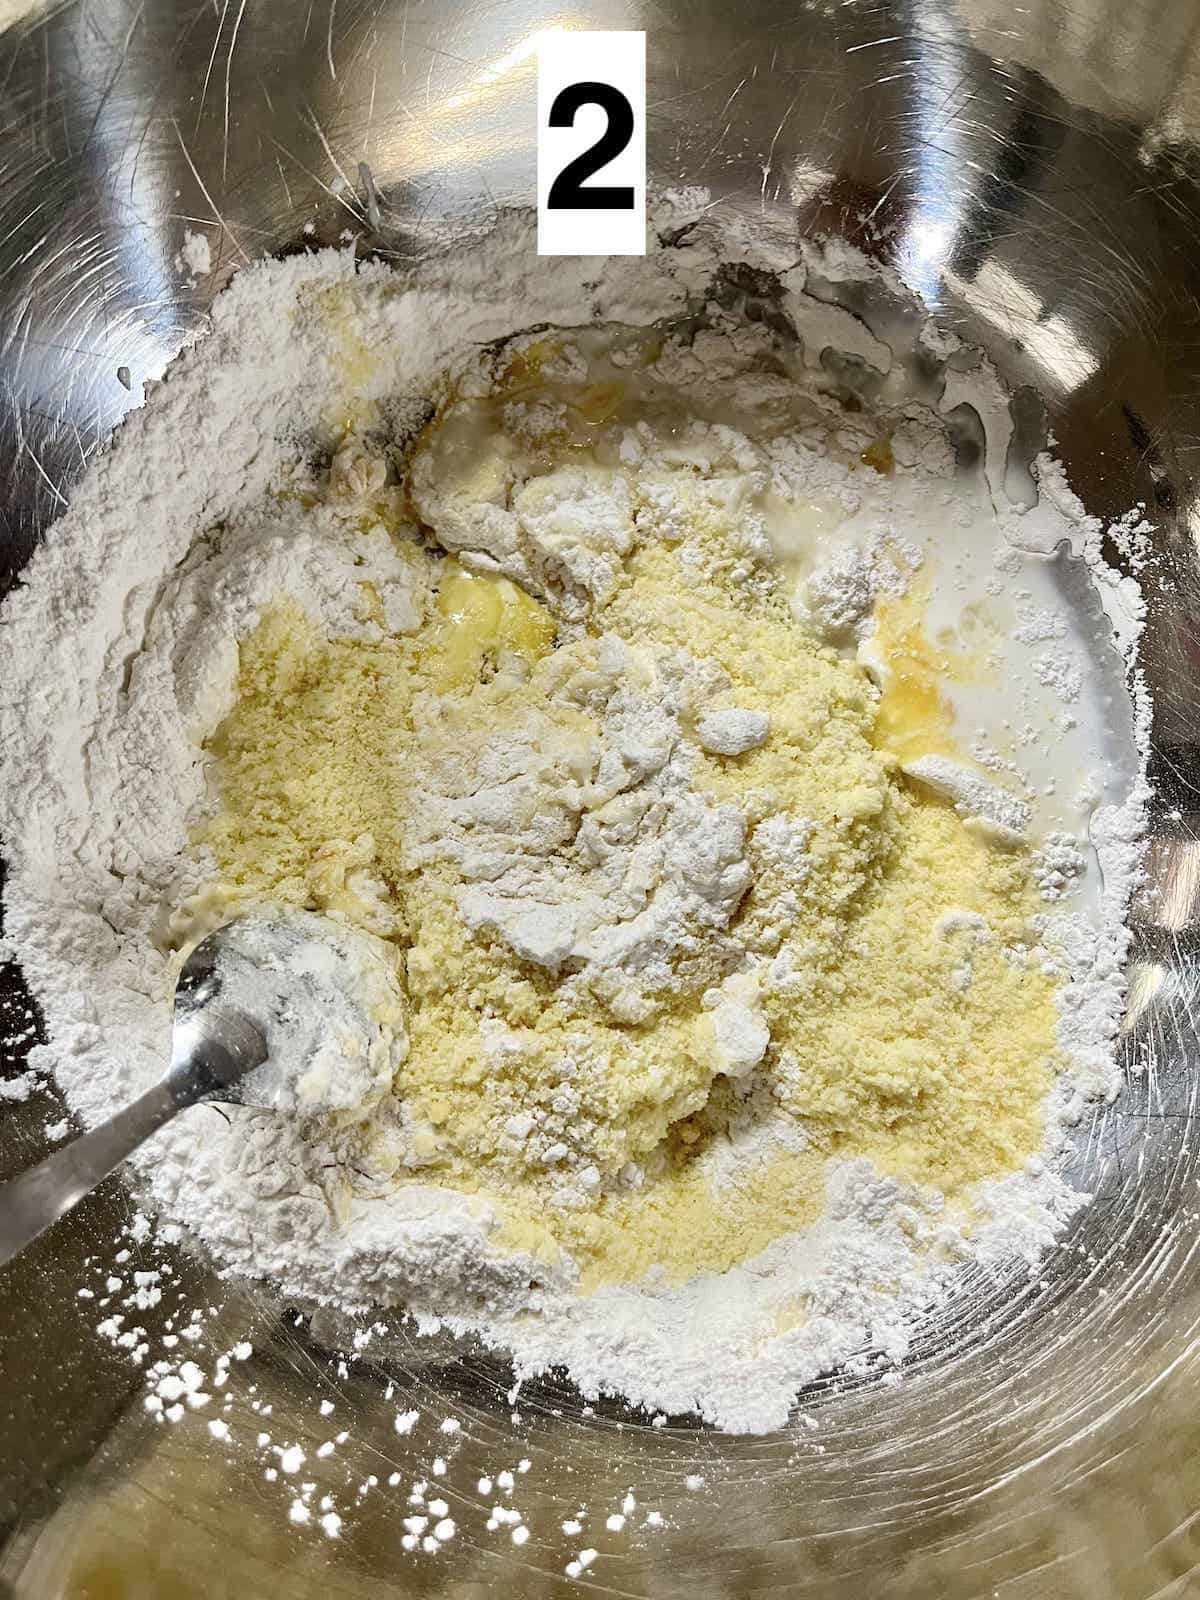
2a. Whilst the machine is heating, beat the egg well.
2b. Mix the dry ingredients in a large mixing bowl then add the wet ingredients and mix well.
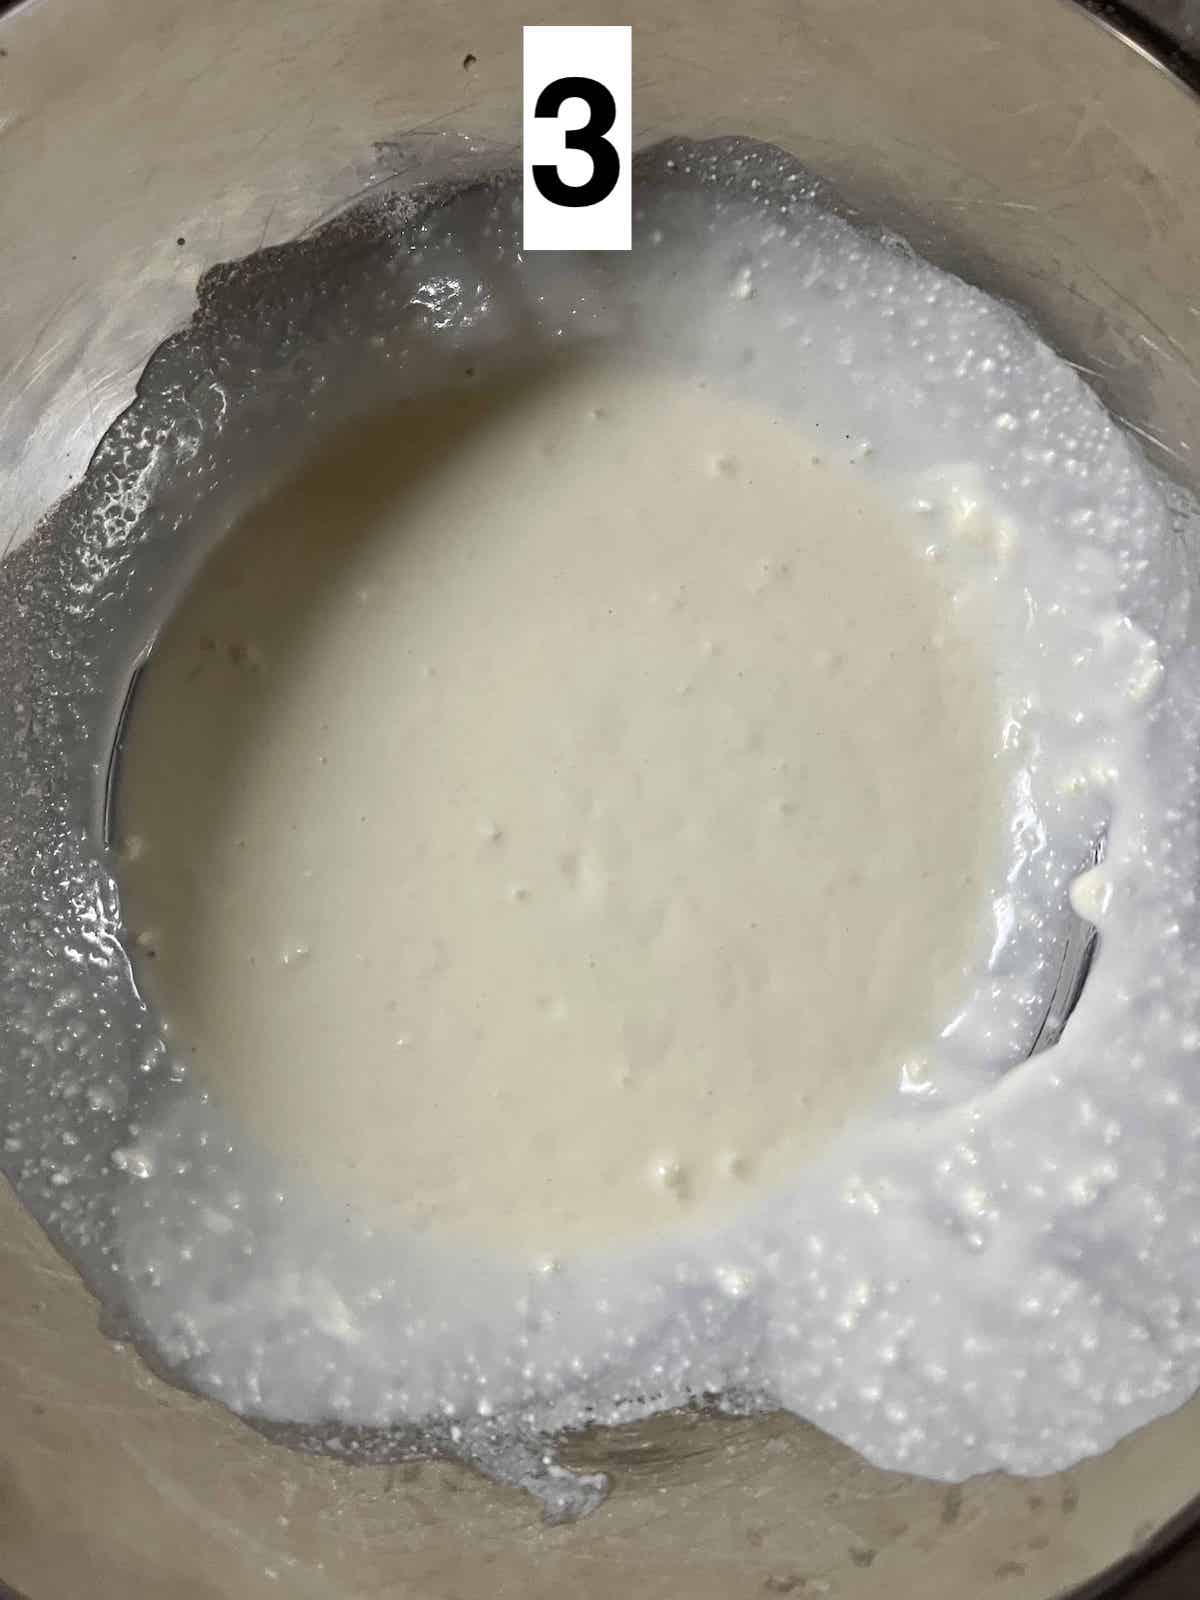
3. Mix till your mochi batter has no lumps. It will be quite runny since you need to pour it down the vertical spout. (If it's too thick, it won't go down.)
Note: if you're using a traditional waffle iron, you'll be using less milk so your batter will be less runny.
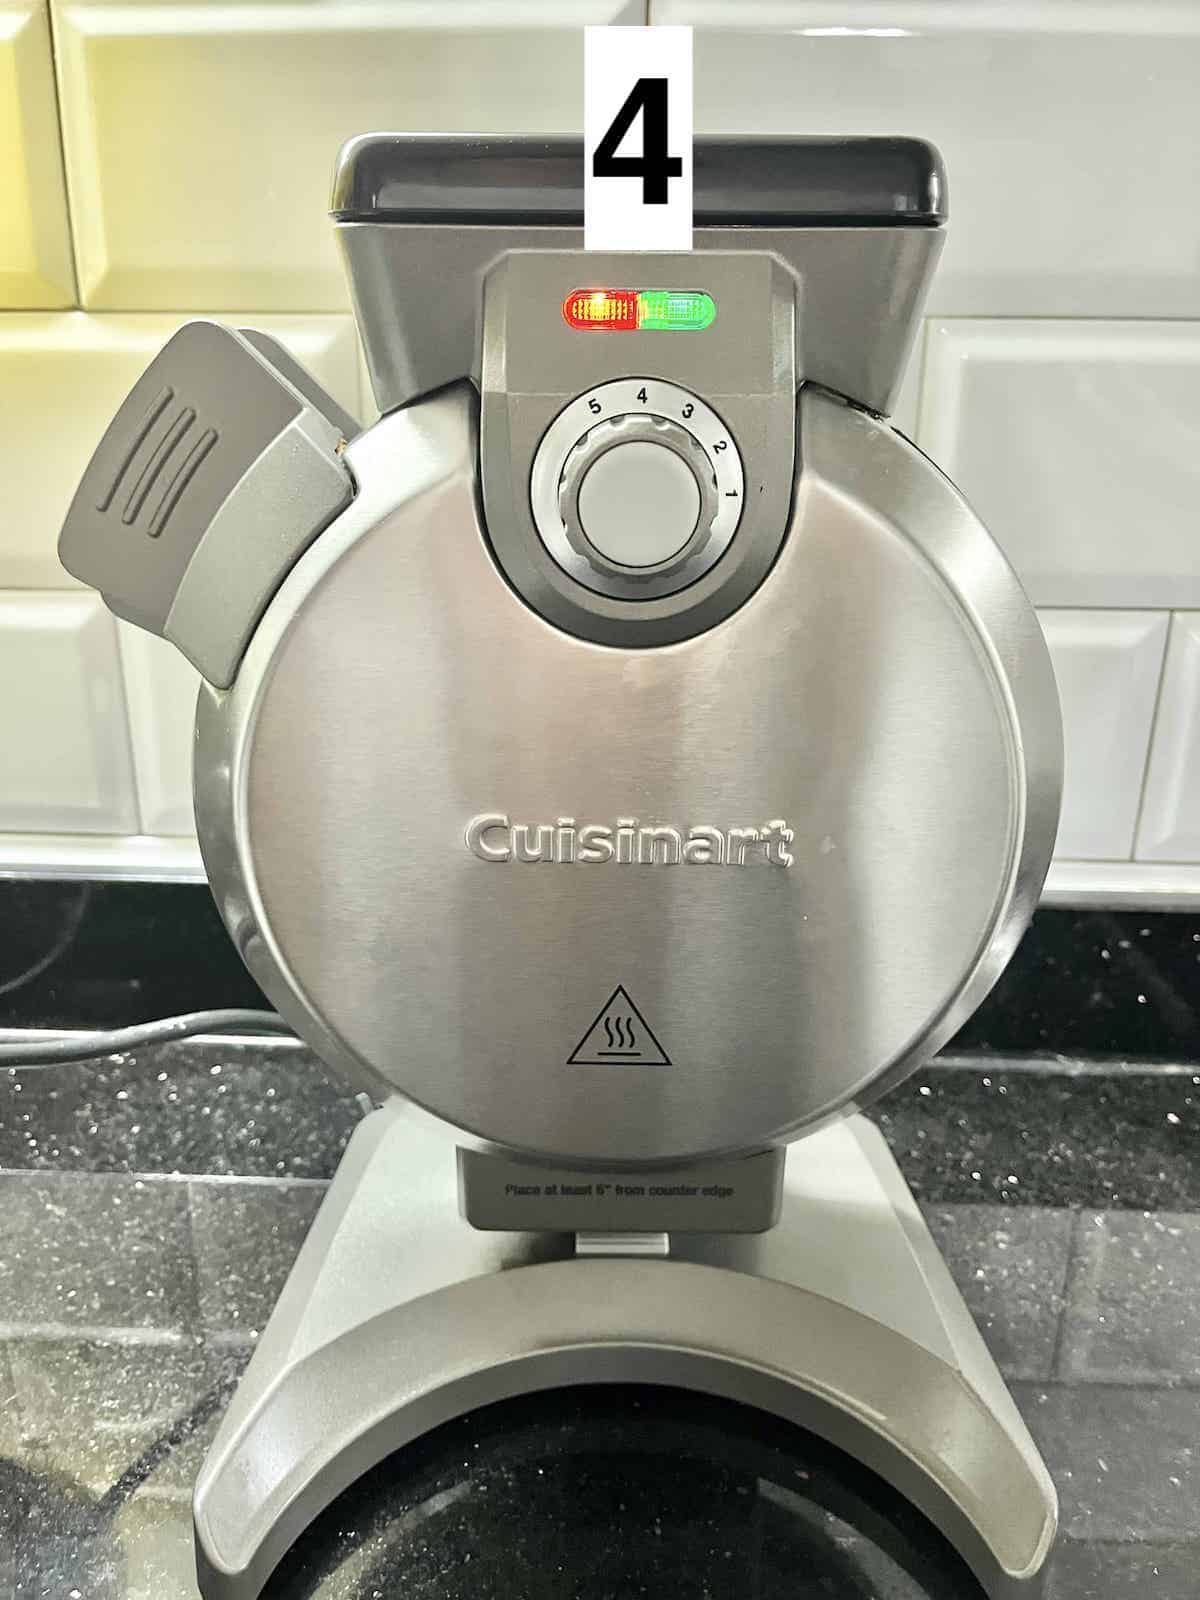
4. Once your Cuisinart waffle maker has pre-heated, the green light will turn on and it will make a loud beep sound.
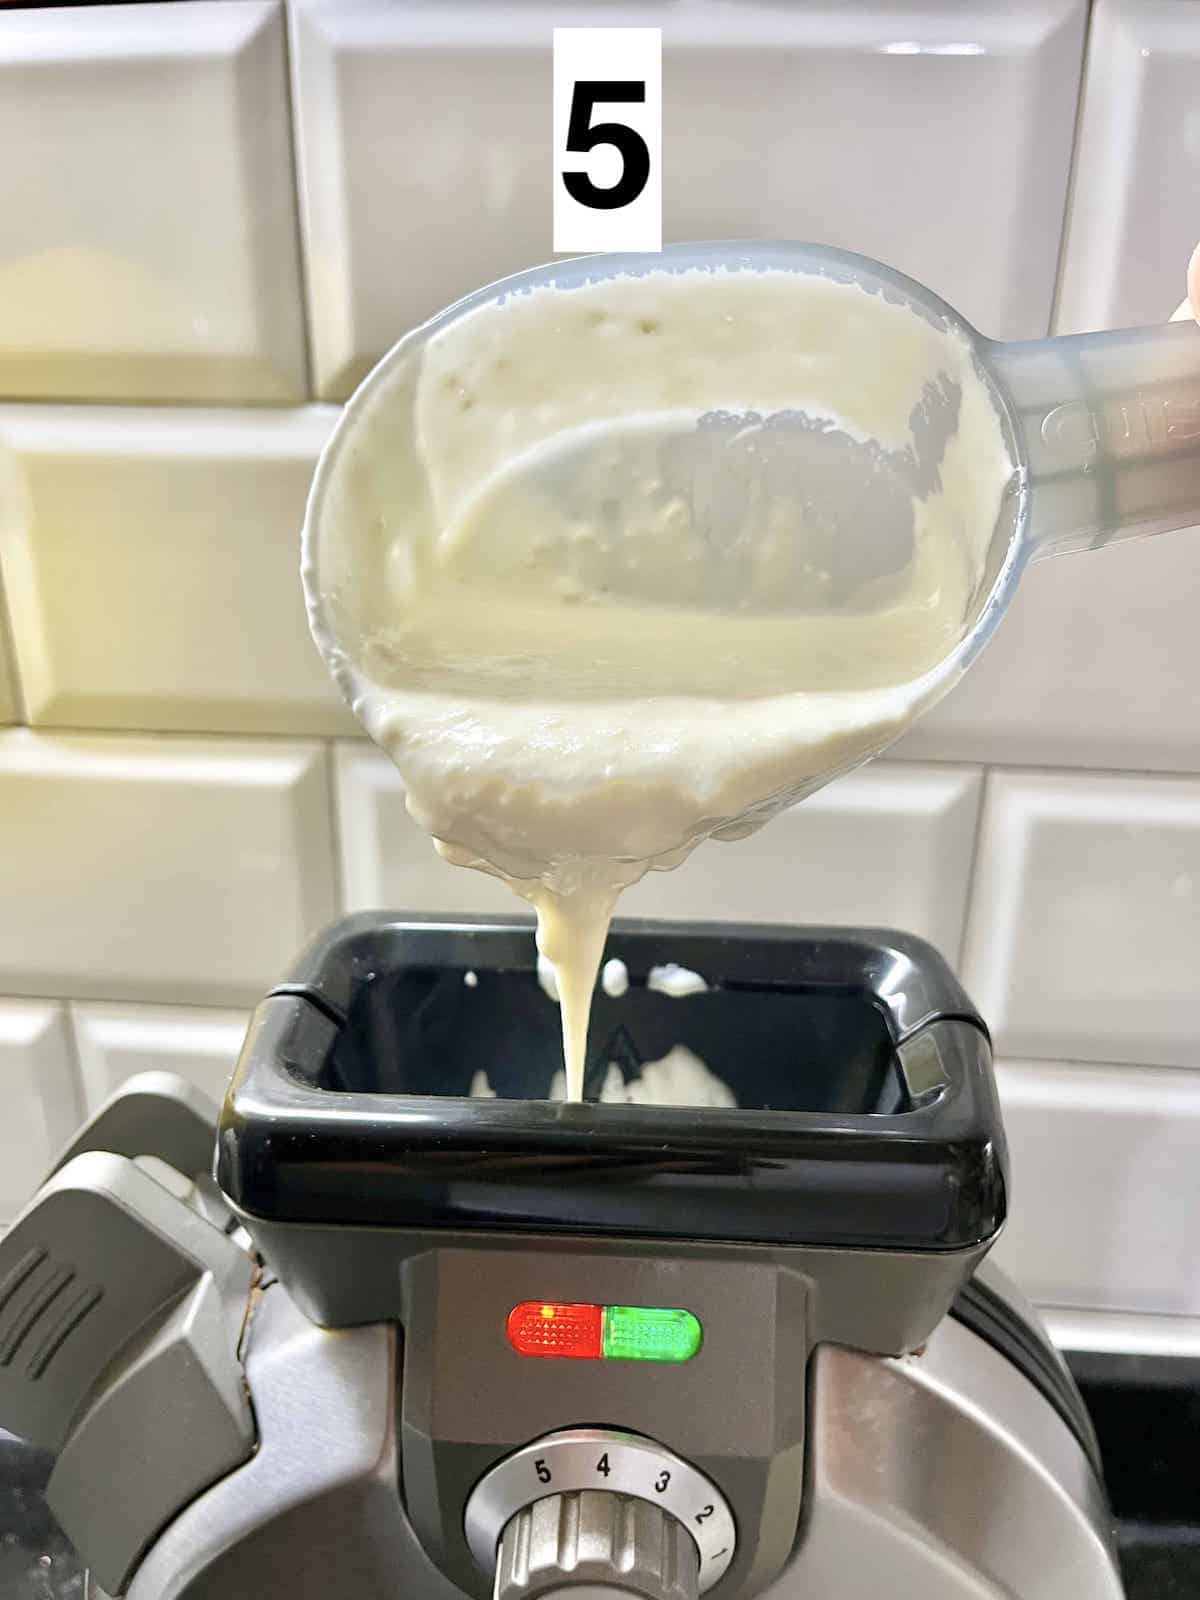
5. Use the Cuisinart scoop to scoop up the mochi waffle batter then slowly pour it down the spout of the machine.
DO NOT OVERFILL OR THE MACHINE WILL POP OPEN!
Note: the best way is to use the Cuisinart scoop so that the machine doesn't leak or overflow (from excess batter.)
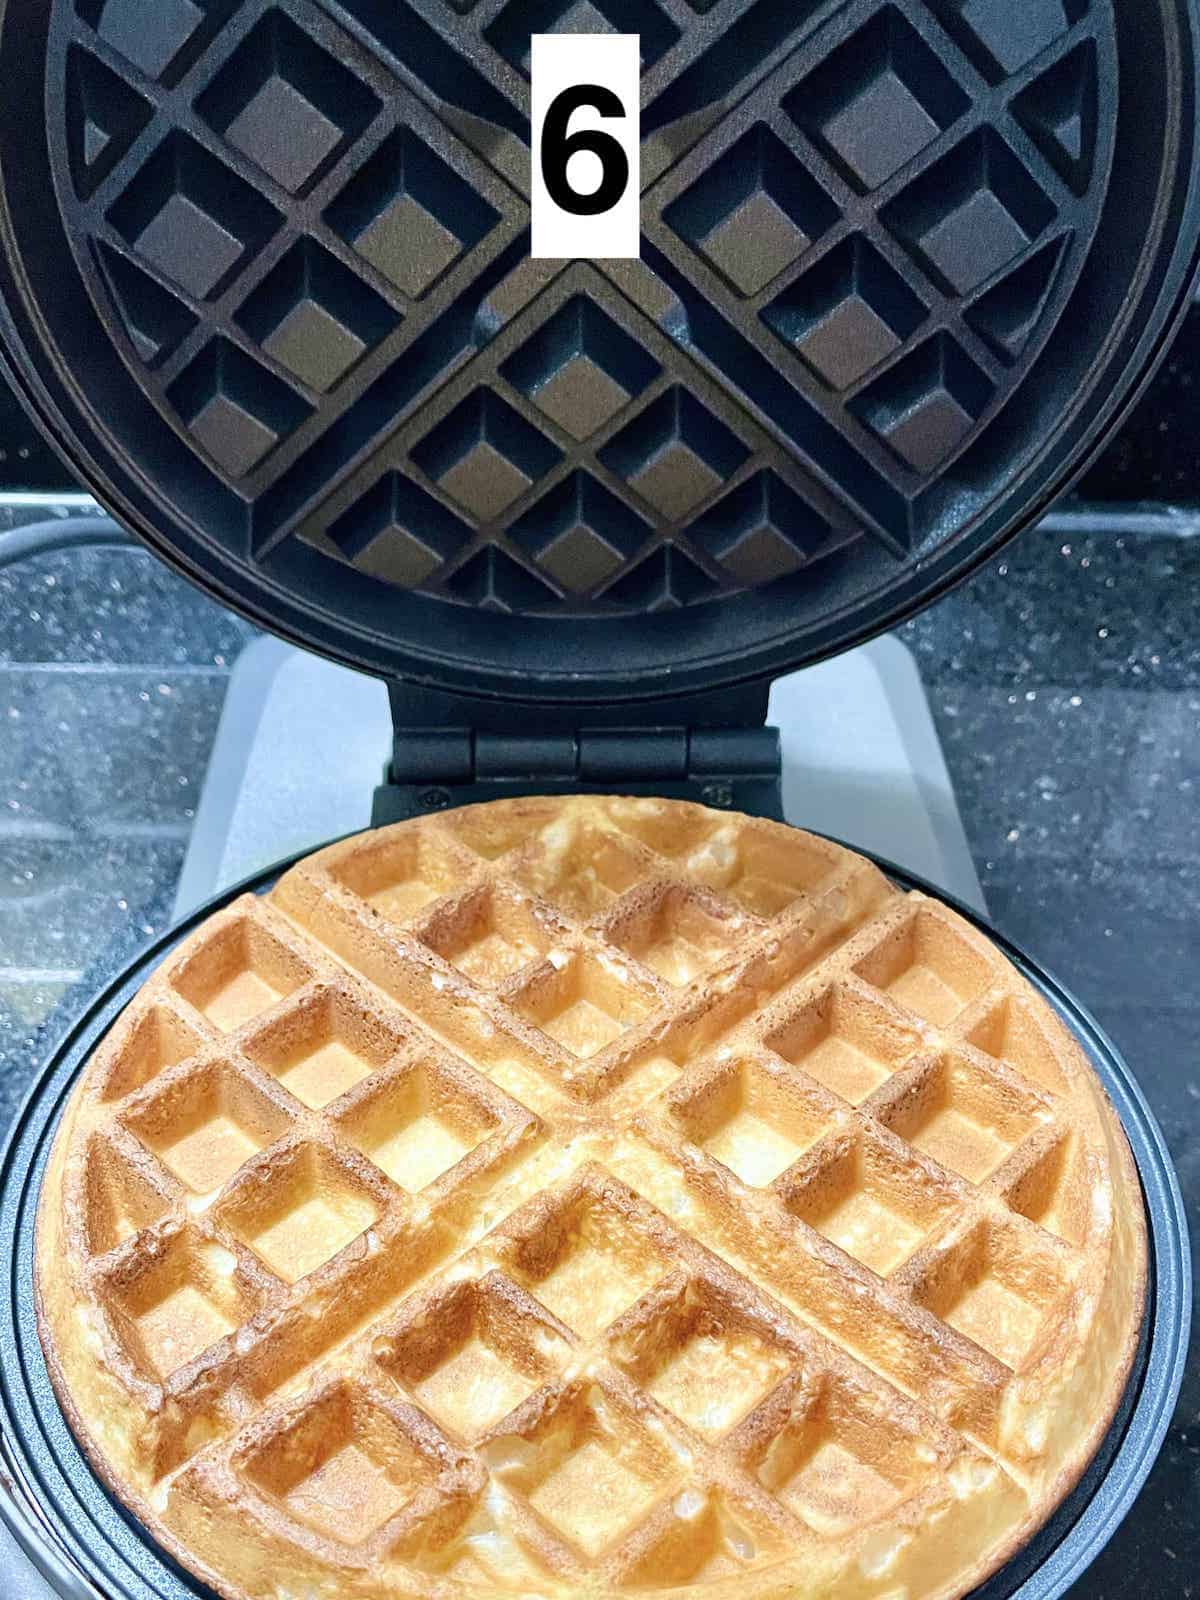
6. When the homemade waffles are cooked, the machine will beep again. Use an oven glove or tea cloth to protect your hands then carefully open the machine. The waffles should be a beautiful golden brown.
Place on a cooling rack and continue making your waffles.
Time to enjoy!
Note: Be careful as there is a lot of hot steam and the machine is burning hot everywhere except the handle clip!
🥡 How to Store
Honestly, mochiko waffles are best eaten hot out of the oven. Once cooled, the texture changes- it is less airy- and it doesn't taste as good.
However, if you make extra, you can store in an airtight container in the fridge for 2-3 days.
Reheating
If you're serving at a party, note that leftover waffles don't look as good after reheating. (They're somewhat collapsed.)
You can reheat in your waffle iron, toaster oven or pan-fry.
👩🏻🍳 Expert Tips
Tip #1: If making a huge batch of homemade mochi waffles, keep the cooked waffles in a 200 F/ 93C/ 73C fan oven while cooking the rest. This makes sure they're perfectly crispy-chewy when you want to serve!
Tip #2: Make sure the machine is pre-heated well, and don't use a low heat setting, for crisp waffles that don't go soggy!
Tip #3: Though we should oil the waffle iron, don't go overboard with the cooking spray as excess oil will just be wasted.
Frequently Asked Questions
This is a Japanese flour. Also known as sweet rice flour, it is made from cooked mochigome rice, a glutinous short-grain rice. It's similar to glutinous rice flour and both can be used to make chewy foods which are very popular in Asia.
Serve with teriyaki chicken thighs, fried chicken, turkey bacon or pork chops. Delicious with maple syrup drizzled on top. A mango cucumber tomato salad on the side goes well too!
🥗 Other Glutinous Rice Flour Recipes

Enjoyed this easy savory Mochi Waffles Recipe? Please leave a 5-star 🌟🌟🌟🌟🌟rating in the recipe card below! If you REALLY liked these chewy waffles, please consider supporting it by buying me a bottle of soy sauce! 🙂 (No obligation though!) Thank you and have a great day!

Cheese Mochi Waffles Recipe
Equipment
- Waffle maker I used Cuisinart vertical but you can use a flat waffle machine too.
Ingredients
Dry ingredients
- 17 Tablespoons glutinous rice flour i.e. 1 Cup + 1 Tablespoon. Substitute: mochiko flour
- ⅓ Cup parmesan cheese grated. Do not substitute with shredded cheese
- ½ teaspoon baking powder
- ¼ teaspoon baking soda
- ½ teaspoon salt
- Pinch turmeric powder Optional, if you want to intensify the golden color. The waffles shown in the picture were made without turmeric and without nutritional yeast.
- Pinch Nutritional Yeast Optional, to intensify the color and make it more savory.
Wet Ingredients
- 1 egg a large one, about 50g, beat well
- ⅚ Cup whole milk (200g) Use only ½ cup of milk if using a regular flat waffle maker.
- 2 Tablespoon vegetable oil Don't use olive oil. Make sure it's a neutral flavoured one.
- Truffle Oil Optional. This just makes the flavor nicer.
For oiling the machine
- Vegetable oil spray Substitute: melted butter
Instructions
Vertical Waffle Maker
- Pre-heat your machine. I cook my waffles on 3 or 4 but you can choose your preferred level of toastiness.Note: for Cuisinart, you'll know the machine is pre-heating if the red light is on. If there is no light, the machine is not on.
- Whilst the machine is heating, beat the egg well.
- Mix the dry ingredients in a large mixing bowl then add the wet ingredients and mix well.
- Mix till your batter has no lumps. It will be quite runny since you need to pour it down the vertical spout. (If it's too thick, it won't go down.)
- Once your Cuisinart waffle maker has pre-heated, the green light will turn on and it will make a loud beep sound.
- Use the Cuisinart waffle scoop to scoop up the batter then slowly pour it down the spout of the machine.Note: It's important to use the scoop that came with the machine as it's the exact amount needed to fill the machine. This way, it won't leak or overflow (from excess batter.) Be careful. DO NOT OVERFILL OR THE MACHINE MAY POP OPEN. (I suggest not pouring in the entire scoopful of batter.)
- When the waffles are cooked, the machine will beep again. Use an oven glove or tea cloth to protect your hands then carefully open the machine. Note: Be careful as there is a lot of hot steam and the machine is burning hot everywhere except the handle clip!
Regular Waffle Maker
- As above but you'll use less milk so the batter is less watery.
Notes
Note: the nutritional information is an estimate automatically calculated using the WPRM recipe maker and I am not responsible for its veracity.
Nutrition
If this Sweet Rice Flour recipe was helpful, maybe you'd like to sign up for my newsletter? Let me know if you prefer them to regular American waffles!


Anna says
Very easy but didn’t come out chewy for me. Still great though, it was airy inside and crispy outside! Would love to get measurements for the chocolate version please — how much cocoa powder and vanilla extract?
Zen says
Thanks for your feedback Anna! Will post a recipe with the chocolate version by the end of the week 🙂