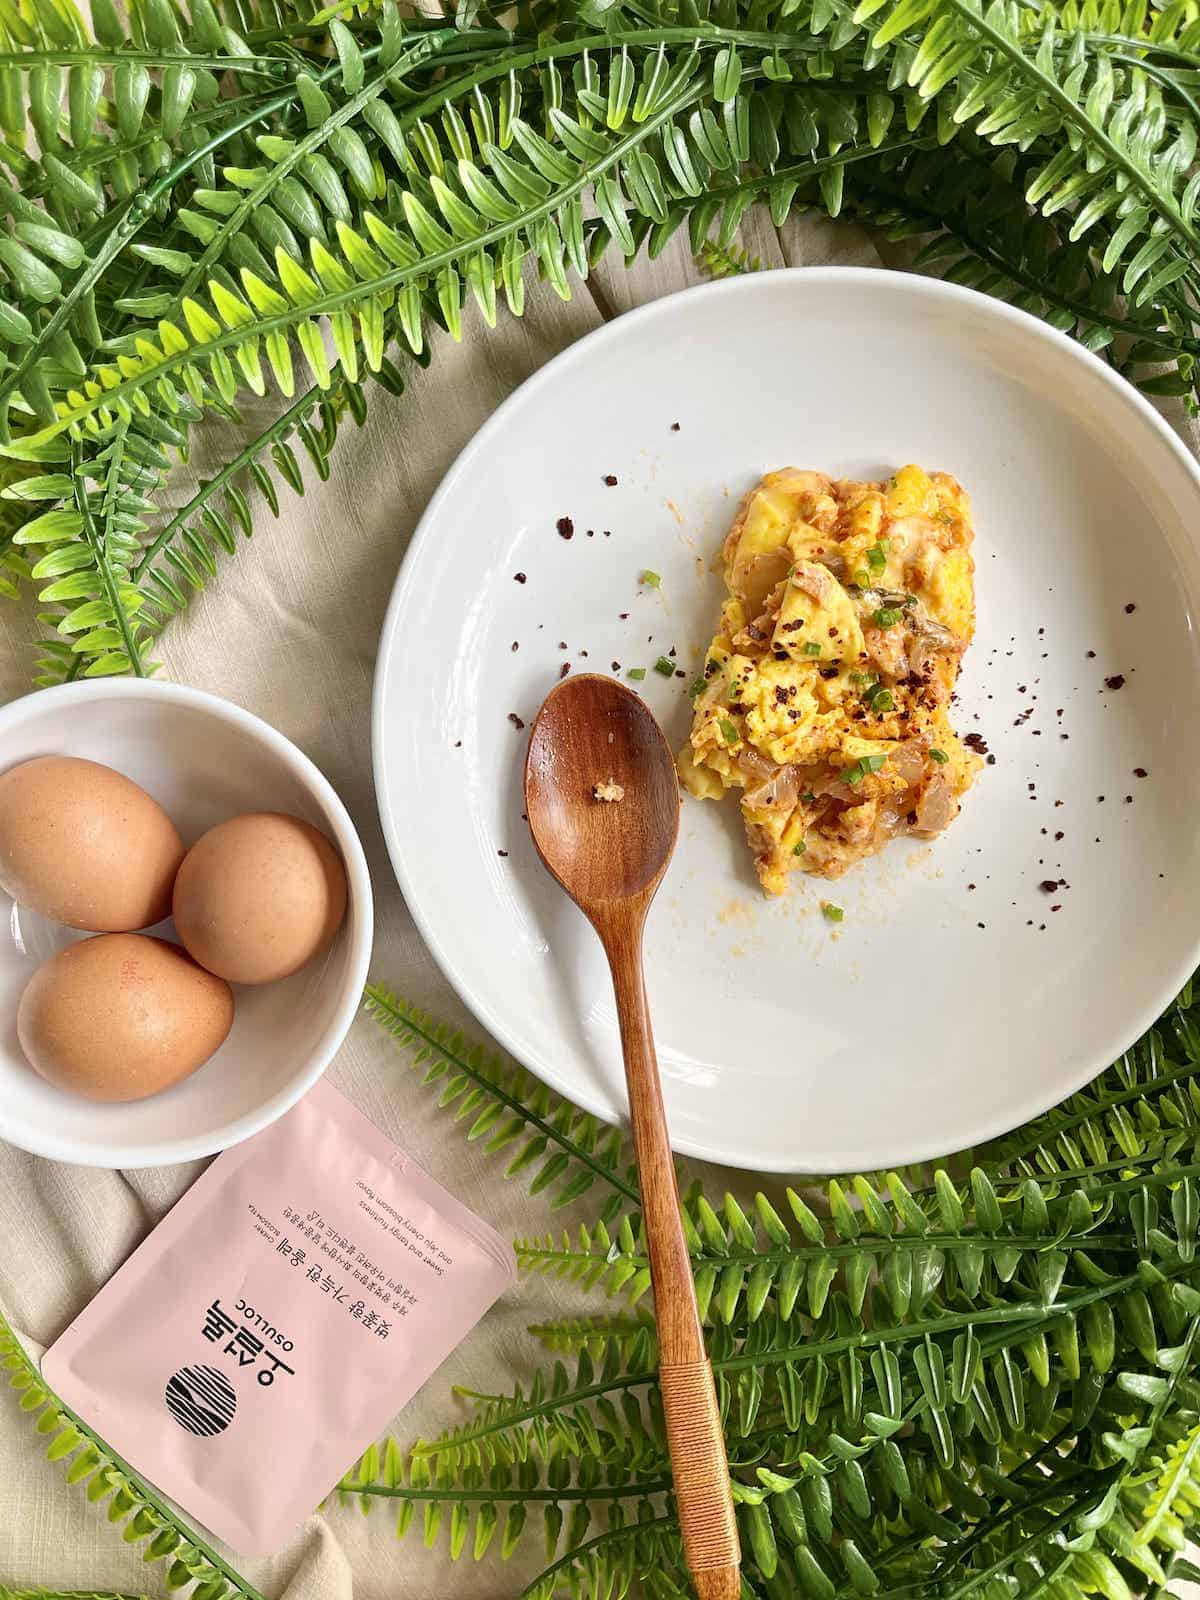
An easy Kimchi Eggs recipe that only requires 10 minutes to whip up- perfect for breakfast, lunch or dinner! You really only need 2 ingredients (though ideally 5) and all are readily available at the regular grocery store!
Jump to:
⭐ Why This Recipe is a Star
- Quick and easy but full of flavor: cooked in under 10 minutes- if you can push stuff around in a pan, you can make kimchi eggs perfectly! The tangy and umami flavors of the kimchi makes it taste much more complex though and fans of kimchi rice will love this as an easy Asian breakfast!
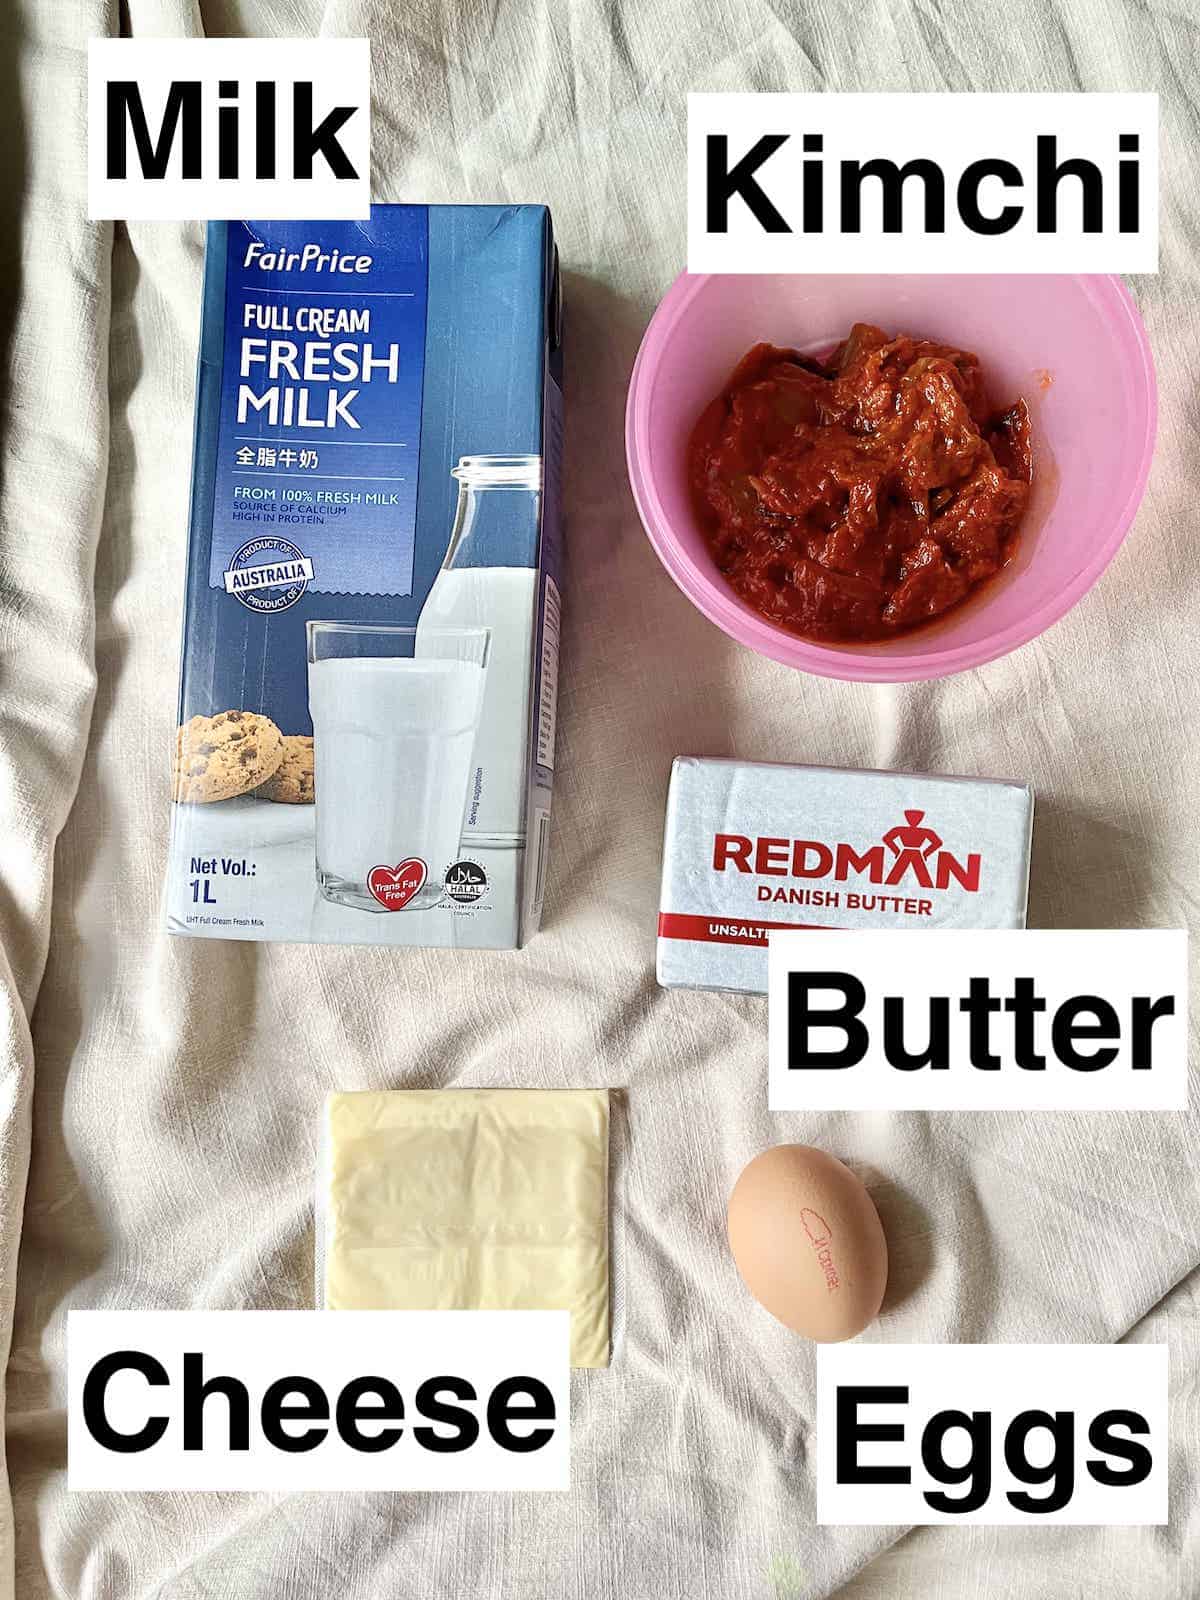
- Only needs 2 to 5 ingredients: you really only need kimchi and eggs (not counting oil and seasoning) but adding some butter, cheese and milk/ cream makes it a better dish.
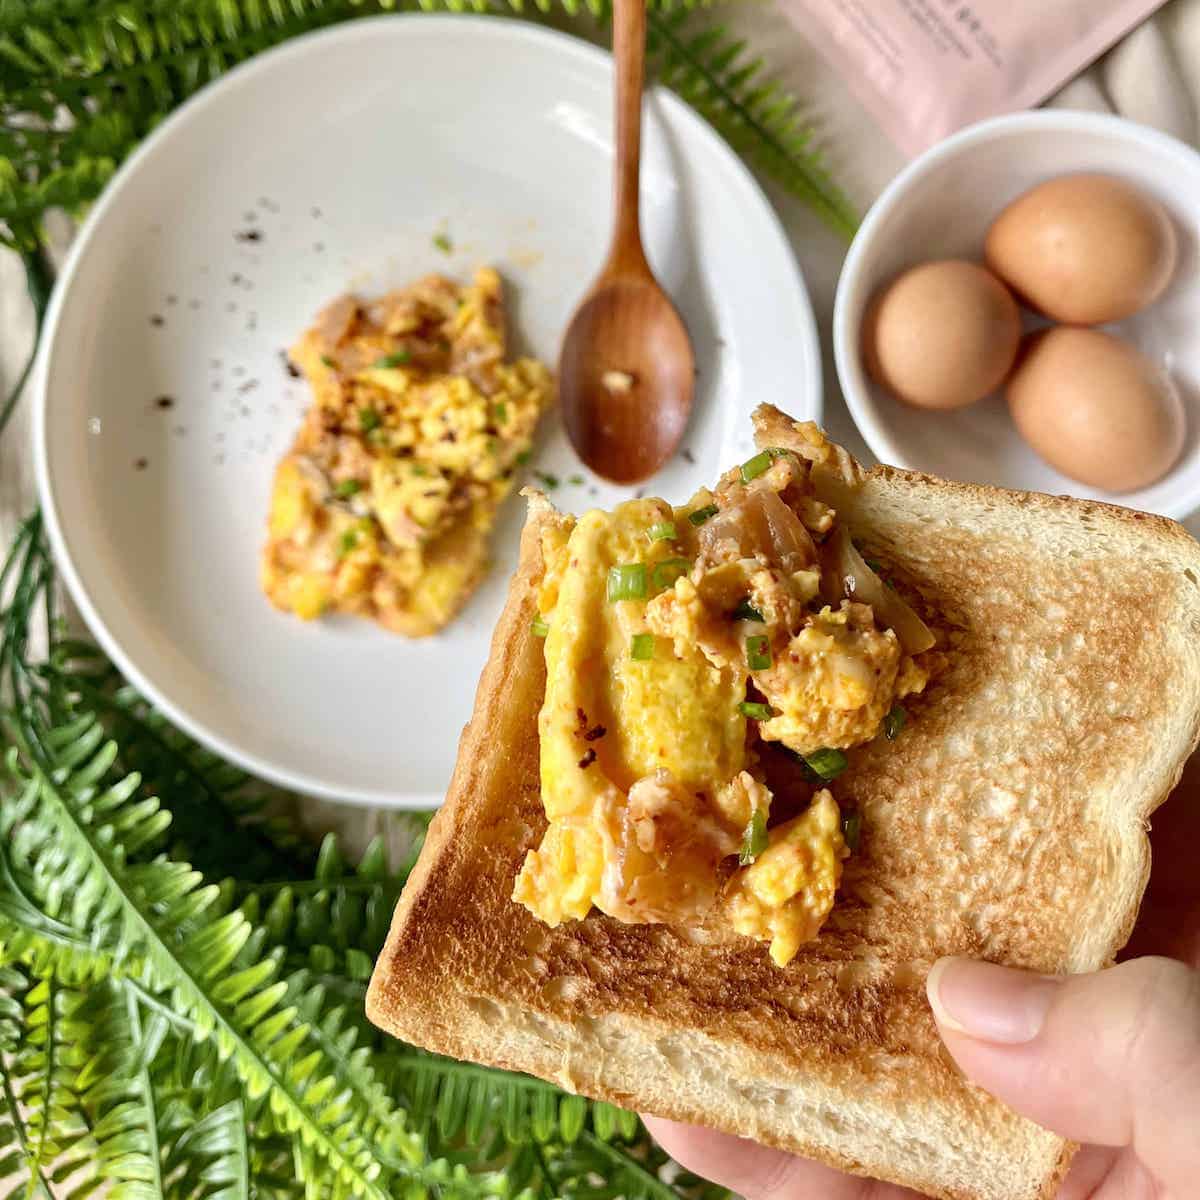
- Versatile: delicious on its own for an Asian breakfast, spooned over toast, in a croissant, served with avocado or with white rice and even brown rice!
🥘 Ingredients
You'll need a few ingredients:
- Napa cabbage kimchi: use both the leaves and the kimchi juice. Extras can be made into Kimchi Aioli or stuffed into roast chicken.
- Large Eggs: If possible, choose free range organic eggs. Higher quality ingredients really pay off in dishes with few ingredients (and of course free-range is much better for the hens than caged farming!) Use the rest of the egg tray in these delicious Asian egg recipes such as Mayak Eggs!
- Milk: feel free to substitute with cream or omit.
- Butter: oil works too but butter makes it even better. You could even use gochujang butter as a finish!
- Optional, cheese: delicious without but there's something about melty cheese and eggs!
Optional: top with some lightly toasted white or black sesame seeds, a drizzle of sesame oil and/or sliced green onion to add freshness to lift the recipe and make it look more appetising!
📖 Variations & Substitutes
- Fried Eggs: Cook up to Step 4 then crack the eggs directly into the pan and fry on medium-high heat. Lower to medium heat so that the egg whites don't overcook whilst the egg yolks cook.
- Omelette: If you're not a fan of scrambled eggs, you can make a kimchi egg omelette instead. Simply cook your omelette as per usual than place the kimchi and cheese on the egg, before folding into half.
- Shakshuka style: Use ½-1 Cup of kimchi along with 1 can of tomatoes (feel free to add onions and other vegetables), stir, then make 6 nests in the mixture and crack 1 egg into each nest, then cover till the eggs are cooked.
🔪 Step-by-Step Instructions
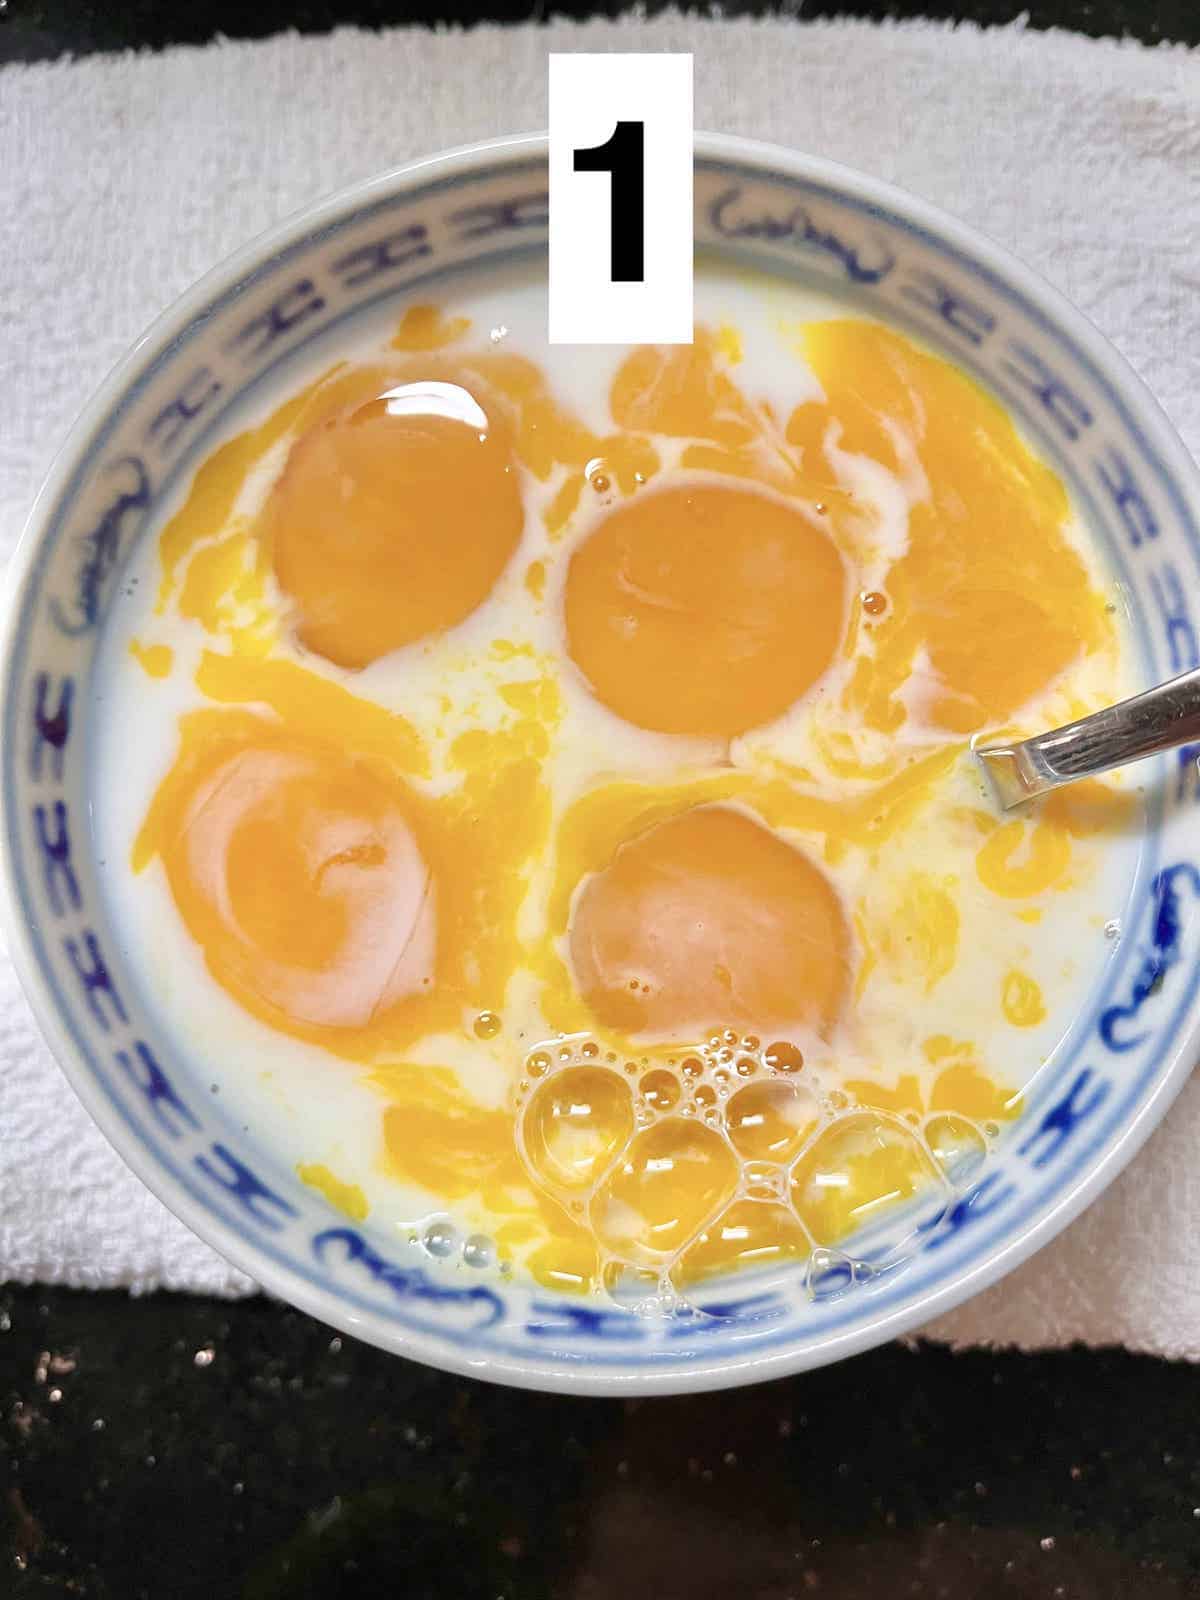
- Whisk the eggs well with the milk or cream.
Tip: if you want to serve the kimchi scramble with toast, you can toast the bread in butter in the same pan but BEFORE starting on your kimchi egg stir fry!
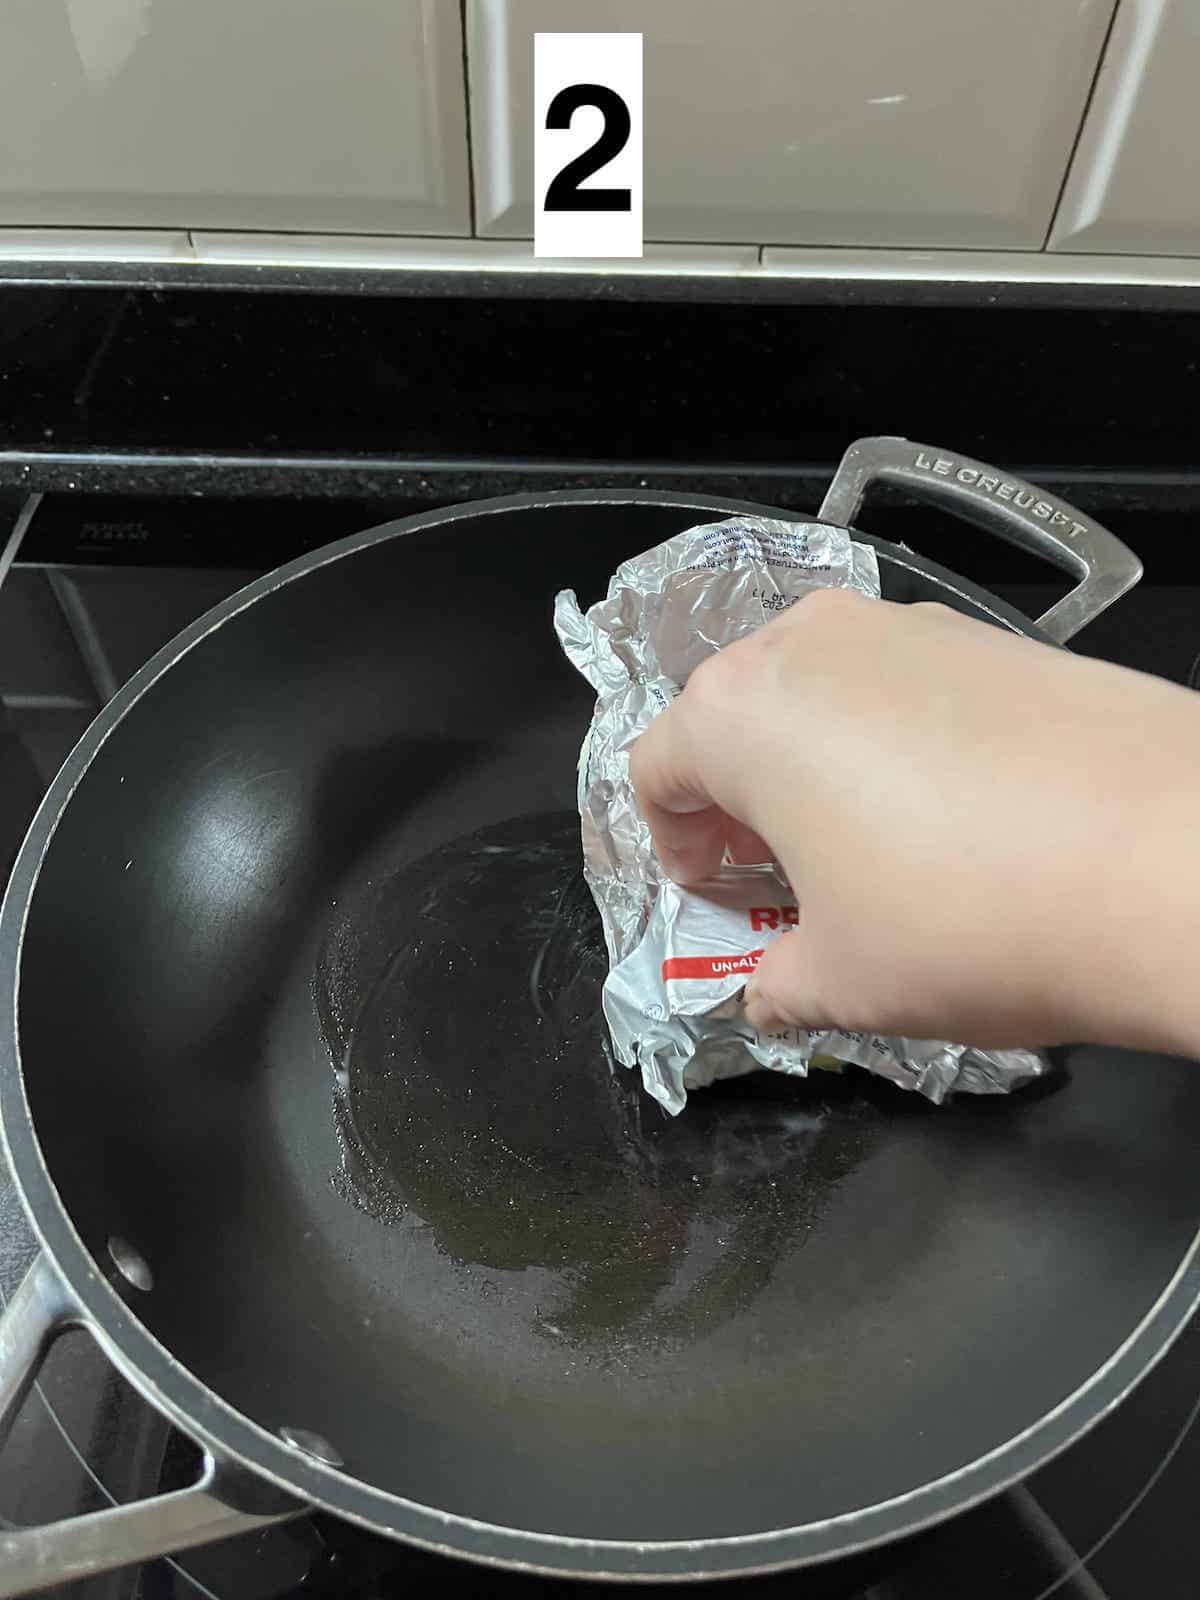
2. Melt ⅔ Tablespoon of butter in your skillet (or use oil) and add a pinch of salt.
Tip: I like to butter the entire surface, as shown above, being adding the butter to make sure I don't have any dry spots.

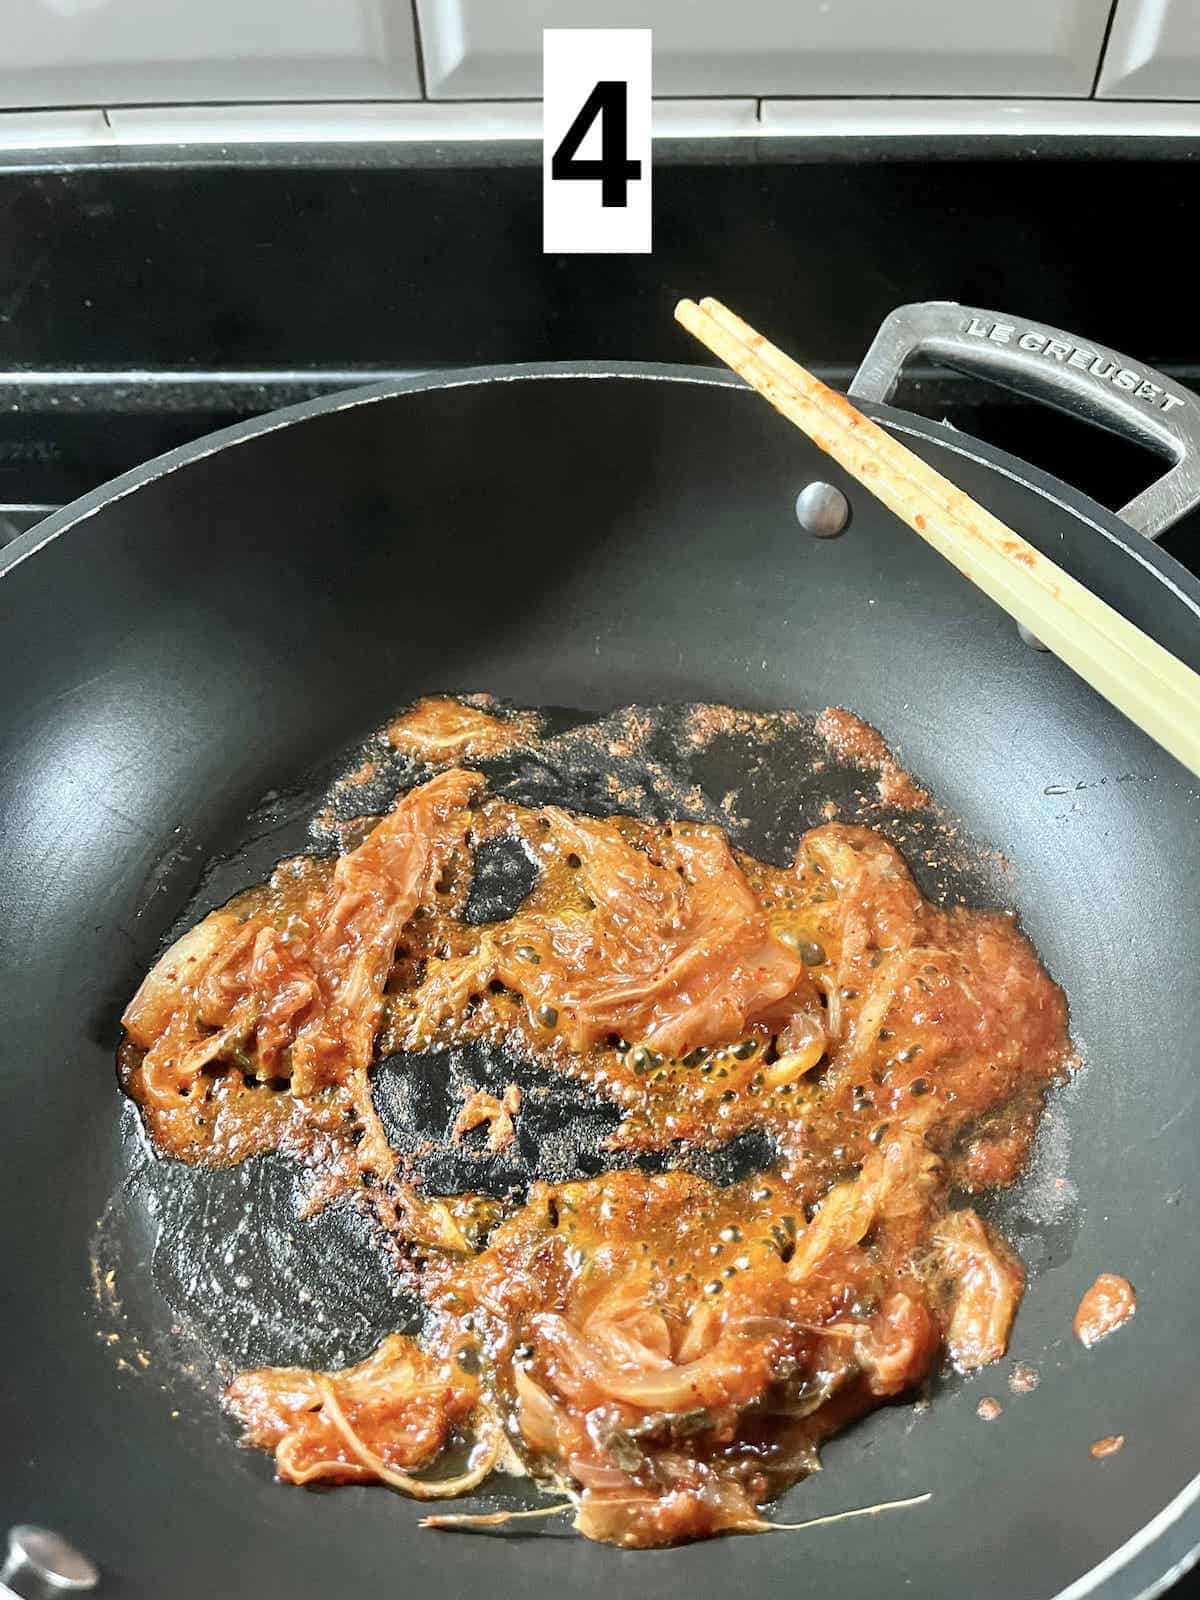
3. Add the kimchi to the hot oil or butter. You can cook till it's soft (about 2 minutes) or, if you have time, let it roast in the pan for longer to really develop the flavor. (See Photo 4)
Note: we add the kimchi then the eggs as we don't want the eggs to overcook! You can also pimp up your egg skillet by adding onions, mushrooms and tomatoes along with the kimchi.
4. When you're happy with the kimchi, push it to the side of the pan. You may need to add a bit more butter or oil to the "empty" part of the pan before adding the eggs.

5. Over medium-low heat, add the eggs and gently stir with a rubber spatula, so that the uncooked parts of the egg come into contact with the heat, and semi-cooked parts are moved away before they fully set.
Continue till the eggs are almost done.
Note: we don't want the fire too hot or the scrambled eggs will turn rubbery.
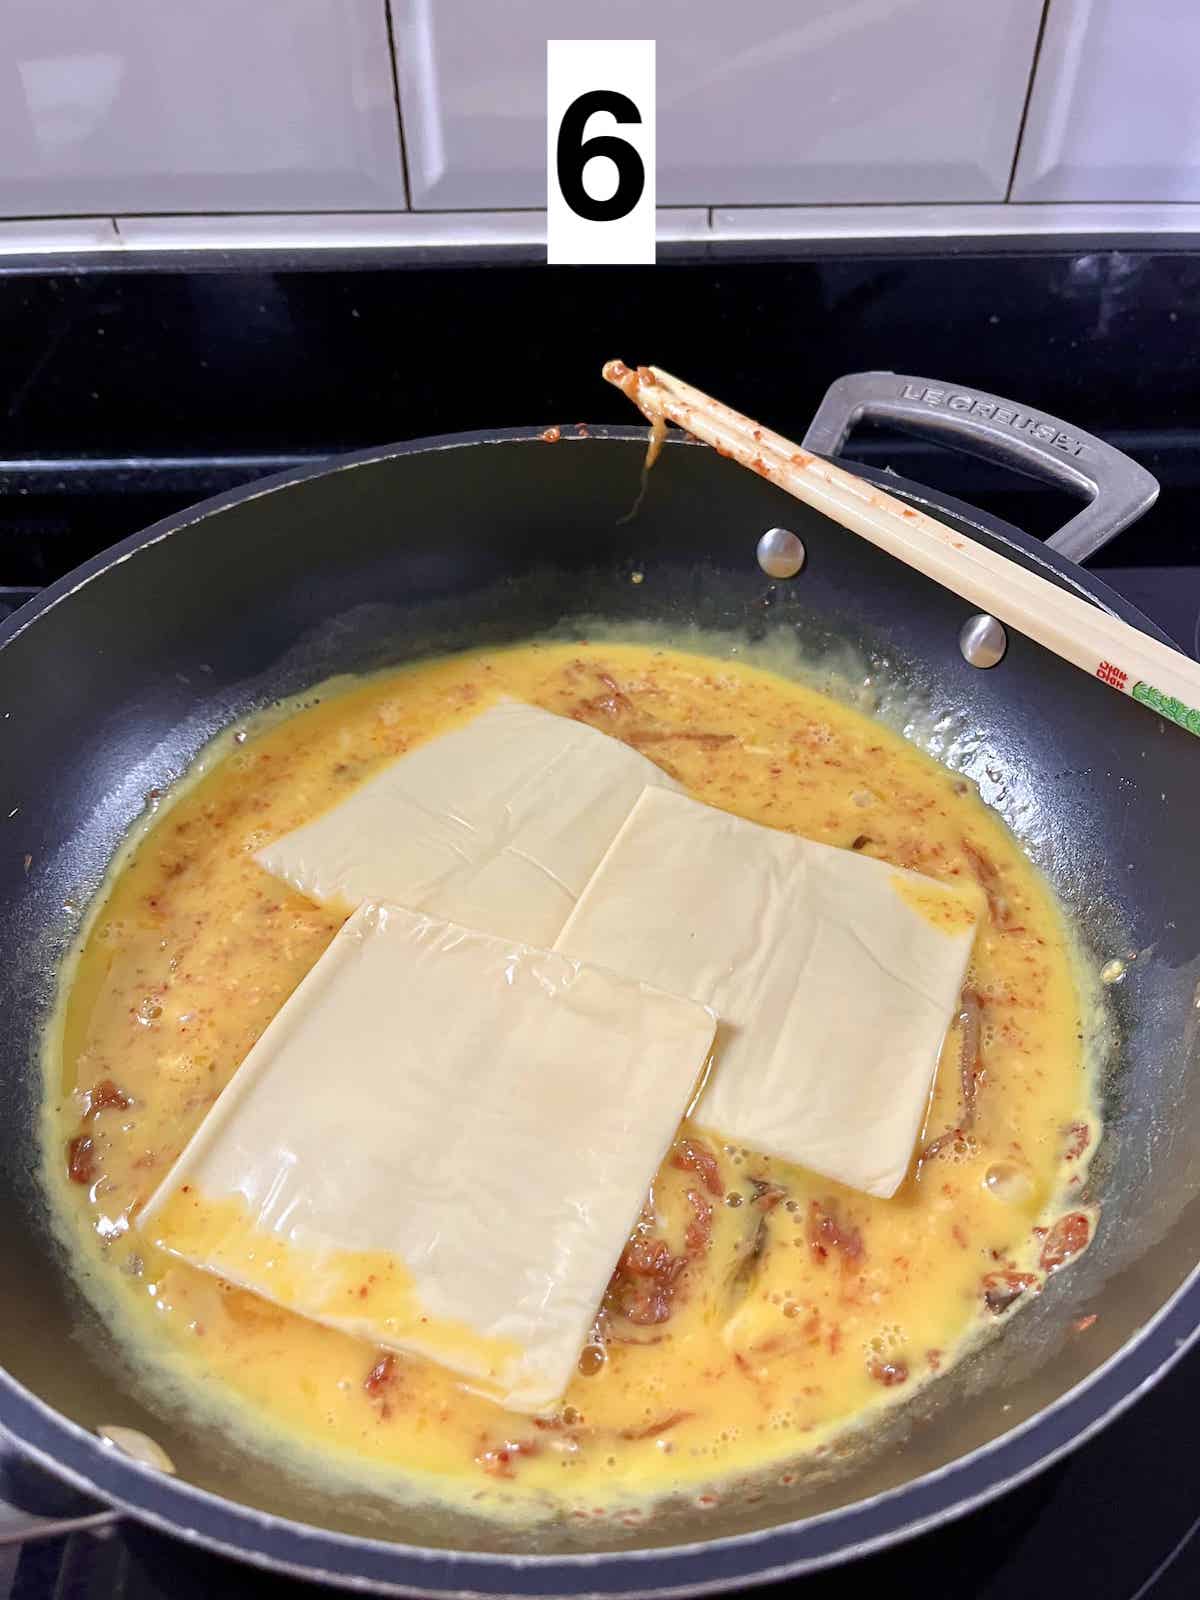
6. Optional: If adding cheese, make sure to add it almost immediately after adding the eggs to the pan so that it can melt.
Season with soy sauce or a pinch of salt but keep in mind that cheese is pretty salty so you won't need much seasoning if adding cheese.
Remove from the heat before the eggs are fully cooked as the residual heat from the pan will continue cooking the eggs.
Tip: for something extra rich, stir in an extra ½ tablespoon of butter just before the eggs set.
🥡 How to Store
Scrambled eggs don't reheat well as the texture turns rubbery so it's best to eat this right after cooking!
🥗 Other Asian Breakfast


Enjoyed this easy Kimchi Eggs Recipe? Please leave a 5-star 🌟🌟🌟🌟🌟rating in the recipe card below! If you REALLY liked this dish, please consider supporting it by buying me a coffee! 🙂 (No obligation though!) Thank you and have a great day!

Kimchi Eggs (10 minutes)
Equipment
- Skillet and heat-proof spatula
Ingredients
- 4 large eggs
- 2 Tablespoon milk Substitute: cream but can omit
- 1 Tablespoon Butter (Unsalted)
- 4-8 Tablespoons kimchi Use regular cabbage/ baechu kimchi, brine and leaves
- 2-3 slices American cheese Optional: No more than 3 or it'll overwhelm the dish!
Instructions
- Beat the eggs well with the milk or cream, if using.
- Melt ⅔ Tablespoon of butter in your skillet (or use oil) and add a pinch of salt.
- Add the kimchi to the hot oil or butter. You can cook till it's soft (about 2 minutes) or, if you have time, let it roast in the pan for longer to really develop the flavor. Note: we add the kimchi then the eggs as we don't want the eggs to overcook! You can also pimp up your egg skillet by adding onions, mushrooms and tomatoes along with the kimchi.
- When you're happy with the kimchi, push it to the side of the pan. You may need to add a bit more butter or oil to the "empty" part of the pan before adding the eggs.
- Over medium-low heat, add the eggs and gently stir with a rubber spatula, so that the uncooked parts of the egg come into contact with the heat, and semi-cooked parts are moved away before they fully set. Continue till the eggs are almost done.
- Optional: If adding cheese, make sure to add it almost immediately after adding the eggs to the pan so that it can melt.Season with soy sauce or a pinch of salt but keep in mind that cheese is pretty salty so you won't need much seasoning if adding cheese.
- Remove from the heat before the eggs are fully cooked as the residual heat from the pan will continue cooking the eggs.Tip: for something extra rich, stir in an extra ½ tablespoon of butter just before the eggs set.
Notes
Note: the nutritional information is an estimate automatically calculated using the WPRM recipe maker and I am not responsible for its veracity.
Nutrition
If this easy brunch dish recipe was helpful, maybe you'd like to sign up for my newsletter in which I send you more tips and tricks to make authentic Asian food?

Dorene chew says
Normally I don’t like scramble eggs but this “kimchi eggs “ changed my mind. Had it with toast for my lunch. Love it… yummy!