Learning how to make lard is the secret ingredient behind traditional Chinese recipes and Singapore's famous street food (Chinese hawker dishes). It's also the key to super flaky pies and pastries, but the process is a little different (vs rendering for Chinese cooking) and I've touched on the differences between the 2!
Jump to:
⭐ Why Render Your Own Lard
- Pork lard makes for super flaky pie crusts: thanks to its high melting point, lard creates super flaky pastries, such as in traditional chinese peanut cookies, Singapore curry puffs and homemade pie crusts (flakier than butter!)
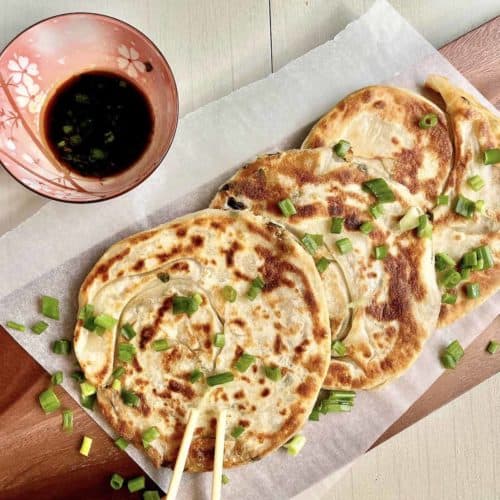
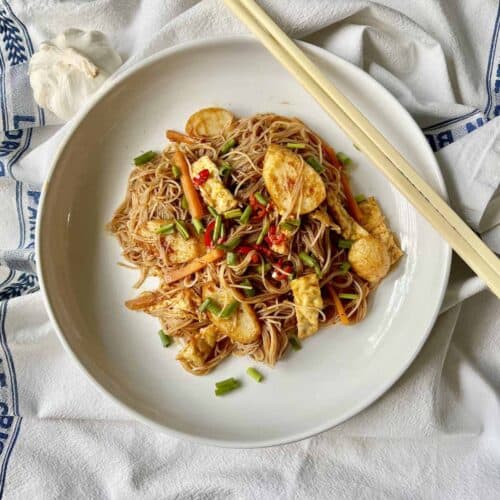
- Secret ingredient to big flavor: It's also the key to making really good traditional Chinese street food, such as spring onion pancakes, muah chee etc. Chinese families have been doing this for centuries and you wouldn't believe how delicious a simple plate of noodles charred in lard over high heat, such as Hokkien Mee, can be! It has so much more flavor than canola oil! You can also get crispy lardons after rendering your own lard which are delicious snacks or toppings for salads and even plain white rice! However, there are a few differences when rendering lard for sweet vs savory uses, which I'll share more about below!
- So much healthier: you can buy ready made pork lard in supermarkets, but who knows what nasty additives and preservatives they contain! They also sometimes have a funny taste. Rendering your own takes a while, but it's mostly passive cooking and you can make a big batch to last for ages!
- Pork lard has a high smoke point: perfect for deep frying at high temperatures (burnt food => cancer FYI) Btw, you can also render other animal fats such as beef (tallow) and chicken (schmatlz) in a similar way.
- Good for the earth and your wallet: It helps you to use up kitchen scraps! (This is something I'm very interested in, which is why I have a whole category of leftovers' recipes, such as this "what to do with leftover rice" post.) If you buy pork belly to cook with, but find it too fatty and trim some of the excess fat away, don't throw those bits out! Keep them for rendering. (However, do it separately. Don't combine it with pure pork lard as the pieces from the pork belly fat may contain meat which will reduce the shelf life of your homemade lard.)
Note: you can make bacon grease at home in the same way you make lard. Bacon fat has a salty, smoky flavour compared to lard's neutral one, and gives food even more umami! I don't recommend it in the average pie crust but it's certainly great for cooking savory food!
If you can't get lard where you are or prefer vegetable oils, here are some of the best lard substitutes.
🐖 Ingredients
You only need 1 ingredient really:
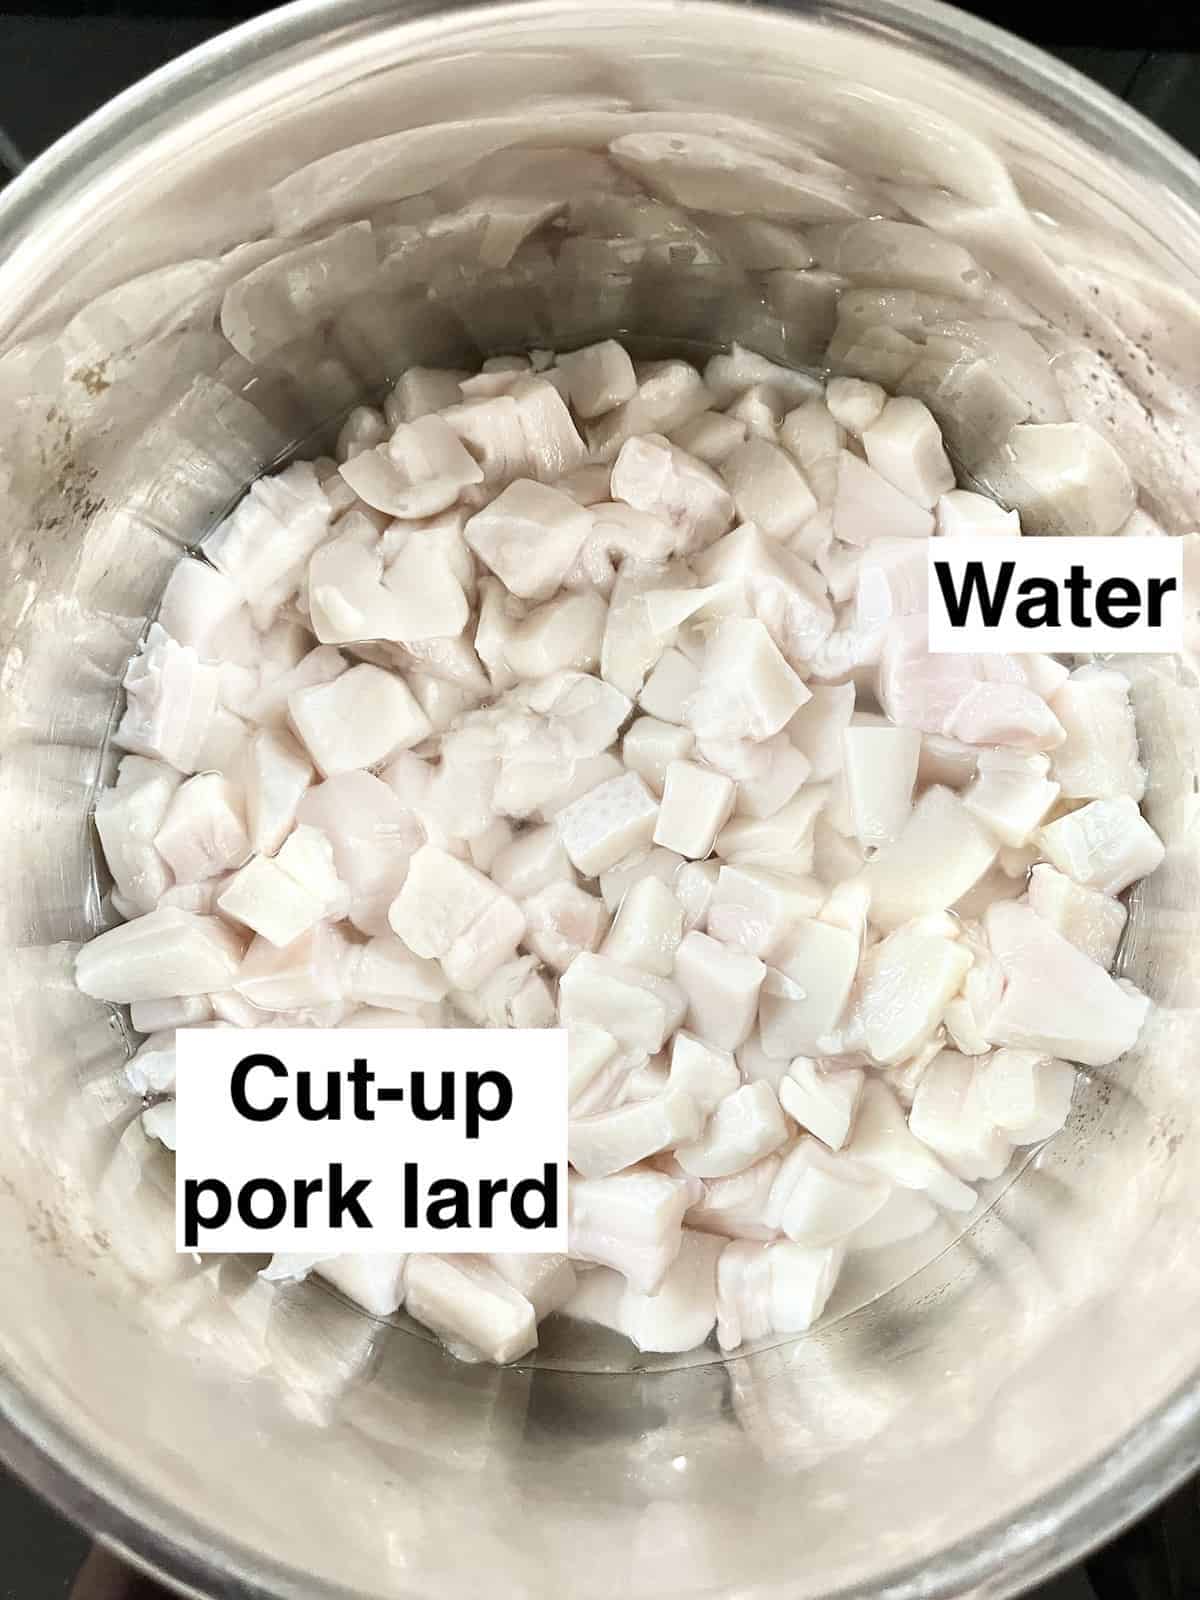
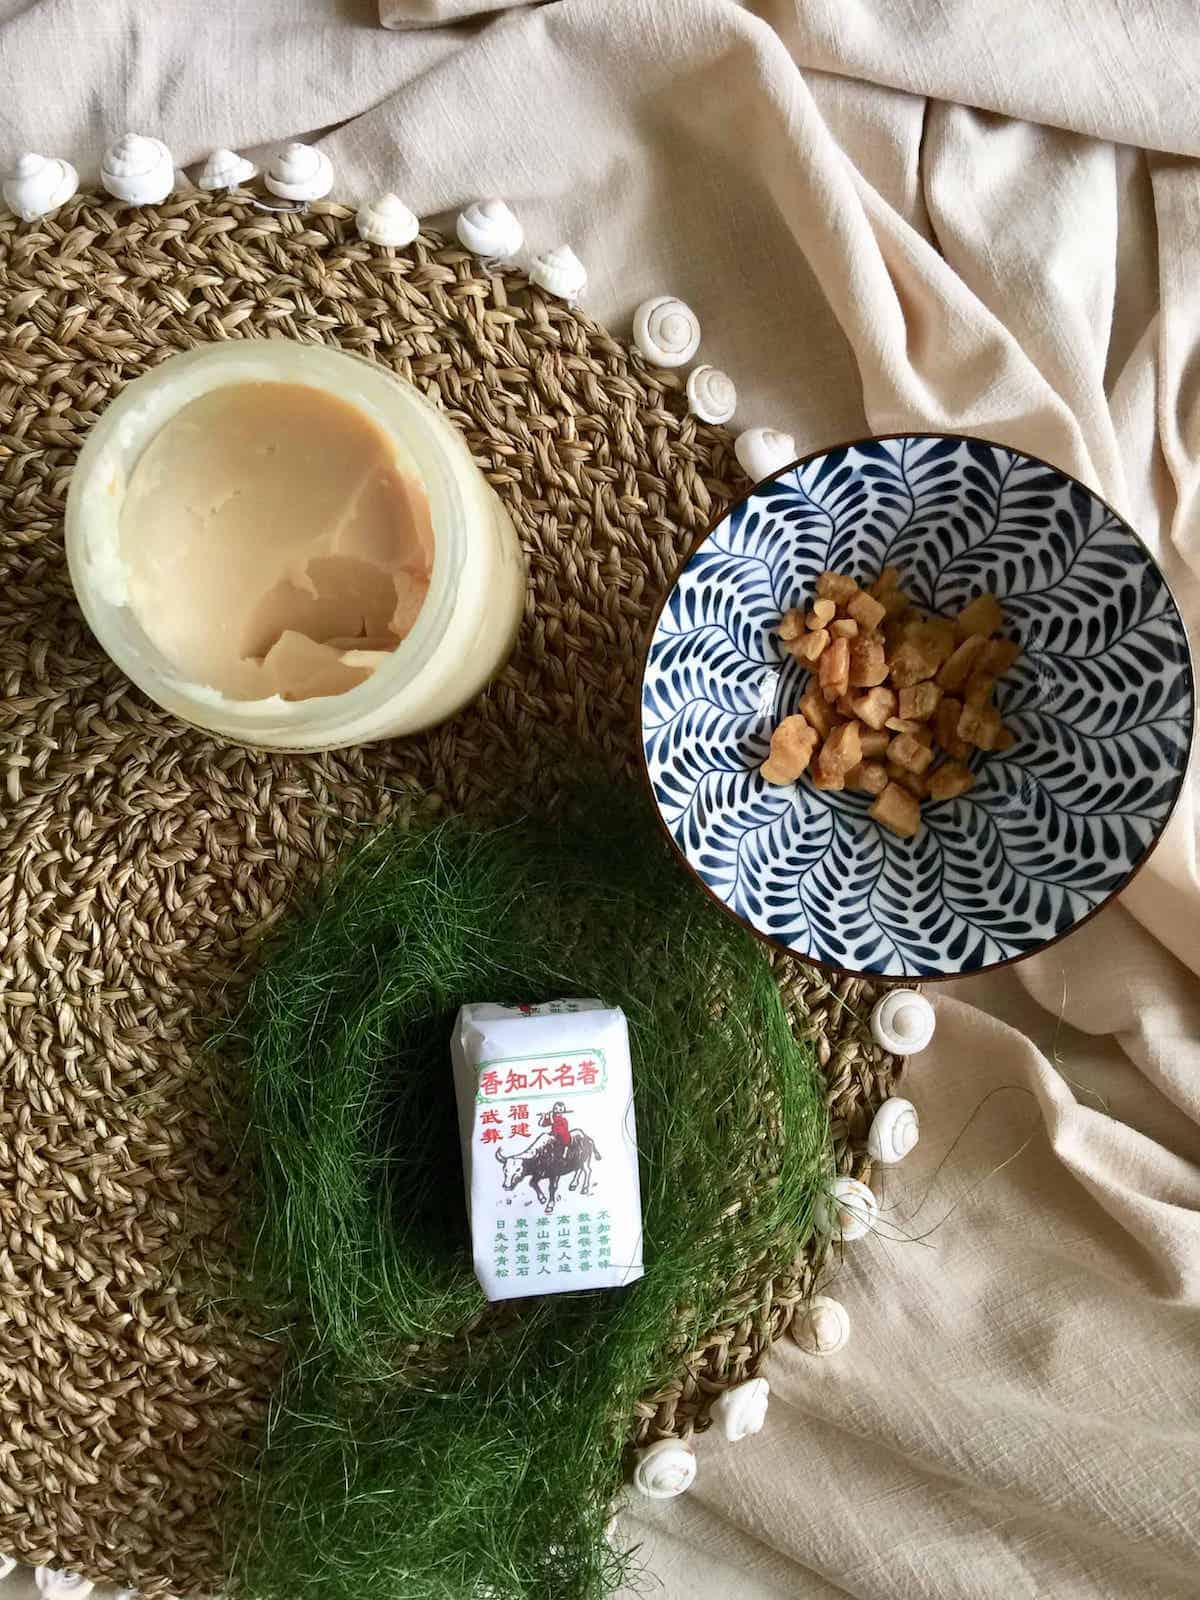
- pork fat: Cut off any meat attached to the pig fat. You want small, evenly-sized pieces of fat, no bigger than 1 inch. (More surface area= faster rendering and crisper crackling.) If you need to cut them yourself, note that lard is slippery- don't slip and injure yourself! To get a better grip on the fat, freeze the lard. Semi-defrost them- they should still have a few ice crystals in them but be soft enough to cut- so they're not slippery when cutting. If you have no time to freeze, at least make sure the lard is fridge-cold and not at room temperature. (You can also blitz them in the food processor to make your life easier or ask your local butcher to grind the fat for you.) See below for the best type of pork fat to use. You can use this website to find farmers near you (in the US) that raise their pigs in pasture (which is better for you.)
- optional, water: if you're using the wet rendering method (see below.)
Note: if desired, some aromatics (ginger and garlic etc) and spices (bay leaves and sichuan peppercorns etc) can be added to the pot. Obviously, I don't recommend this if you're rendering lard to use in pastries and pies.
However, for use in traditional Chinese and Asian cooking, this is a great way of adding more flavor to your food AND reducing the porky smell that permeates the air during the rendering process.
If you're more interested in the scratchings than the lard, you can add a pinch of salt and vinegar to crisp the skin. It'll make this post much too cumbersome if I go into detail here. I'll save that for another post- if you guys are interested!
Wet vs Dry
Lard can be made by:
- dry rendering: heating just the pork fat in a pot over a low temperature.
- wet rendering: a ¼- ½ cup or so of water is added to the pork fat and boiled off. There is less chance of your pork fat burning- if you've never melted pork fat before, you may want to start with this method. Don't add too much water though or you'll be rendering for even longer!
Types of Fat
You can use different types of pork fat to make lard:
- leaf lard (fat): This is from around the pig's kidneys or organs. Leaf fat is best for pastries as it has a more neutral flavor and results in a nice white lard. However, you don't get as much of it per pig (as compared to the back or belly fat) so, most likely, you'll have to use the back fat too. (There's only 3-4 lbs per pig usually!) You can identify leaf lard as it's less smooth looking compared to other types of pork fat- it almost looks wrinkled?
- fatback: This is the fat along the shoulder and behind/ back of the pig. It is best for stir fries and making crispy lardons. It sometimes comes with the skin attached and results in a lard with a slight pork flavor. (Sometimes the butcher will even give you the lard for free if you live in an area where there's no demand!)
- belly fat: not recommended if you can get either of the above. Save it for dishes such as tau yew bak (soy sauce braised pork)!
Note: Although I do trim out the excess fat when I cook with pork belly (and keep it for rendering), I don't recommend buying pork belly specifically for rendering. It's hard to completely separate the meat and fat and the leftover bits of meat in the lard will reduce its shelf life.
I just do this because I don't like to waste food! If you're the same, here are some ideas on what to do with leftover food.
🍳 Step-by-Step Instructions
Before you get started, make sure you have time!
Whichever method you use, rendering will take a few hours. Although it's mostly passive cooking, you do need to stir every now and then. You don't want to start rendering then realise you have to run out of the house 30 minutes later!
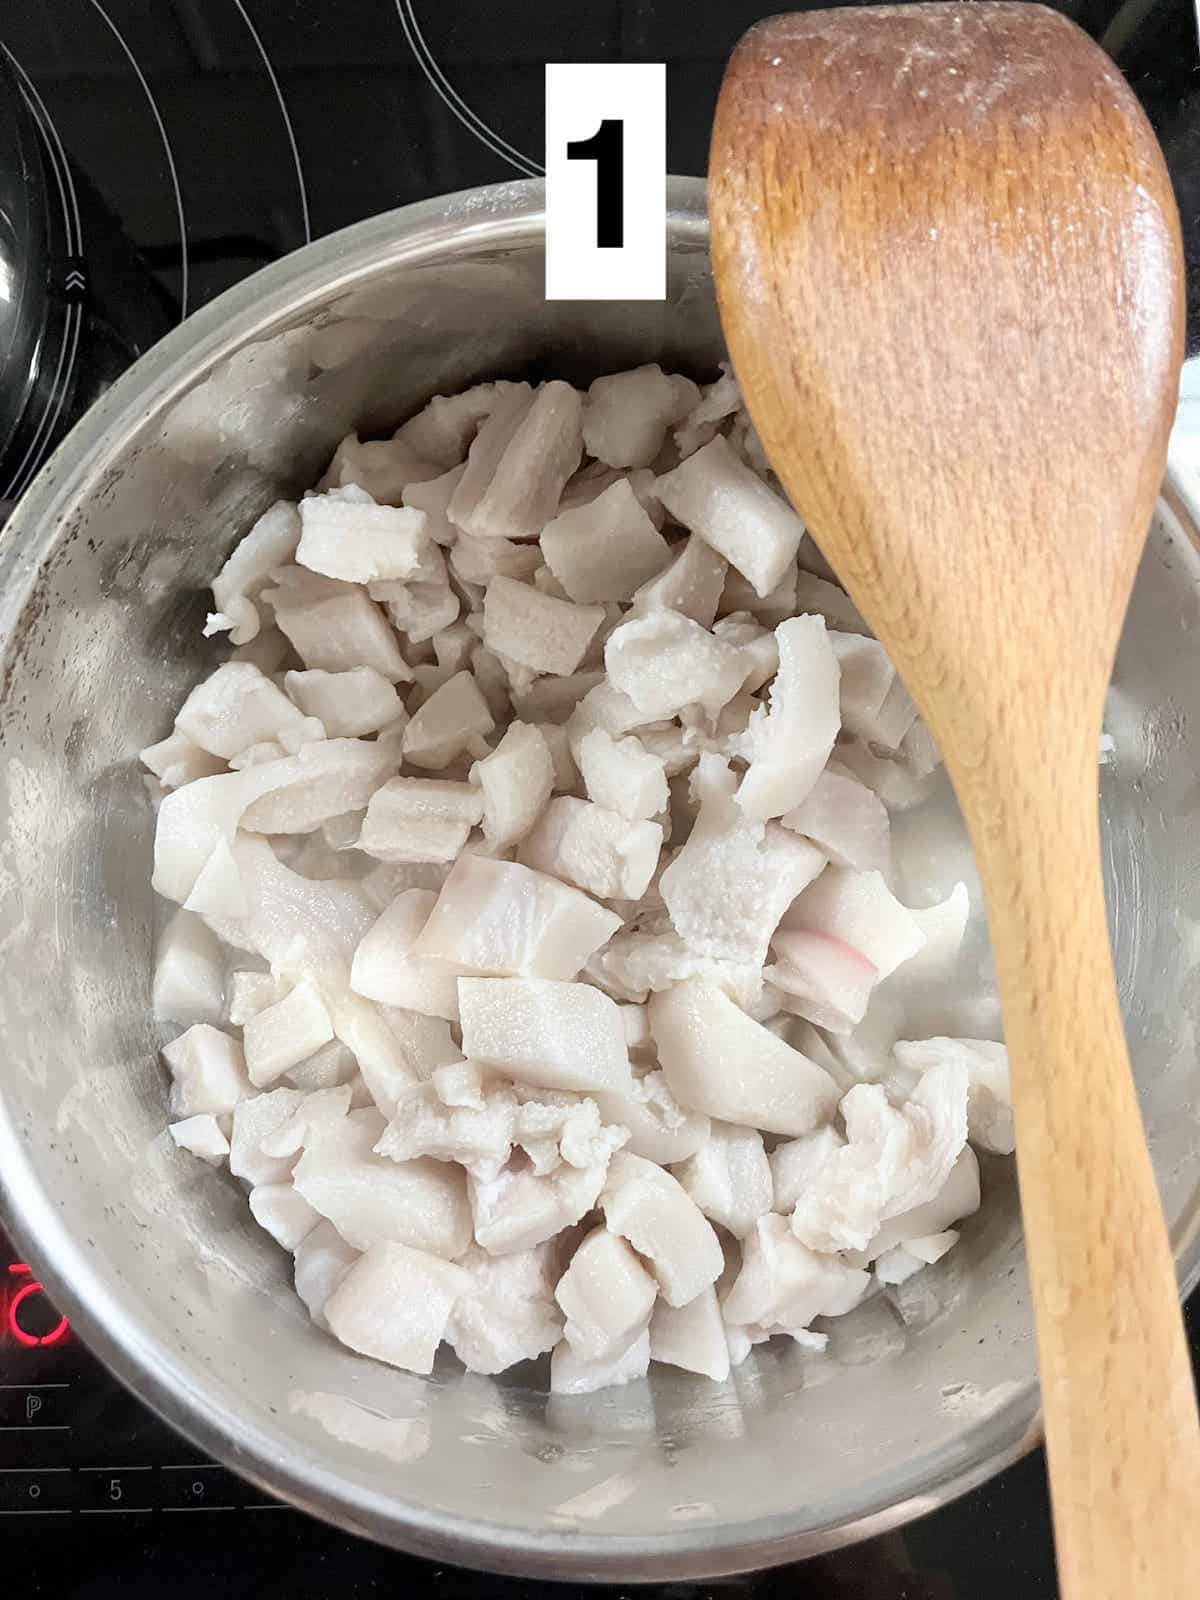
- Add the cut-up small cubes of pork lard and water to a heavy-bottom pot which allows for even heating. Use a Dutch Oven if you have one. (A flimsy pot is also dangerous, as you can easily overturn it and the rendered lard is HOT.)
- Use low heat: melting pork fat needs to be a slow process. (Using high heat gives the lard a stronger porky taste.)
- Set the fire on 2 (mine's a Bosch induction with a maximum of 9.) When you see the fat melting, reduce to 1 (lowest heat possible.)
- Stir every 30 minutes or when you hear sizzling. Don't let the fat stick to the bottom or sides of the pot, or your lard will taste porky!
Note: Optional pre-step is to blanch the lard in boiling water before rendering. Chinese cooks believe this reduces the sour pork smell!
Also, rendering lard has a strong smell. Make sure to open your windows and shut bedroom doors!
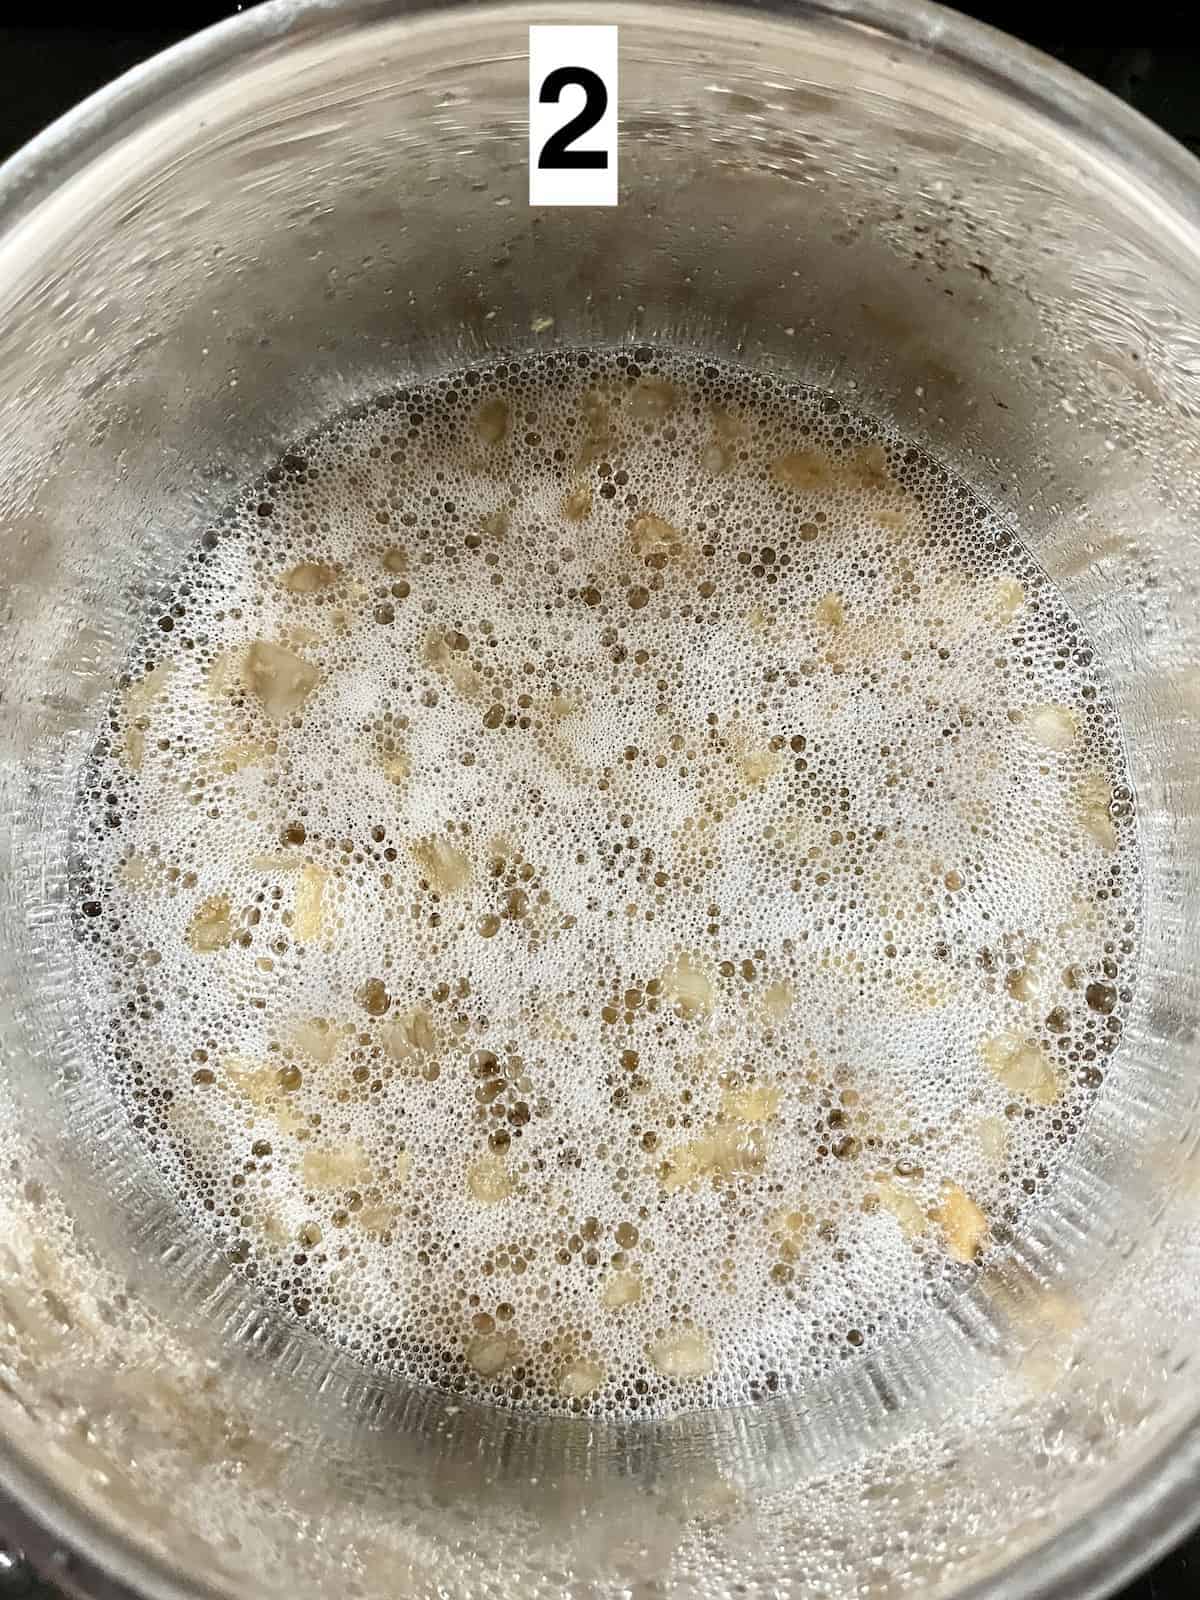
5. The lard will eventually start bubbling so don't be alarmed. (The bubbles indicate that there is still moisture in the fat. You're always using low heat so you should never be boiling the lard.)
6. Once there are no more bubbles and the crackling has risen, switch off the fire.
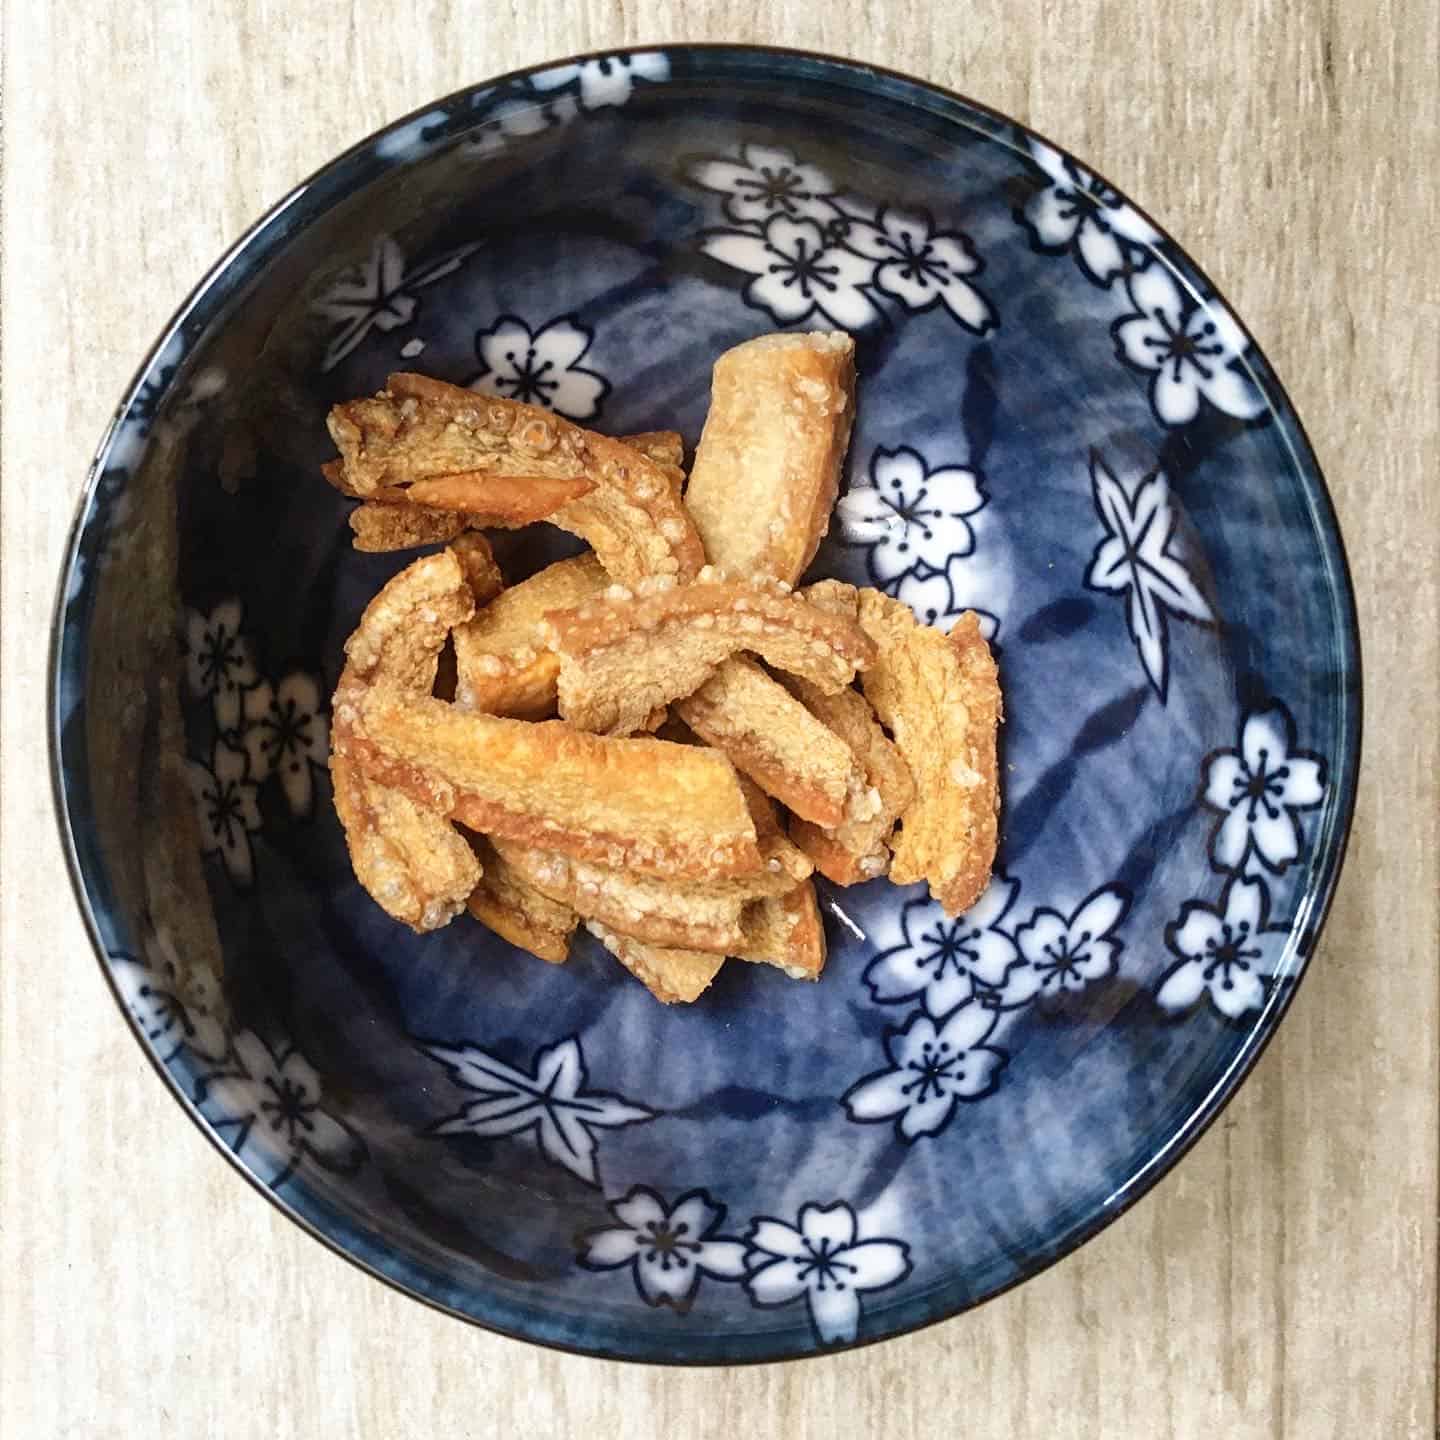
7. Remove the golden brown scratchings. I recommend carefully sieving using a strainer or cheesecloth. (The lard is VERY hot and can burn you!) You can also crush the scratchings to get every bit of oil out.
8. Lay the scratchings on a paper towel to absorb excess oil.
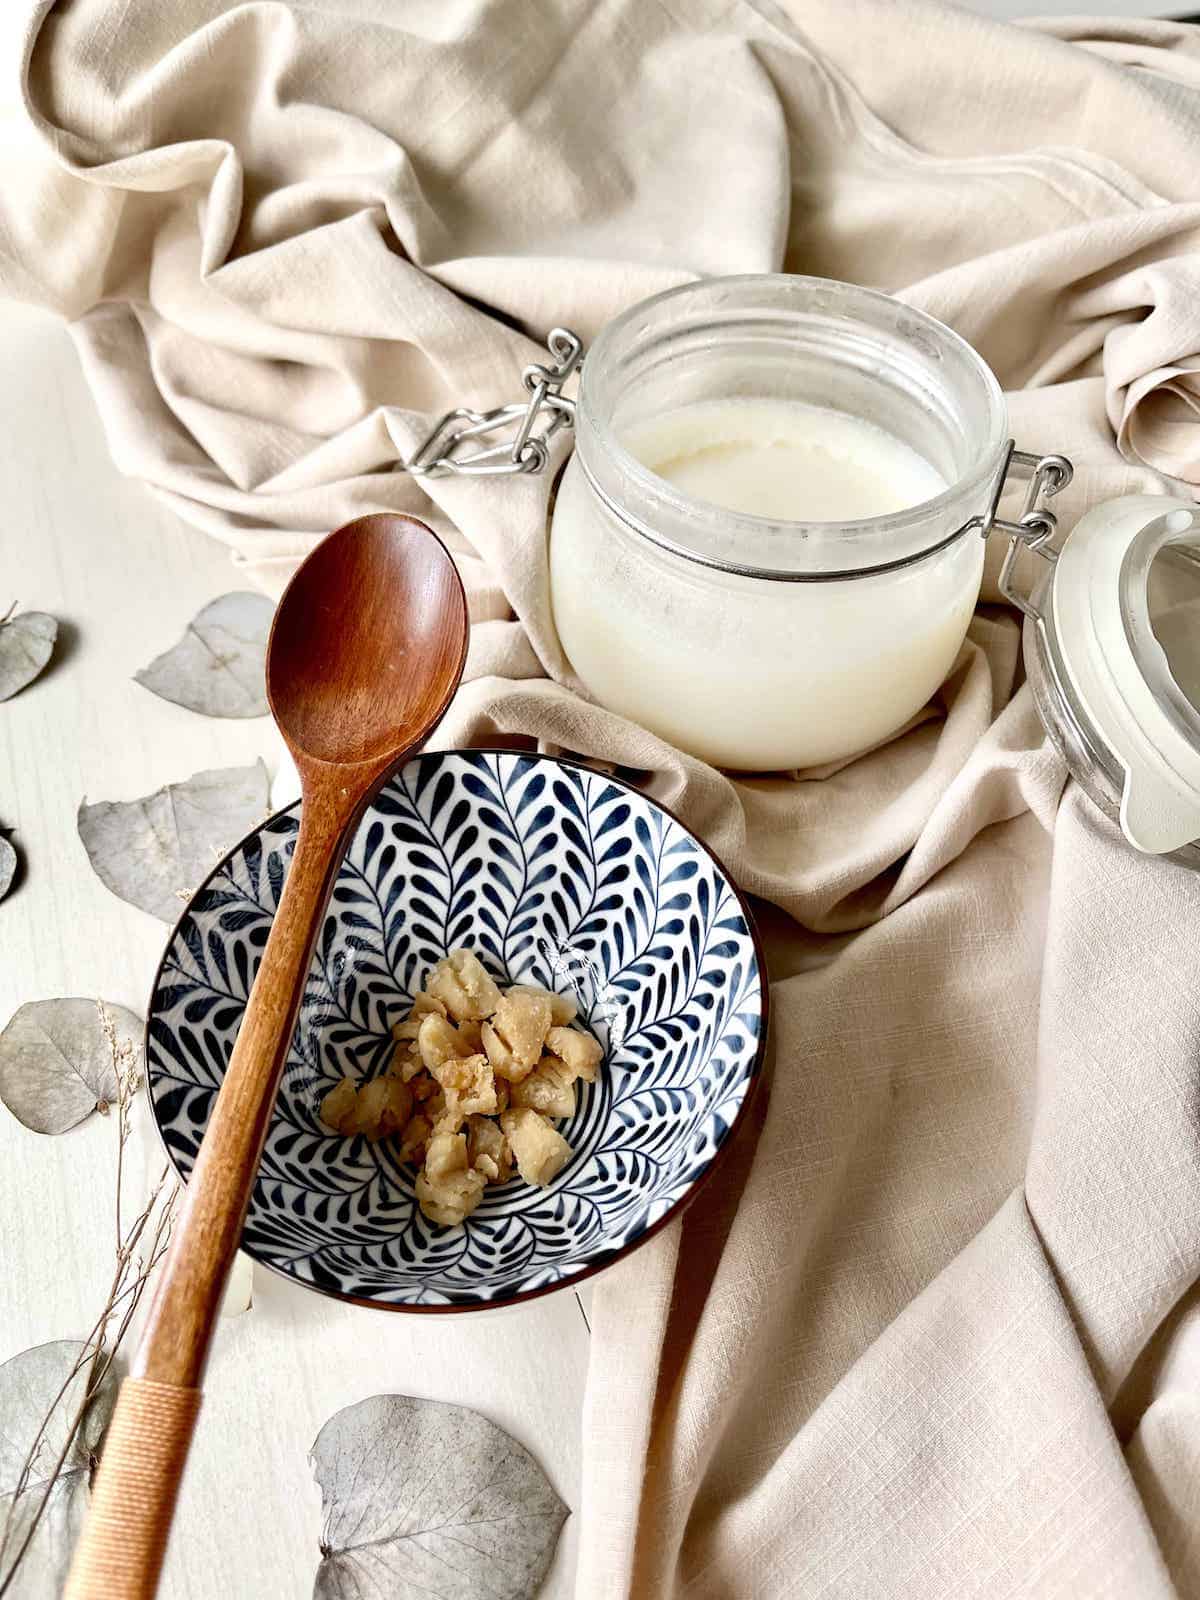
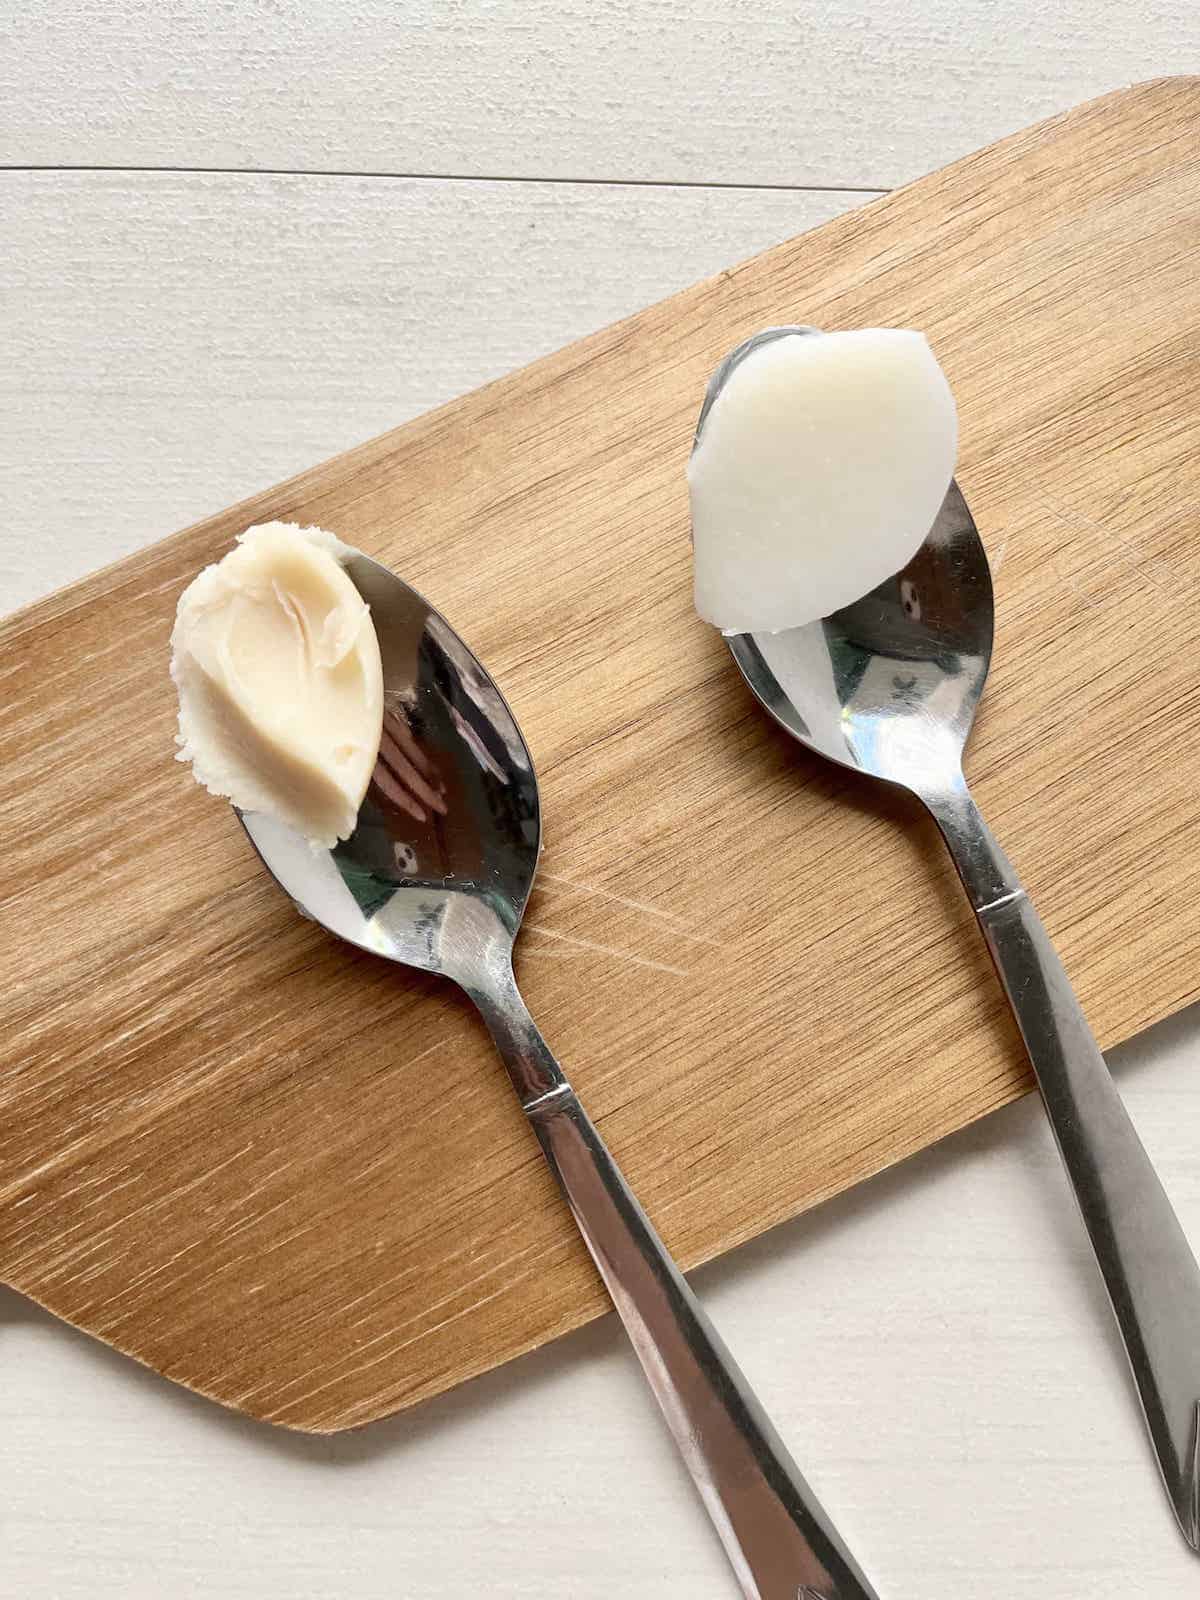
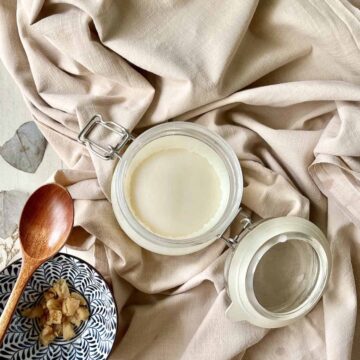
9. Store the liquid fat in sterilised heat-proof glass mason jars. (The lighter the color of the oil, the better it is for making pies.) Below 93-113F, your lard will solidify into (hopefully) pure white fat.
10. Once cool, seal and place in the fridge.
Other Methods
You can also make lard in an instant pot, slow cooker and in the oven!
- In the Oven: you want to use low heat so a temperature of about 200-225 F (93.3 C- 107C.) You don't need to add water for oven rendering. Don't cover the pot or the moisture can't evaporate. This can take up to 8 hours so only do this if it's not that expensive to run your oven! (Tip: if you have a heat-proof colander, put the fat in the colander then the colander in the dutch oven. The whole set-up goes into the oven. The rendered lard will drip out of the colander into the dutch oven, saving you the work of straining! Just use the back of a spoon to gently crush the crackling in the colander, to get all the oil out.)
- In the Slow Cooker: This is probably the easiest way to render lard. Set on high for 30 minutes. Then reduce to low, cover but with the lid ajar (to allow steam to escape) and stir every 20 minutes or so. (If you hear sizzling, definitely stir so that it doesn't stick!) The lard will sink at first and your pot will look less full. After a few hours, the cracklings will settle at the bottom, and you know your lard has been rendered.
- In an Instant Pot: I don't have 1 so no comment from me on the method. (I've found some online but can't reasonably recommend something I've not tried!)
Note: if your lard is yellow, save it for stir-fries and other savory recipes where you don't mind the flavor of pork! NOT in pastries or sweet pies!
🥮 How to Use
Lard
The best ways to use lard are:
- As a replacement anytime you need to use butter or traditional cooking oil!
- It makes a super flaky pie crust: use half butter, half lard to get the flavor and the texture right!
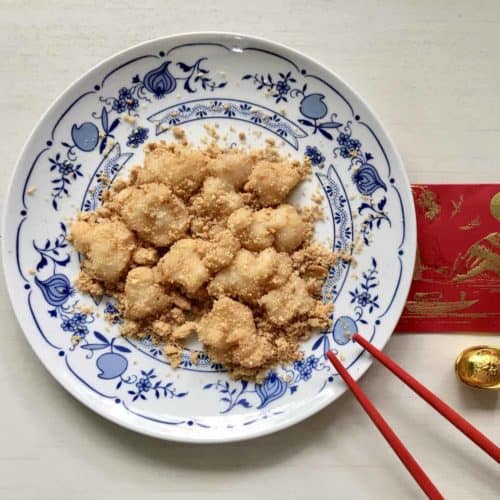
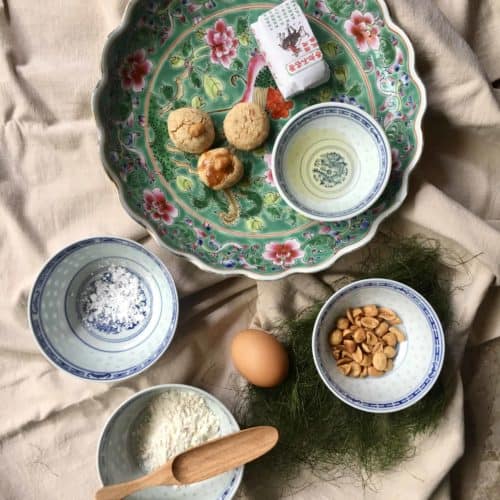
- For melt-in-the-mouth Asian cookies, such as peanut cookies and walnut cookies (this is the traditional Indonesian way to make these Chinese New Year goodies.)
- For chips and roasting veggies
- Non-culinary uses: soap, candles, salves, greasing machinery, seasoning your cast-iron pans etc
Crackling
- Salt, then snack on them, they're super addictive! (Quite rich though so you may not be able to eat so many at a go.)
- Sprinkle them on fried noodles such as bihun goreng
- Use as toppings for dishes which you want to add crunch to, such as soups, porridge or bean stews. I added some to the pumpkin seafood porridge I made last night and it was delicious!
- Toss with salad! Pork scratchings are basically a tastier replacement in any dish that calls for croutons.
🥡 How to Store
Lard
Pork oil can last for a long time. I know of people who say they keep their lard for up to a year but I like to use mine up MUCH more quickly that that!
Traditionally people left the rendered fat out at room temperature but I would recommend putting it in the chiller since we have access to the technology now! (Make sure it's stored in an air-tight container/ sterilised glass jar.)
Before using your rendered pork fat, always check that it is not rancid (as indicated by the presence of a bad smell!) or moldy. Properly rendered pork lard won't go moldy- mold means that there was moisture left in the pork fat.
You can also freeze it, but don't thaw and re-freeze.
Note: Use clean utensils to scoop out of the glass jars.
Crackling
Pork scratchings, on the other hand, are best consumed within a few days or they'll go soft.
If you store them in the fridge, they'll go hard and won't taste as good. I recommend dry frying them to crisp them up before eating as a snack.
👩🏻🍳 Expert Tips
Tip #1: Lard keeps for a good while, so make a large amount each time and save on your gas bills. Even if you reduce the amount of pork fat, the time required to render stays approximately the same (about 3 hours.) Lard can also be frozen! If you have an obscene amount of lard to render, you can break it into 2 phases- keep the 1st for pies and the 2nd for savory dishes (where you don't mind a pork-y flavor!)
Tip #2: Ensure the fat is all cut into equal sized, small fat pieces. If they are sized differently, they will cook at different rates and you will end up with both undercooked and burnt lardons! Cutting the fat into small pieces means that you get bite-sized lardons; large pieces of fat will leave you with lardons that are too big.
Tip #3: Lard can be slippery so cut with care! If your lard does not come cut, pop it in the freezer for 10-15 minutes before cutting. This helps to harden the pork fat and make it easier to cut.
💭 Recipe FAQs
A good lard should be snowy white. See the above photos for a jar of lard rendered on higher heat (and thus slightly yellow- but still usable in savory foods) vs a jar rendered slowly and lovingly!
If you haven't rendered all the oil out, the pork scratchings will not be as crispy as you want. Just dry fry them in a pan for a bit (on medium heat.) They'll shrink, produce more oil and get nice and crispy. Alternatively, you can also bake them on low heat. (The amount of time will depend on their size etc.)
Lard isn't as unhealthy as it's been made out to be! (I'd say it's healthier than Crisco.) The BBC even names pork fat the 8th healthiest food thanks to its vitamins, fatty acids and minerals! You'd be surprised to hear than lard actually has less saturated fat and more mono unsaturated fat than butter! However, too much isn't good for you so keep your lard intake in moderation. (It has cholesterol! For everyday use, stick to olive oil.) A combination of butter and lard in pastries is best in my opinion- 1 for texture, the other for flavor.
Most people say it's shelf-stable at room temperature but I don't want to risk it so I always refrigerate my lard. Although it's meant to last up to a year in the fridge, I prefer using mine up within the month!
🍜 Recipes which are Better with Lard
How to Make Lard (Pies vs Chinese Food)
Equipment
- Dutch oven Substitute: heavy-bottomed pot
- Metal strainer or cheesecloth
- Airtight Glass jar Sterilised
- Kitchen towel for scratchings
Ingredients
- 2 lb Pork Fat I say 2 lb but, really, use as much as you can get without over-filling your pot! Rendering pork lard doesn't get significantly quicker if you reduce the amount of fat, so make sure your time is well-spent. It also lasts for months in the fridge, so it makes sense to batch make!
- Aromatics and spices such as ginger, scallions, sichuan peppercorns etc Optional, only use if melting pork fat to use in savory dishes such as Chinese Noodles. Not to be used when rendering lard for pies and cookies!
- ¼-½ Cup Water Optional, only for wet rendering. Also not necessary if rendering in the oven.
Instructions
- Optional pre-step: blanch the lard in boiling water before rendering. Chinese cooks believe this reduces the sour pork smell! Also, rendering lard produces a strong smell. Make sure to open your windows and shut bedroom doors!
- Cut your partially thawed or chilled pork fat into equal sized, small pieces. (For easier cutting, put the fat in the freezer for 10-15 minutes to firm it up. Don't work with room temperature fat as it's slippery.) Alternatively, get your butcher to grind it or blitz it in your food processor.
- Add the cut-up pork lard (and water and aromatics, if using) to a heavy-bottom pot which allows for even heating. Use a Dutch Oven if you have one. (A flimsy pot is also dangerous, as you can easily overturn it and the rendered lard is HOT.)
- On low heat: melting pork fat needs to be a slow process. (Using high heat gives the lard a stronger porky taste.) Set the fire on 2 (mine's a Bosch induction with a maximum of 9.) Stir the fat to prevent sticking and burning.
- When you see the fat melting/ oil oozing out, reduce to 1 (lowest heat possible.) Note that it is more difficult to tell when the oil is oozing out with wet vs dry rendering.
- Stir every 30 minutes or when you hear sizzling. Don't let the fat stick to the bottom or sides of the pot, or your lard will taste porky!
- The lard will eventually start bubbling so don't be alarmed. (The bubbles indicate that there is still moisture in the fat. You're always using low heat so you should never be boiling the lard.)
- The fat will take 2-4 hours to completely render. Make sure that there are no more bubbles and the crackling (pork bits) have risen before switching off the fire.
- Remove the golden brown scratchings. I recommend sieving using a strainer or cheesecloth. You can also crush the scratchings to get every bit of oil out.
- Place the pork scratchings on a kitchen towel to absorb the excess oil. If not as crunchy as you like, pop them into a dry pan, air fryer or oven for a few minutes (350F/ 177C)
- Filter the pork lard into a sterilised, heat resistant glass jar- this is particularly important if you've added aromatics to your lard. Allow it to completely cool before covering and refrigerating.
- Keep it for up to 6-9 months in the fridge and do not use if rancid (smells bad) or moldy. (Some people say 12 months- I like to err on the side of caution! You can freeze if it you want it to last longer.)
Notes
- In the Oven: you want to use low heat so a temperature of about 200-225 F (93.3 C- 107C.) You don't need to add water for oven rendering. Don't cover the pot or the moisture can't evaporate. This can take up to 8 hours so only do this if it's not that expensive to run your oven! (Tip: if you have a heat-proof colander, put the fat in the colander then the colander in the dutch oven. The whole set-up goes into the oven. The rendered lard will drip out of the colander into the dutch oven, saving you the work of straining! Just use the back of a spoon to gently crush the crackling in the colander, to get all the oil out.)
- In the Slow Cooker: This is probably the easiest way to render lard. Set on high for 30 minutes. Then reduce to low, cover but with the lid ajar (to allow steam to escape) and stir every 20 minutes or so. (If you hear sizzling, definitely stir so that it doesn't stick!) The lard will sink at first and your pot will look less full. After a few hours, the cracklings will settle at the bottom, and you know your lard has been rendered.
- In an Instant Pot: I don't have 1 so no comment from me on the method. (I've found some online but can't reasonably recommend something I've not tried!)
Note: the nutritional information is an estimate automatically calculated using the WPRM recipe maker and I am not responsible for its veracity.
Nutrition
If you've enjoyed this article on "How to Render Lard at Home", you can sign up for more Asian food content here. (I won't spam you!)
Alternatively, if you'd like to sponsor a small content creator, here's the link to my Buy Me a Coffee page (no pressure though!)


Carina says
The Low heat tip is great! I used to do it with medium heat and it didn’t work as well!
Dorene cheo says
Yummy