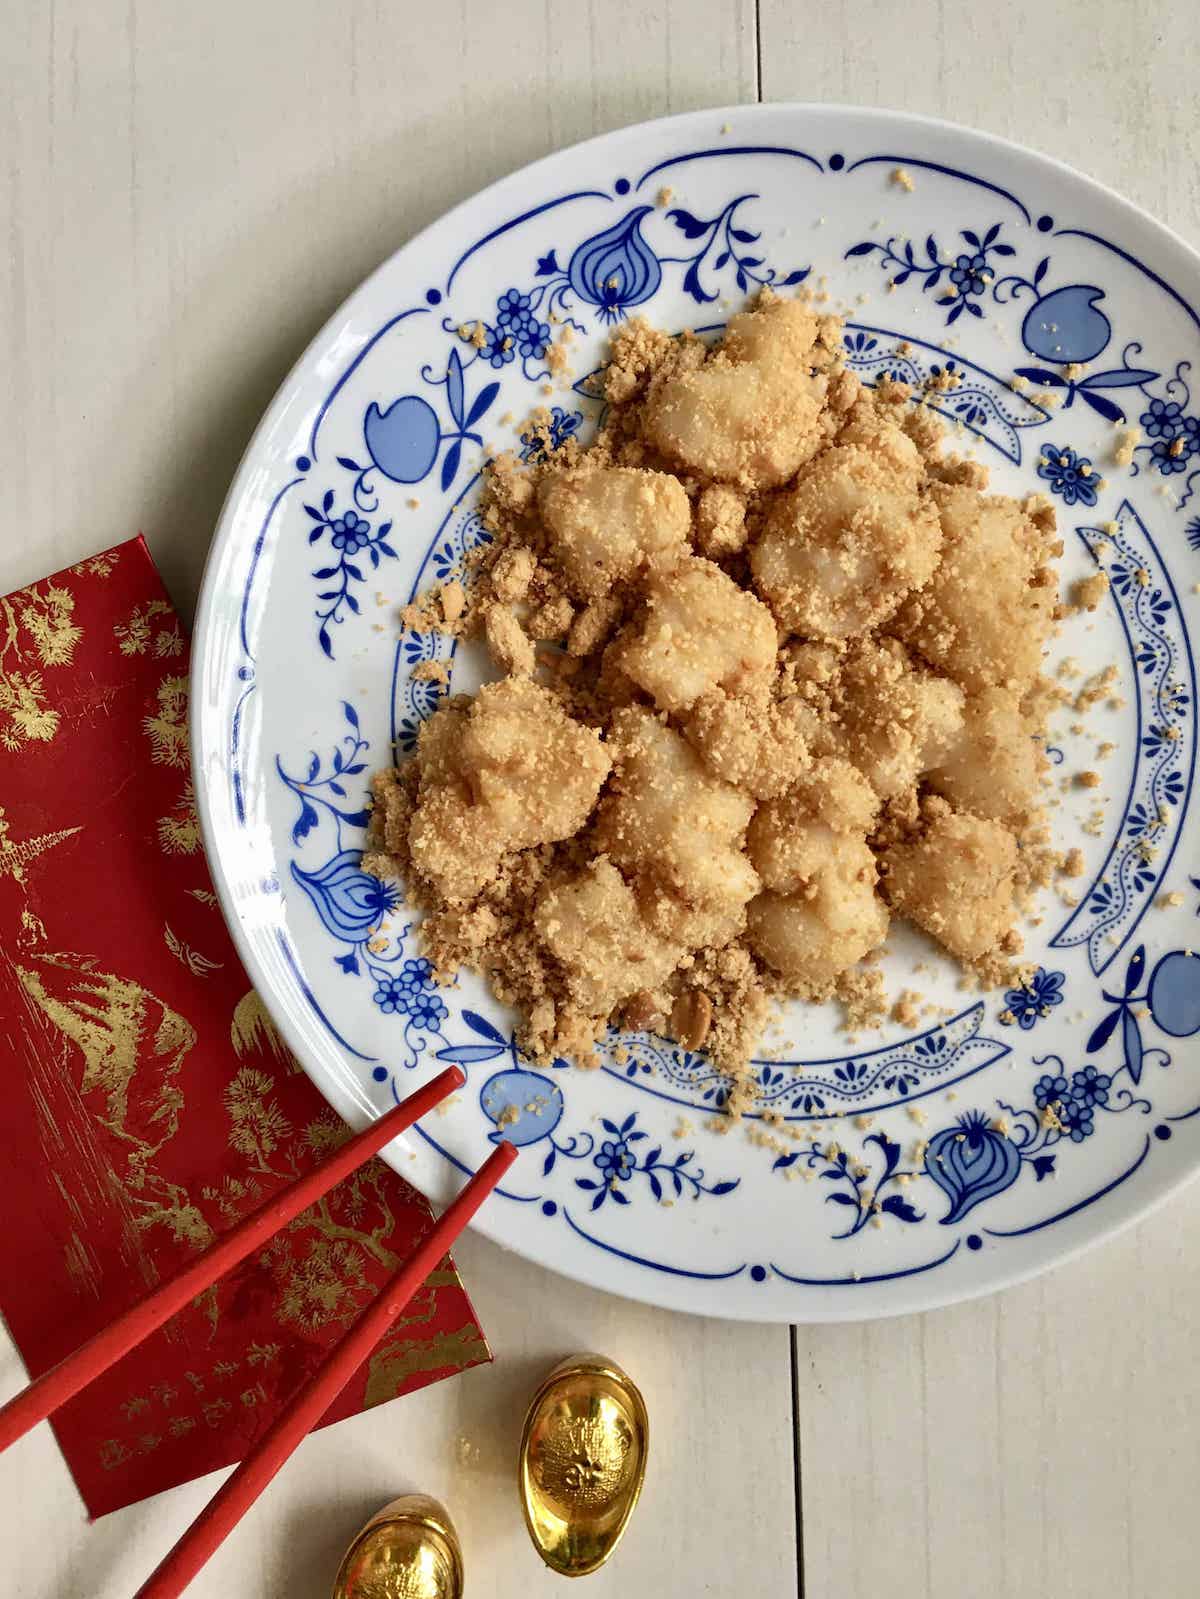
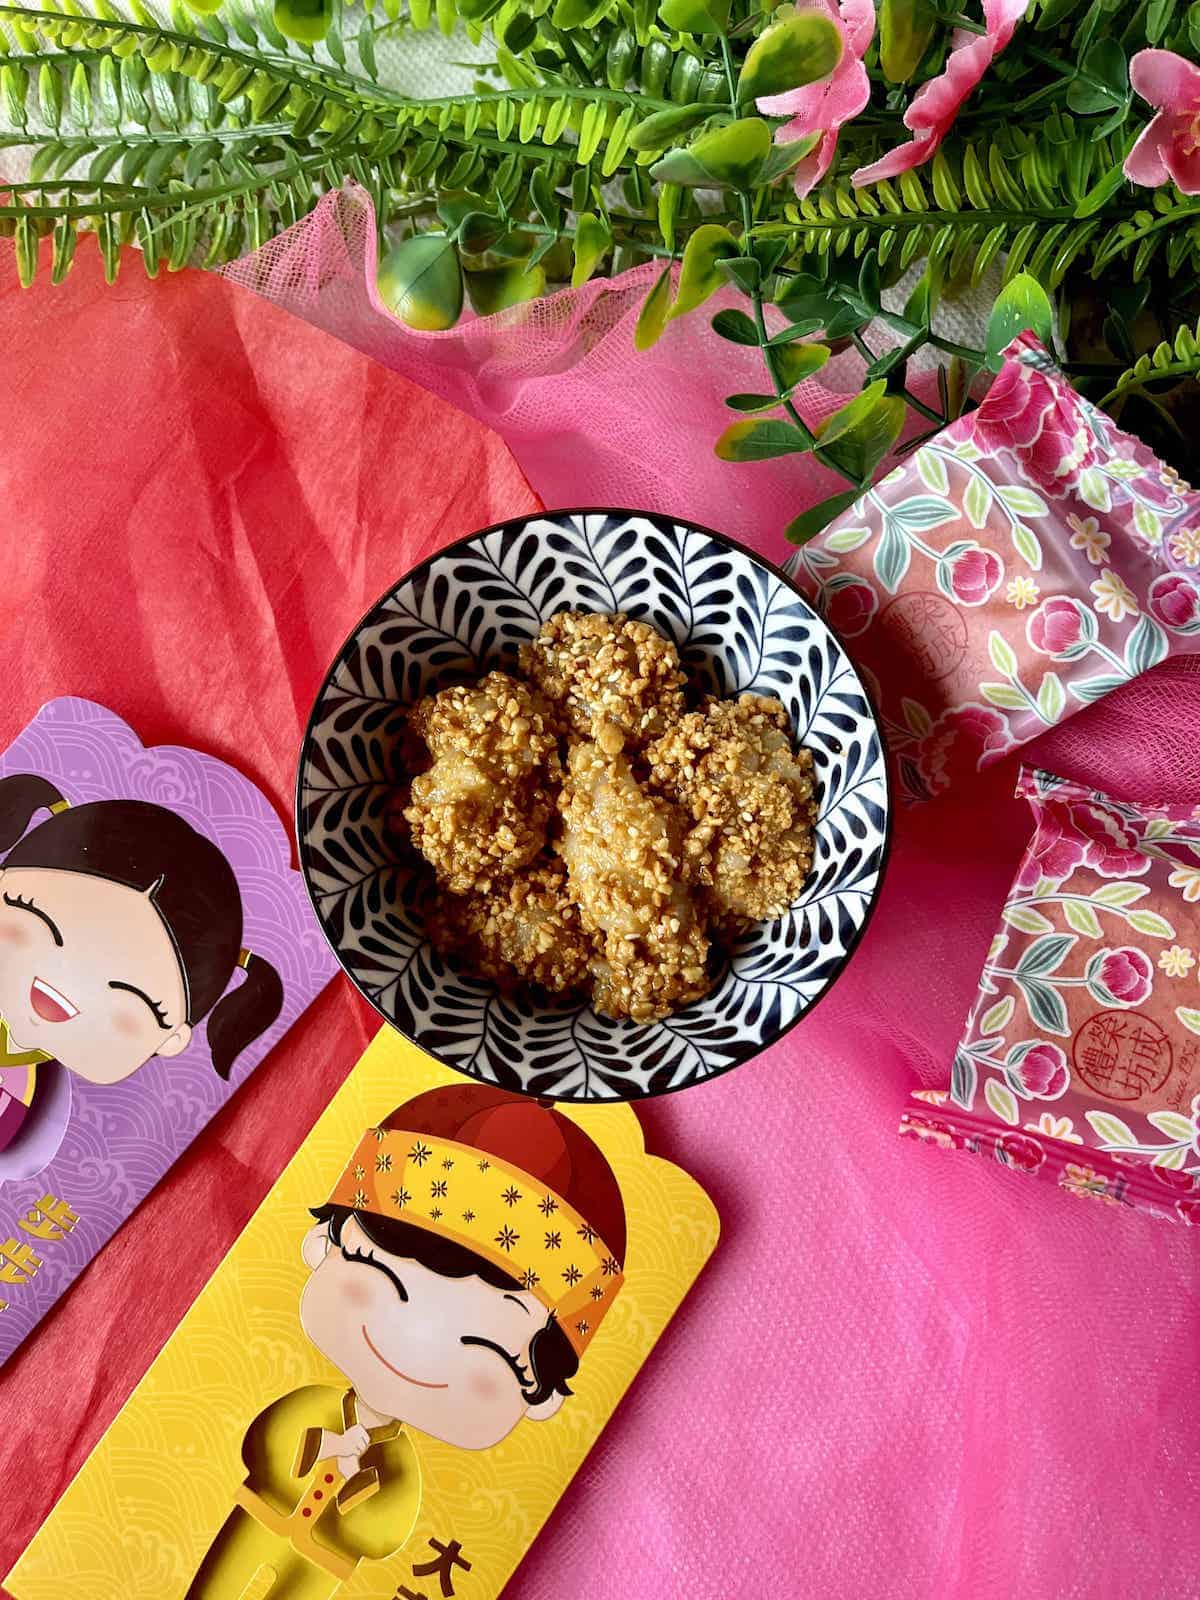
The Chinese equivalent of Peanut Mochi, Muah Chee is a popular, traditional Hokkien dessert which is soft, chewy and bouncy. My easy vegan/ vegetarian muah chee recipe can be made with 5 easy methods: it can be steamed, fried or even cooked in the microwave, air fryer, and rice cooker!
Jump to:
⭐ Why Make This Recipe
- Muah Chee is delicious: chewy and aromatic, if you like mochi, you'll love muah chee!
- It is also hard to find these days: Making Muah Chee is somewhat of a dying trade- lots of work and low returns for the street vendor. Thus, I decided to make my own muah chee as my Grandfather was a great fan of it!
Note: there's only 1 last traditional muah chee maker in Singapore (Hougang 6 Miles Famous Muah Chee at Toa Payoh Hub #B1-01, Stall 21, Tel: +65 9862 1501.) I've hiked down to try it before and it's delicious.
He stirs and pounds the dough for ages so it is much springier than any homemade muah chee and I highly recommend trying it. Well, you could probably get your Chinese mochi as bouncy if you're willing to spend an hour or so stirring and beating!
🥜 What is Muah Chee?
Muah Chee (麻糍, also known as muar chee), or Chinese mochi, is a delicious snack with a chewy texture. A traditional South Chinese street snack (often eaten at breakfast!) that was brought to Singapore and Malaysia by the Hokkien and Teochew community, muah chee is especially popular amongst the elderly.
Fun fact: in Teochew, muah chee means "full of wealth" so it's a very lucky dish to eat during Chinese New Year. It is also a traditional dish to offer to the Gods- apparently, the sticky texture will help wealth stick to you! ("Muah" = full and "chNee" (which is how it is pronounced in Teochew)= $$$) Now that I know this thanks to ieatishootipost, I made muah chee for CNY!
ATTENTION: Glutinous rice flour foods are so sticky, if not chewed well, they can get stuck in one's throa and suffocate you so CHEW CAREFULLY. In Japan, people go to hospital (and even die) from eating mochi every year so be extra careful, especially with the young and old.
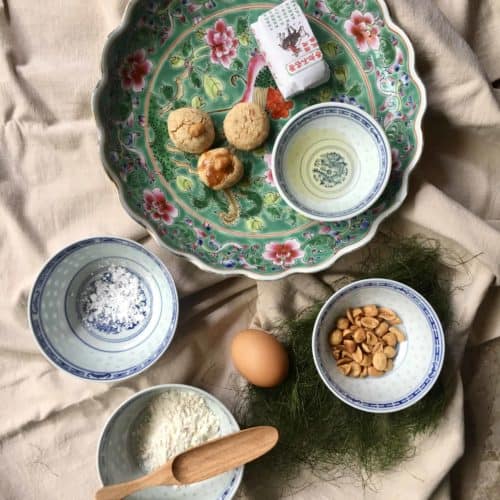
🥣 Ingredients
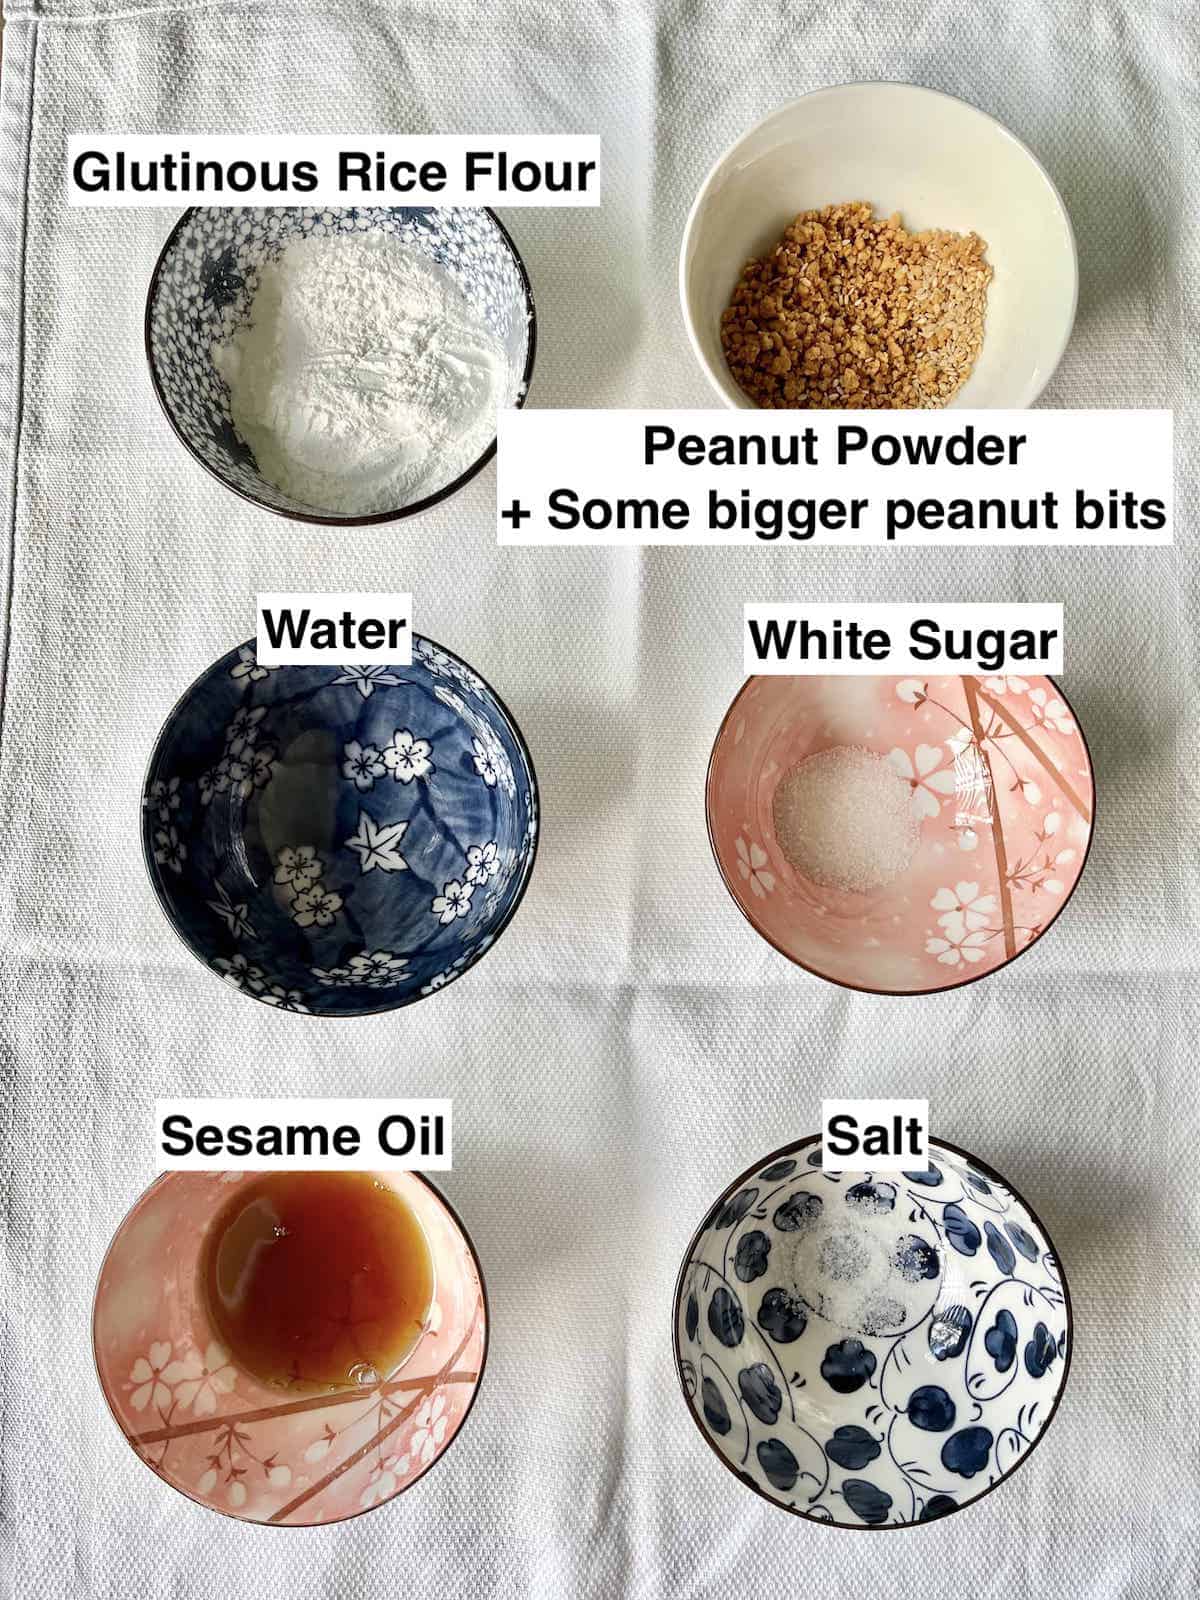
For the Glutinous Rice Dough
You will only need a few simple ingredients:
- Glutinous Rice Flour: Do not use rice flour instead! They're not the same thing at all. A good substitutes is mochiko flour or 1 of these glutinous rice flour alternatives. (Mochiko is made from cooked mochigome, a glutinous short-gain rice, but it creates a less elastic dough so your final result will not be so chewy.) Some muah chee recipes recommend tapioca flour or potato starch as an alternative to glutinous rice flour but I've not personally tested them (yet).
- Water: The ratio of glutinous rice flour: water determines the texture of the snack. Good muah chee should be chewy, bouncy and almost stretchy. If you use too little water (for example, an equal ratio of water and dough), you'll end up with a too-thick dough that isn't bouncy in the least. I recommend using a flour: water ratio of around 2:3 (i.e. for every 1 oz of glutinous rice flour, use 1.35-1.5g oz of water.) Today, there are South East Asian variations of muah chee which use pandan juice.
- Sesame oil: You can use shallot oil, peanut oil or 1 of these sesame oil substitutes. As a last resort, if you're trying to be healthier- a neutral vegetable oil such as sunflower oil. The muah chee won't be anywhere as fragrant if you use a veg oil- in that case, pile on the toppings to make up for the lack! (Pork lard is the most traditional and also the tastiest but obviously not vegan or vegetarian.) I don't recommend olive oil as the taste is quite strong. If you're frying, omit the oil from the dough mixture. (It'll be added at a later stage- adding a bit of oil to the dough makes it a little silkier.)
- White caster sugar: the amount of sugar is a guide- you may want to add more/less to your Chinese mochi depending on how sweet of a tooth you have! I sometimes mix it with the peanut flour to create a slightly sweet topping. You can replace with white granulated sugar.
- (A wee bit of) Salt
For homemade Shallot Oil
To make your own shallot oil (instead of using sesame oil), heat up ½ Cup of neutral vegetable oil then saute 8-9 shallots (sliced thinly) in the oil over low heat till the shallots have turned golden brown.
After the mixture has cooled, sieve out the shallots- which can be added to soup or rice- and the remaining liquid is shallot oil.
For the Coating
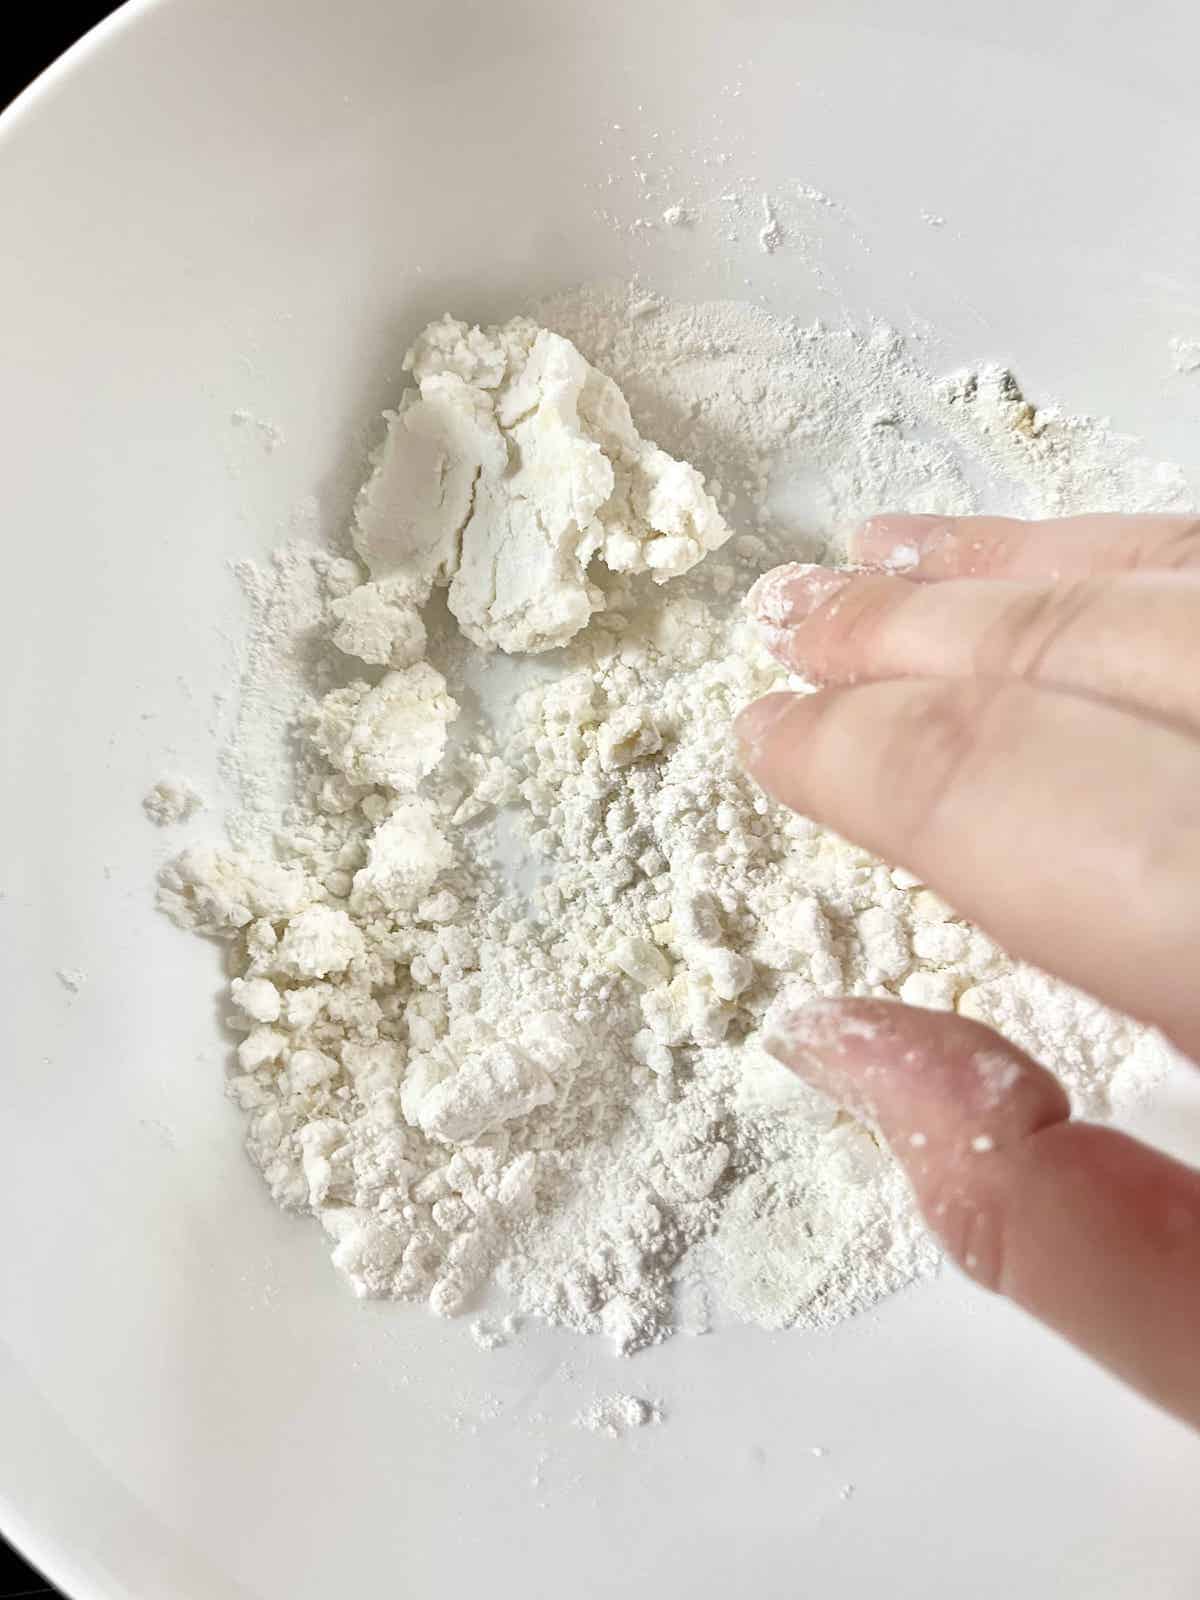
I use peanuts in my recipe but there are other options that I've listed below:
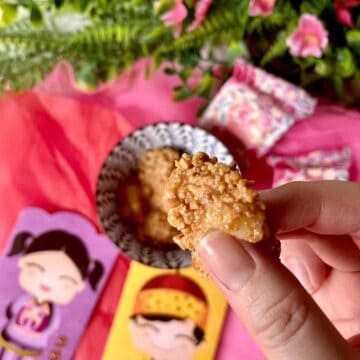
- Roasted peanuts: for homemade peanut powder, you can fry, skin and blend (with the sugar) the peanuts yourself. (Don't process for too long or all the oil will come out and you'll end up with peanut butter.) Alternatively, toast store-bought peanut powder in a dry pan to make them more aromatic. (A middle ground is to get unsalted, roasted whole peanuts, then process them yourself. These nuts are usually fresher than the crushed ones and you have more control over the texture. See below on the texture.) I sometimes add sesame seeds to make it more fragrant.
- Traditional substitute: black sesame powder.
- Modern twist: you can use any other crushed nuts, such as cashews, hazelnuts, brazil nuts, brown sugar, grated coconut or a mix of ingredients.
- Japanese fusion: to make it more like Chinese mochi, use green tea instead of water and/or coat the pieces in matcha powder!
- For those with a sweet tooth: White caster sugar or white granulated sugar
Peanut Powder vs Crushed peanuts
Some recipes call for pure peanut powder, but I find including some bigger peanut pieces provide a better contrasting texture to the sticky and chewy dough.
Thus, my recipe calls for mixing peanut powder with bigger crushed/ chopped peanuts. The fine peanut powder is to ensure each piece is coated well and the bigger pieces provide bite!
For more information on frying peanuts, you may want to check out my Chinese vegetarian peanut cookies recipe, 1 of the most popular Lunar New Year recipes on this blog.
Note: It's harder to find pre-ground black sesame powder but you can dry fry black sesame seeds then put them through a spice grinder. (Apparently, black sesame muah chee is extra auspicious!) Whichever you choose- peanut or black sesame- you need to mix it with sugar to make a tasty coating for the dough.
📋 Step-by-Step Instructions
Muah chee is traditionally cooked over a low fire, but I've made my Chinese mochi recipe flexible so it can be steamed, fried, cooked in the microwave, rice cooker or air fryer.
Personally, I find steaming the easiest as it's mainly passive cooking compared to the other methods where you need to stir the dough every few minutes.
Note: you can even use a thermomix if you have 1!
Cooking Times
A quick summary of cooking times (excluding the time to stir and fold the dough at the end):
- Steaming (traditional): approximately 15-20 minutes
- Pan frying: about 15-20 minutes
- Air frying: about 10 minutes
- Rice cooker: about 9 minutes
- Microwave: 3-4 minutes
Note: you can also make a boiled version then coat it with peanuts and sesame- sort of like a Taiwan peanut mochi recipe or a tang yuan with no filling. This will take about 20-30 minutes but is quite a different process to the above methods, so I'll leave it for another post!
How to Tell if it's Cooked

To tell when the glutinous rice dough is cooked, check the colour and texture.
The colour should have changed and the texture will be squidgy. You can also insert a toothpick through the centre of the dough, like you do with bakes. If it comes out clean, the dough is ready.
Steaming
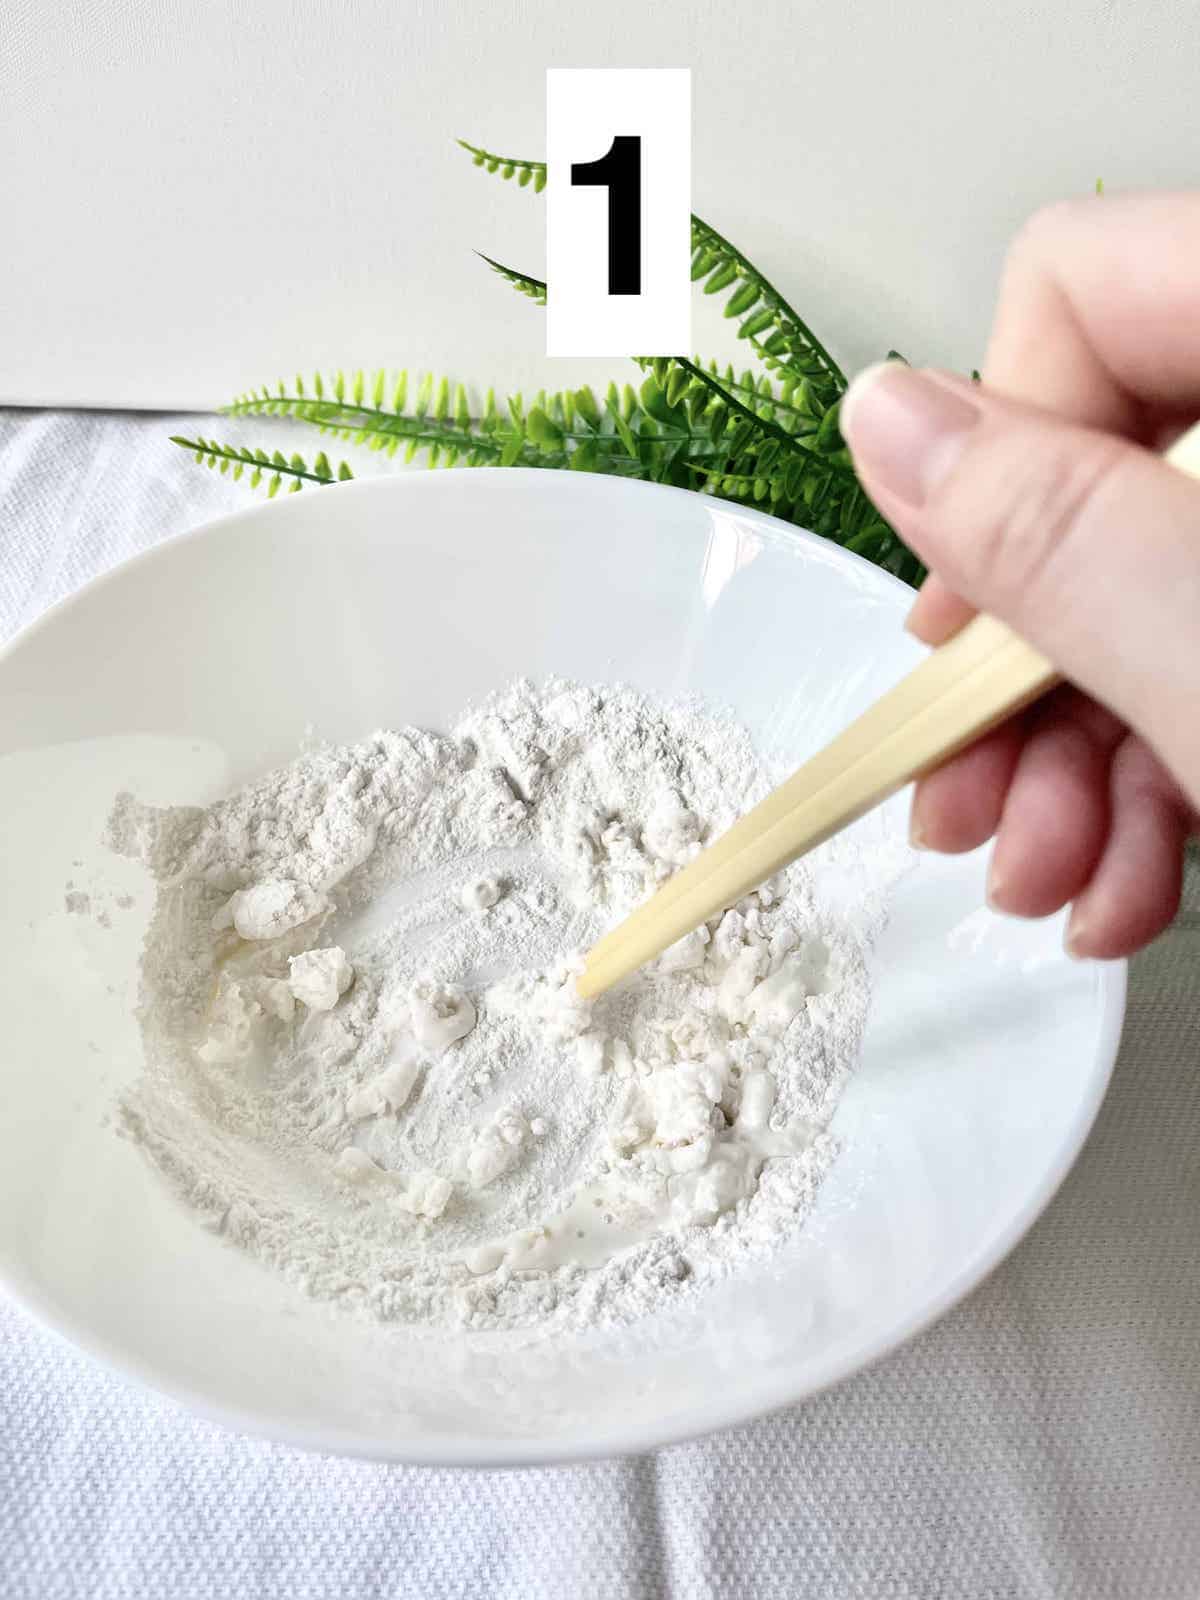
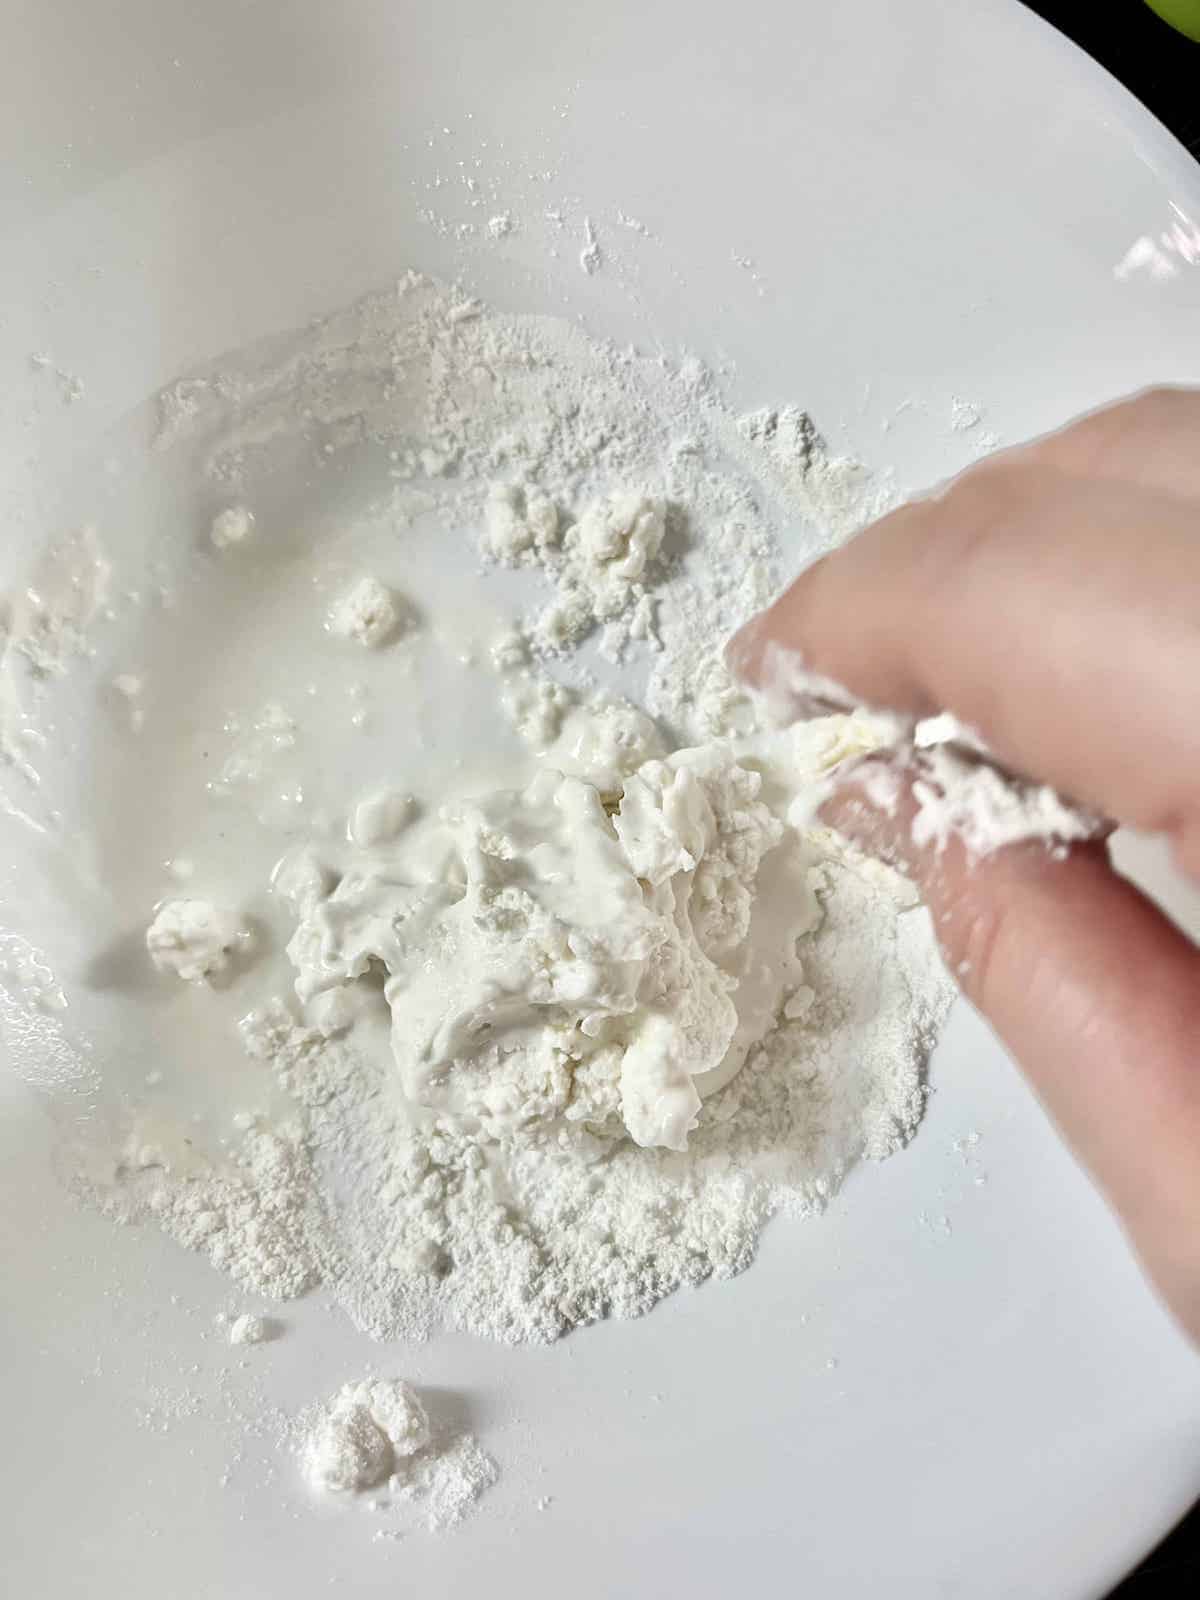
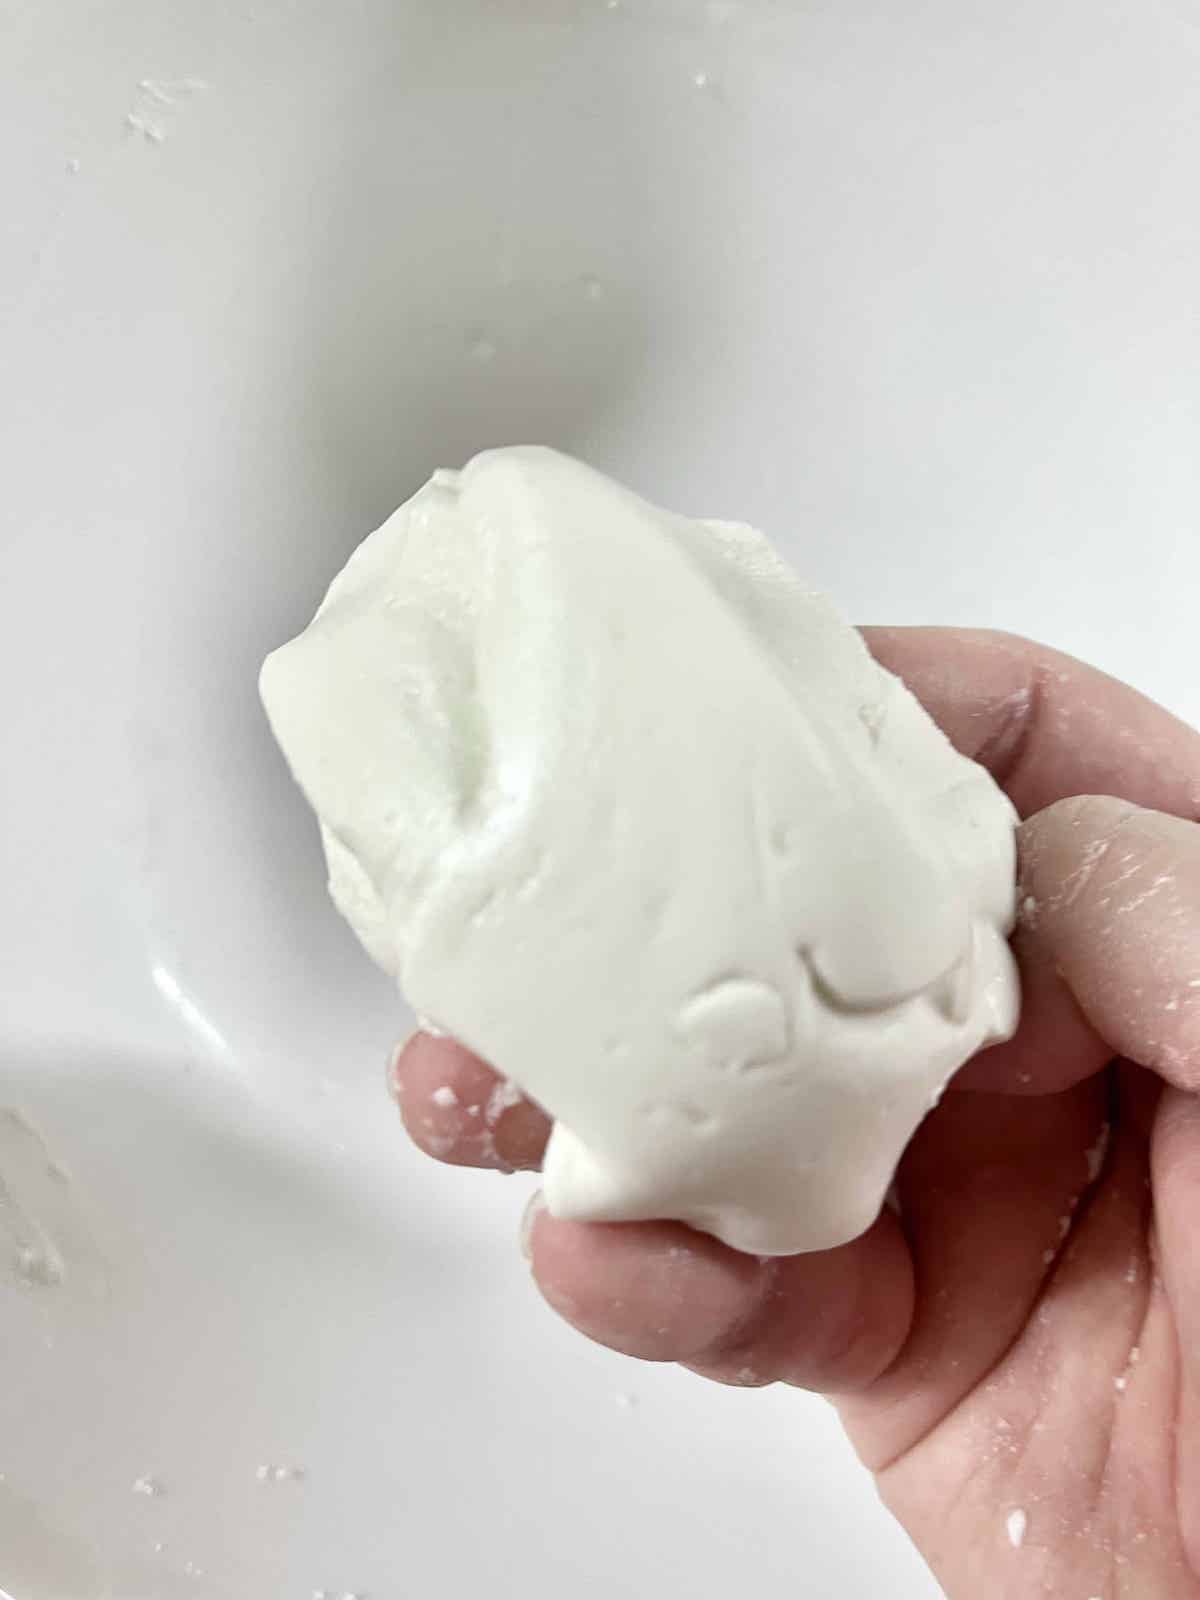
1. Mix all the dough ingredients and stir with an oiled chopstick or your oiled fingers. (You'll eventually need to use your hands to get the dough well-hydrated.)
The amount of water required is a guideline and will change according to your dough. If you need to add more water/ glutinous rice flour, do it teaspoon by teaspoon so you don't overwhelm the dough! (See below for pictures.)
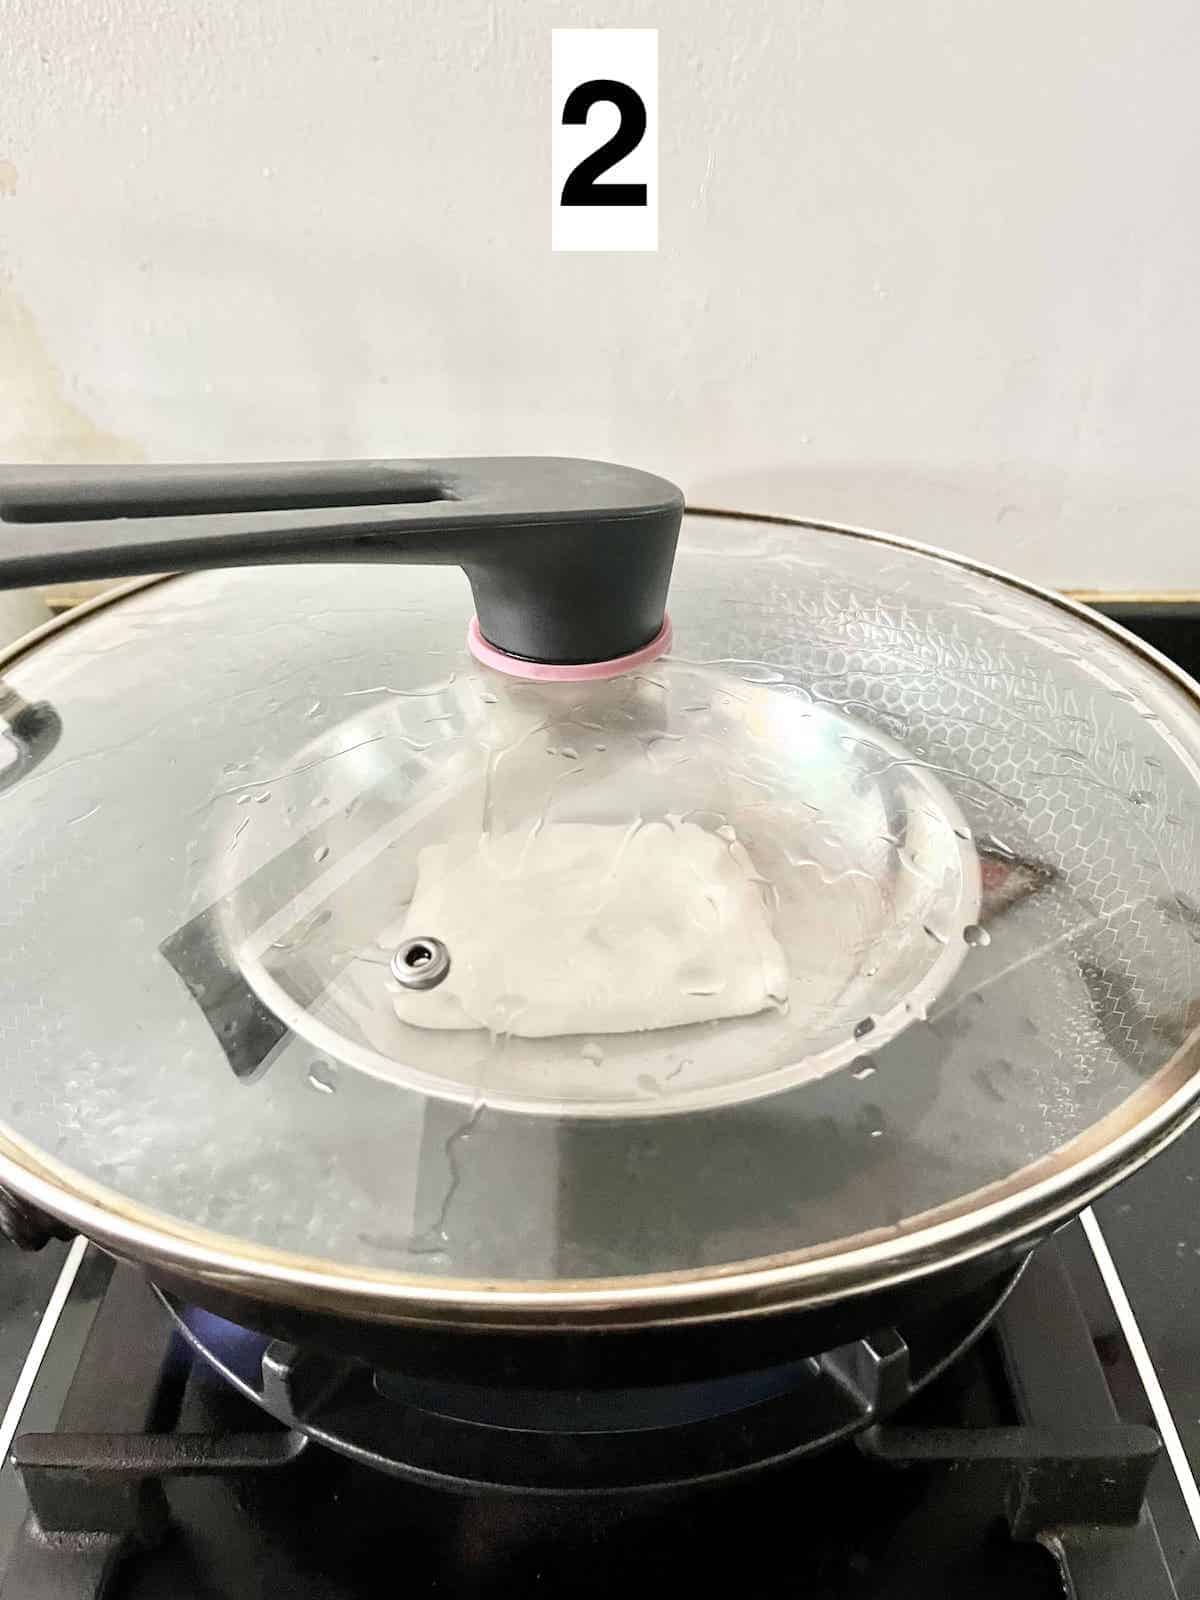
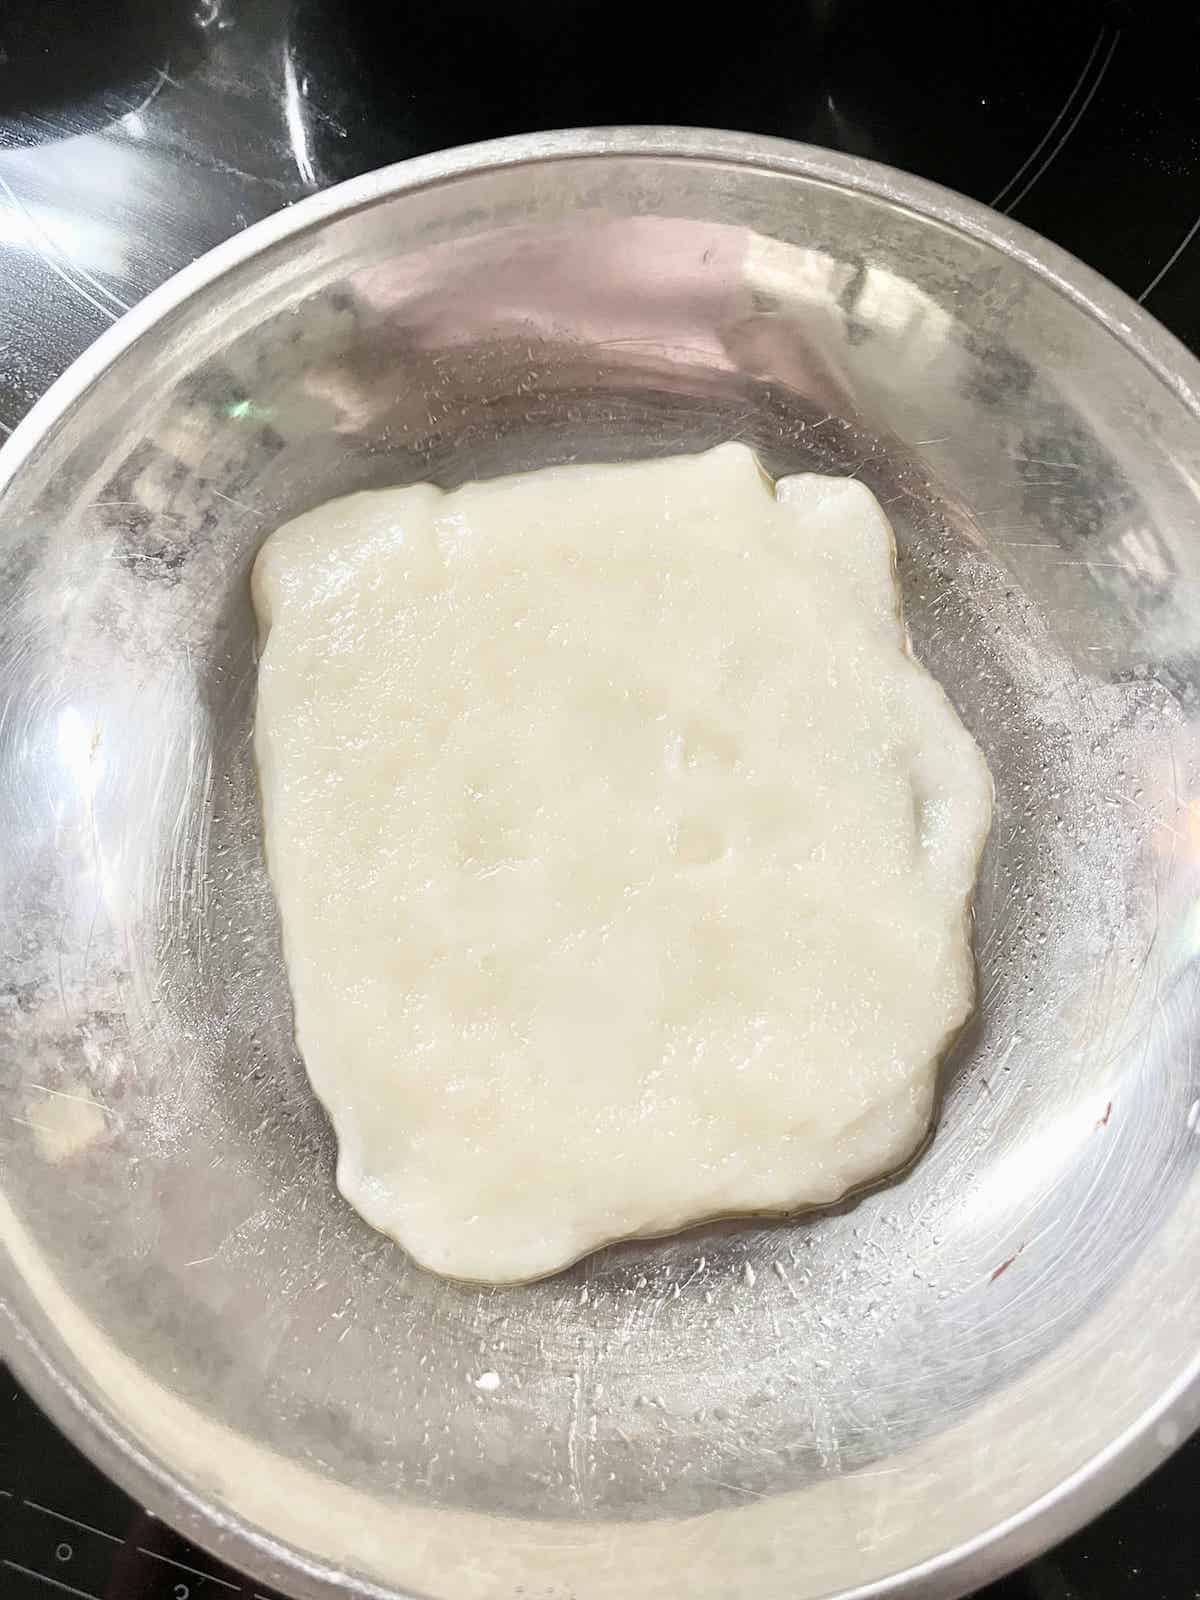
2a. Pour into the oiled, heat-proof bowl and steam for 15-20 minutes till cooked. (See above on how to tell if dough is cooked.)
2b. If you haven't already prepared your coating, do it now. The dough hardens on contact with air and needs to be coated almost immediately.
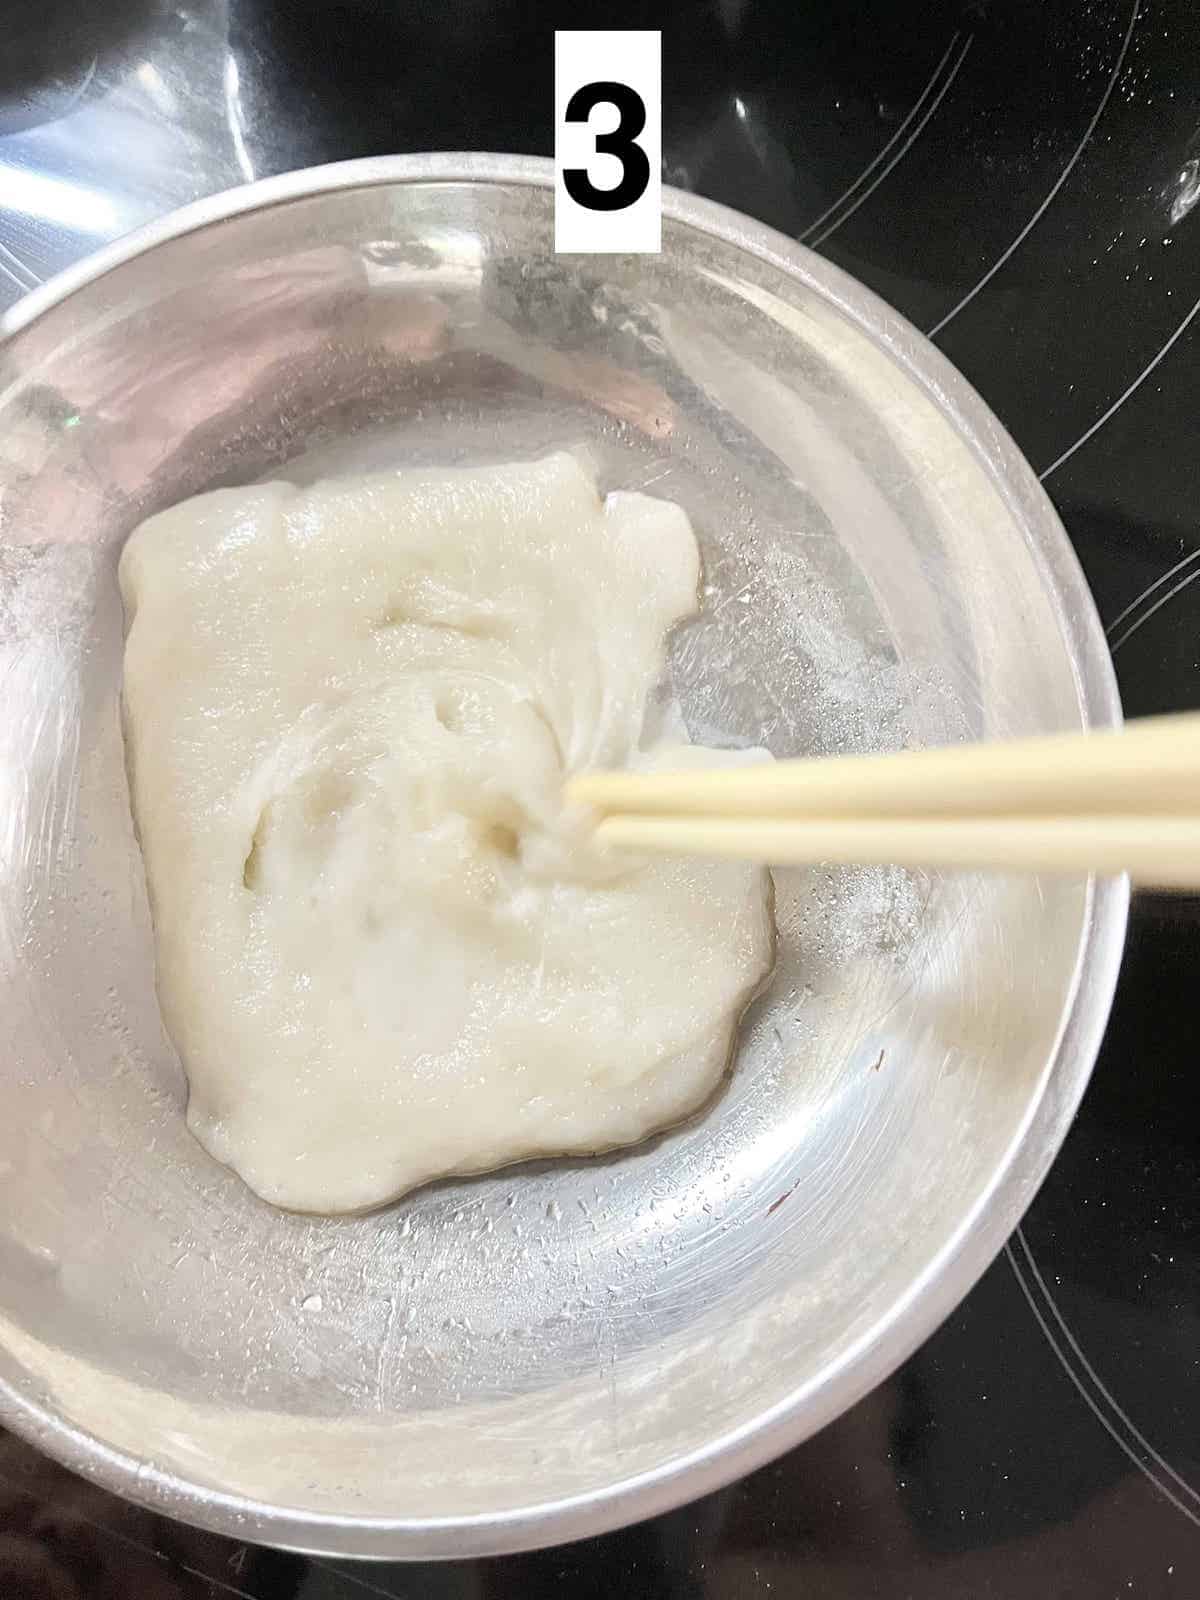
3a. For the best springy texture, you need to stir and fold the muah chee dough many times after it has been cooked. This is similar to how mochi is pounded.
3b. Stir for a minimum of 1-2 minutes then allow to rest for 5-10 minutes. (Not too long or the outside of the dough will harden.)
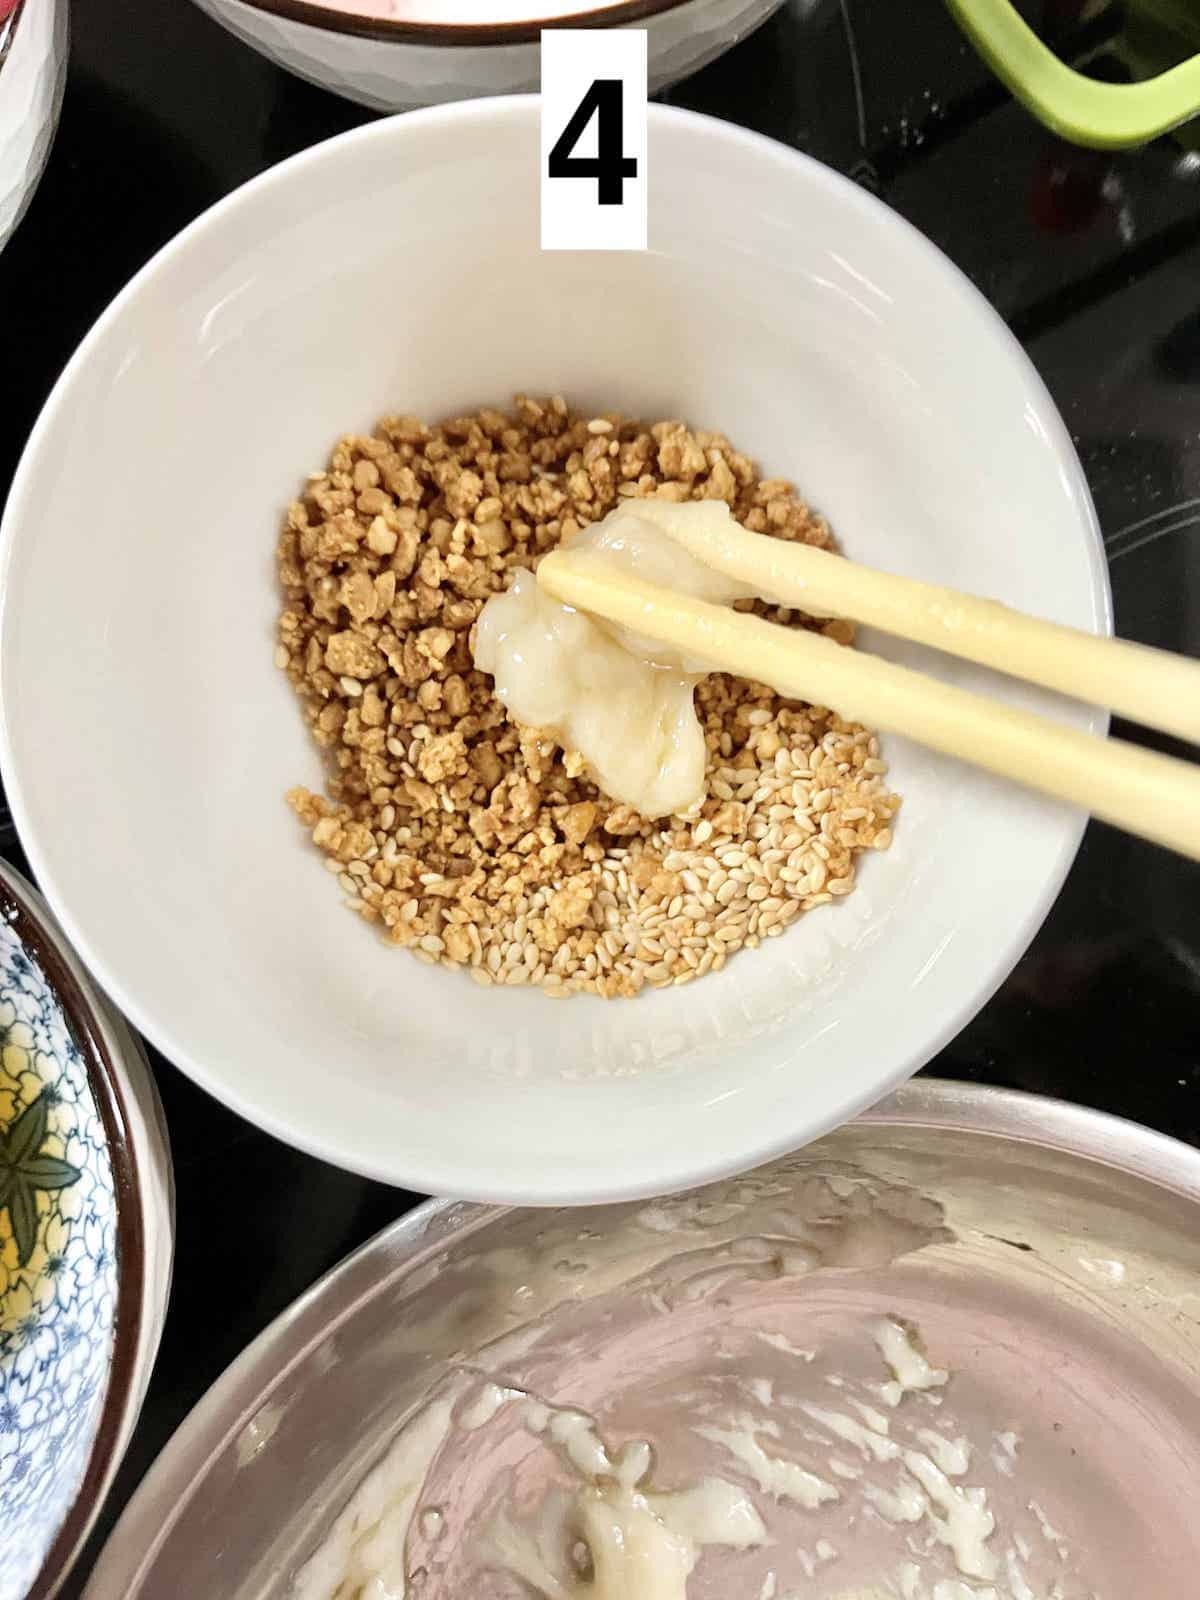
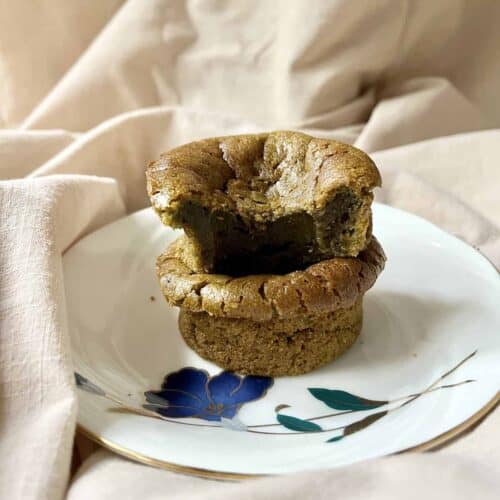
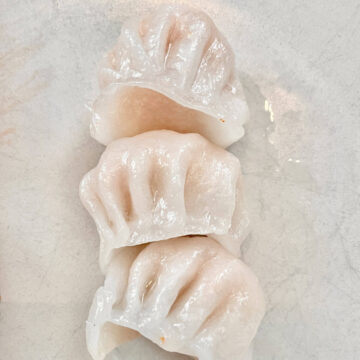
4. Once cool, pinch off small pieces with your oiled hands or chopsticks (not scissors), dip lightly in the sesame oil then roll in the peanut mixture. Enjoy the chewy glutinous rice balls straight away.
Tip: Be generous with the topping: I've only heard gripes about too little peanuts/ sesame and never complaints that there was too much!
How much water to add?
Microwave
If you're pressed for time, microwaving is the way to go, as a good microwave should cook the dough in 3-4 minutes, which is 20% of the steaming time!
Note: The texture is going to suffer though, so make sure you stir and fold MANY times at the end.
Panfrying
Don't add the oil to the dough as you'll be using it to pan fry. (Sesame oil burns easily so shallot oil may be a better choice for frying.)
Rice Cooker
Any rice cooker works- if yours is a modern multi-function machine, use the regular "cook rice" function.
However, note that if you have an older model which doesn't have a non-stick pot, you may have some problems getting the dough out!
🥡 How to Store
Muah chee tastes best when eaten right after cooking- if not, it becomes less soft and bouncy. Serve immediately after cooking- don't batch make in advance.
However, if you made too much of this Chinese mochi, cover the uncoated dough tightly with cling film and store in the fridge for 3-4 days. (Once cold, the muah chee will harden - and won't be sticky- so you will need to reheat before coating and serving.)
If you've already coated the dough, it will taste good left at room temperature for up to 1 day- moisture will start forming which will make the coating soft, so coated muah chee shouldn't be left overnight.
The peanut or black sesame toppings can be stored in an air tight container at room temperature. Ideally, don't mix in the sugar till right before coating the dough, as the oils of the peanut and sesame will melt the sugar.
How to Reheat
Steam till soft, cool for 10 minutes, then coat the Chinese mochi with your preferred topping.
👩 Expert Tips
Tip #1: The batter should be quite sticky after cooking - you want the coating to stick to it, after all- so you may want to very lightly oil the container (that you're pouring the liquid dough into) to make it easier to remove the cooked dough. (Once the dough is coated, it won't be sticky anymore.)
Tip #2: Some recipes say to use scissors to cut the dough into pieces- this is undoubtedly the cleanest method which produces the neatest looking snack. However, a professional muah chee seller told me that you want messy looking pieces! The crevasses on each piece offers more surface area for the coating to stick to, making for a more delicious snack. So use your (oiled) hands to pinch off smaller pieces, or use (oiled) chopsticks and not scissors!
Tip #3: This Chinese mochi snack should be in small bite-sized pieces. The dough is pretty bland, and most of the flavor is from the sugar and peanut coating. If the pieces are too big, the ratio of dough: coating will be too high and it won't be tasty. In addition, cutting the muah chee (and mochi) into small pieces and chewing well prevents small bowel obstruction (which would cause significant stomach pain and maybe even hospitalisation!)
Tip #4: Coat each piece only when you want to eat it, if not the topping will soften due to the moisture in the dough, and it won't provide as much bite.
💭 Recipe FAQs
Yes. The traditional ingredients are glutinous rice flour, crushed peanuts (or black sesame, water, salt, sugar and an oil (usually pork lard, shallot oil or sesame oil)- all of which do not contain gluten.
Your water: glutinous rice flour ratio is probably wrong. Too little water will result in a hard and non-chewy texture. More details in the post and recipe card on the correct ratio.
Yes. It's best eaten right after making but the uncoated dough can be kept for 3-5 days in the fridge. See my post for more details on storage.
Have you noticed how similar the 2 names are? However, unlike Japanese mochi which is seen as quite refined and can be rather expensive, muah chee (which is like a Taiwan peanut mochi) is usually a cheap street snack (which is unfair as it is not traditionally any less work to make!) Mochi usually comes in a round shape with a filling, but the latter is a softer, plain, formless dough that's traditionally coated with peanuts and/ or sesame. (Mochi is so popular, there are even mochi muffins and mochi brownies these days!)
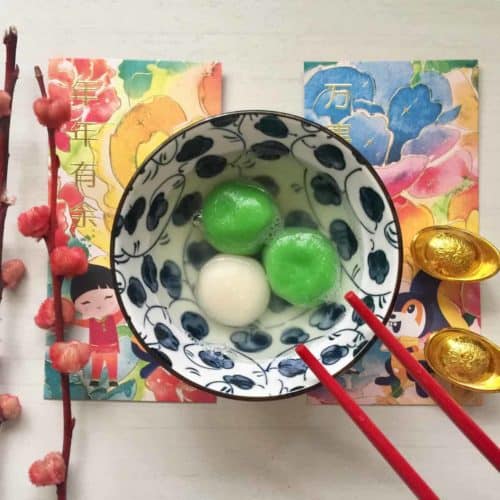
Note: there is a similar Chinese dessert called tang yuan (glutinous rice balls) that is more similar to mochi. Chinese people normally eat that on winter solstice and on the last day of CNY.
🧧Other Chinese New Year recipes
Enjoyed this Chinese Peanut Muah Chee Recipe? Please leave a 5-star 🌟🌟🌟🌟🌟rating in the recipe card below! If you REALLY liked this traditional Chinese Snack, please consider supporting my work by buying me a coffee! 🙂 (No obligation though!) Thank you and have a great day!
Muah Chee (Peanut Mochi) (5 Methods)
Equipment
- Rubber heat-proof spatula
- Steamer or wok with steamer stand If steaming the dough. Alternative: pan if frying, microwave, air fryer or rice cooker
- If not frying: Non-stick heat-proof bowl that can be steamed/ put in the air fryer/ microwave (depending on which cooking method you choose) Oil the bowl you're cooking the dough in, especially if it's not non-stick! This will make it easier to pinch out the cooked batter later.
- Optional: chopsticks for pinching the dough I prefer using my (oiled) fingers but if you're going the chopstick route, oil the front bit first.
- Optional: spice grinder/ food processor/ blender if grinding your own black sesame coating/ processing your own peanuts
Ingredients
For the dough
- ⅔ C Glutinous rice flour (83g or 2.9 oz) Some people have said potato starch or tapioca flour can be used as substitutes but I've never tried them and am not confident they'll produce the same bouncy texture.
- ½ C Water (118ml/ 4 fluid ounces)
- ½ Tablespoon Sesame oil (If frying the dough, you will need more oil- about 1-2Tablespoons) You can substitute with pork lard, shallot oil (directions in the notes on how to make shallot oil), peanut oil or even a neutral vegetable oil like sunflower (least recommended as it's tasteless)! If you don't have oil, that's fine too (for steaming/ rice cooker/ microwave/ air fryer) but the dough won't be as smooth or fragrant.
- ⅔ teaspoon white caster sugar Substitute: white granulated sugar.
- ⅛ teaspoon salt
For the peanut coating
- 1-2 Tablespoons Sesame oil For dipping the dough pieces LIGHTLY before coating with peanut or sesame. If you're coating with matcha or cocoa powder, however, you may want to skip oiling the dough as it's easy for the powder to become oily. (Skip this step if frying the dough.) Substitute: pork lard/ shallot oil/ neutral vegetable oil (least recommended)
- ½ Cup Peanut Powder mixed with some bigger grated peanut Substitute: black sesame seeds, cashews, hazelnuts, matcha powder etc.
- ⅛ Cup white caster sugar or to taste. You may want to add more or less depending on how sweet you like your food! Substitute: white granulated sugar.
For oiling the equipment
- Neutral vegetable oil To prevent the dough from sticking
Instructions
Make the coating first (The dough hardens on contact with air, so prepare the coating first to make sure everything is mis-en-place once the dough is cooked and cooled.)
- For black sesame coating: dry fry the black sesame seeds till fragrant, let it cool, then grind in a spice grinder. Mix with the sugar till evenly distributed.
- For peanut coating: fry the peanuts, let them cool, remove the skins, then blend in 2 batches. Process the 1st batch till it's crushed into 1-2mm pieces but blend the 2nd batch further till a powder (but not so much that it becomes peanut butter). Mix the 2 batches with the sugar till evenly distributed.
Steaming
- Mix all the dough ingredients and stir well till the flour is dissolved.
- Pour into the oiled heat-proof bowl then steam for 15-20 minutes. (The dough will solidify, become sticky and change colour when cooked)
- Stir the dough till it becomes bouncy enough for your liking (minimum 1-2 minutes) then let cool for about 5-10 minutes. (Don't leave for too long as the dough will form a hard coating around it.)
- Once cooled, pinch off small pieces with your oiled hands and dip them in the oil- you want the dough VERY lightly oiled and not dripping!- then coat with the peanuts, black sesame or whatever you've chosen to use.
- Serve immediately and enjoy!
Microwave
- In an (oiled) microwave-safe bowl, stir all the dough ingredients together till the flour has dissolved into the liquid and is smooth- the mixture will feel thicker than water when stirring.
- Put the bowl in the microwave and blast on high for 2 minutes. The dough should be partially formed at this point i.e. half solid, half liquid but if your microwave wattage is too low, it will take longer. (I recommend starting with 2 minutes first regardless of the wattage, because the shorter the cooking time, the softer the dough.)
- Use a rubber spatula to stir well, then microwave again for 1 minute on high. Remove and stir again (folding the dough into itself to give it a bouncy texture). If the dough still has liquid parts, microwave for 1 more minute, then stir well. (Repeat this till there's no more liquid- the exact time will vary depending on the microwave model. As a guide, a 1000W microwave took a total of 3½-4 minutes to make muah chee- the longer the cooking time, the harder the dough.)
- Once the dough has absorbed all the liquid, do NOT stop stirring- keep folding the dough into itself till you are satisfied with the springiness. (Do this for at least 1-2 minutes)
- Allow the dough to cool for 5-10 minutes (don't leave it too long or it'll become hard and the peanuts/ black sesame won't stick)
- Once cooled, pinch off small bits with your oiled hands and dip them in the oil- you want the dough VERY lightly oiled and not oozing!- then coat with the peanuts, black sesame or whatever topping you've chosen to use.
- Eat straightaway!
Rice Cooker- don't add the oil into the liquid dough till after it's been cooked
- Stir all the dough ingredients EXCEPT the oil till everything is dissolved.
- Pour the liquid batter into the (lightly oiled) rice cooker pot, pop it in and switch on the rice cooker- if yours is a multi-function device, make sure it's in "Cook Rice" mode.
- After 3 minutes, open the rice cooker and stir the dough well with a rubber spatula. At this point, the batter is still partially liquid.
- Repeat the cooking and stirring 3 times (i.e. a total of 9 minutes cook time). By the 3rd cycle, there should be minimal liquid left, which should be absorbed into the dough when you stir and fold it into itself. (The rice cooker is still on whilst you stir the dough.)
- Once the dough is fully cooked (there's no more liquid and the colour has changed), add the oil (optional) and fold the dough into itself till the oil is fully absorbed. Stirring the batter is what makes it springy, so stir and fold for at least 1-2 minutes. Longer if you can!
- Let it cool for 5-10 minutes (not too long or the dough will become hard and the peanuts/ black sesame topping won't stick)
- Once cooled, pinch off small pieces with your oiled hands and roll them in a bit of oil- you want the dough VERY lightly oiled and not oozing!- then coat with the peanuts, black sesame etc
- Best eaten right after coating!
Air Fryer
- Mix all the dough ingredients well till a smooth liquid batter forms.
- Pour it into an air-fryer safe pot, which you leave in the air fryer at 180C for approximately 10 minutes- every 2 minutes, you'll need to open the air fryer and stir the dough several times. It should get progressively stickier and more "chewy". Note: the timing is a guideline and not prescriptive- if the dough is fully solid by the end of the (eg) 4th cycle, stop cooking then- if you do all 5 cycles, the dough will become tough.
- At the end of the 5th cycle (10 minutes cooking time in total), the dough should have very little or no liquid left. Keep stirring and folding the dough for 1-2 minutes to give it an elastic texture.
- Allow the dough to cool for 5-10 minutes (not too long or the it will become hard and the topping won't stick)
- Once cooled, pinch off small bits with oiled hands and roll them in a bit of oil- you want the dough VERY lightly oiled and not oozing!- then coat with the peanuts, black sesame etc
- Serve straightaway.
Frying- don't add the oil into the liquid dough
- Mix all the dough ingredients except the oil till all dissolved
- Heat a pan on low-medium heat, pour in 1 Tablespoon sesame oil/ shallot oil/ peanut oil/ vegetable oil/ pork lard and once hot, add the liquid batter and stir.
- The batter will slowly thicken- keep stirring and folding till it changes colour and becomes a thick, solid dough. The cooking process will take 15-20 minutes. If necessary, add the other tablespoon of oil.
- Once done, stir and fold a few more times then cool for 5-10 minutes. Don't leave it too long or the batter will solidify.
- Since the dough was stir-fried in oil, it is not necessary to dip them in oil again. Simply pinch off small pieces of dough and roll in the coating.
- Serve rightaway and enjoy your traditional Chinese snack!
Notes
Note: the nutritional information is an estimate automatically calculated using the WPRM recipe maker and I am not responsible for its veracity.
Nutrition
If you've made this Chinese street snack, which method did you go for? I like steaming and frying the best! For more traditional recipes, please do sign up for my Asian recipes mailing list!


Rose says
I love how you've given the instructions for so many ways to cook muah chee! Made the steamed one today and it was just like I remember! Will try the microwave version next
Zen says
Thanks Rose, I prefer the texture of the steamed- how about you?