A detailed guide to making your own delicious and healthy Maesil Cheong (Korean green plum syrup) which will help even fermentation beginners make it perfectly the 1st time. This easy fruit cheong can be used to make tea, cocktails, salad dressings, jellies and more!
Jump to:
Why Make This
- Korean Sweet Maesil Syrup is delicious: I first came across maesil-syrup when I had maesil-cha (plum tea) (click the link for a recipe) whilst backpacking across South Korea with a friend 15 years ago. My friend ended up loving this green plum extract syrup so much, she even brought a jar back to London! Since we loved it so much, I decided to learn how to make it!
- Has Health Benefits: Several Korean blogs also rave about the health benefits of green plums. The kit I bought describes it as an "antimicrobial syrup" and says that "in Korea, plums are traditionally utilised as an antidote, disinfectant and builds immunity to infectious diseases".
- Easy: it's a really simple project that is a great confidence builder to get a newbie into home preservation and fermentation projects such as makgeolli, or Korean rice wine,
Note: it does involve 3 months of passive waiting time though. If you want a quicker cheong recipe, try this Korean tangerine cheong recipe.
What is Maesil Cheong?
A fairly new ingredient in Korean cooking, dating back about a decade or so, maesil-cheong 매실청 is now widely used in the Korean kitchen.
is now widely used in the Korean kitchen.
It is a syrup of fermented green plums (maesil), which are also known as Ume 梅 in Japanese and meizi in Chinese. (The fruits themselves, even when yellow (ripe), are full of citric acid and too sour to be eaten raw.)
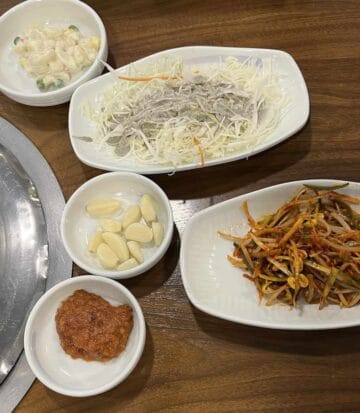
This fermented fruit syrup can be used in many Korean recipes, from stews and soy sauce eggs to fresh kimchi to drinks!
Random: Very confusingly, Wikipedia says that the 1:1 plum:sugar ratio is necessary to prevent fermentation but my kit says that "maesil-cheong...(is) buried in layers of sugar and left to ferment."
Since my kit comes with the symbols of The Embassy of the Republic fo Korea, Korea Agro-Fisheries & Food Trade Corporation, Ministry of Foreign Affairs and Ministry of Agriculture Food and Rural Affairs, I shall believe it over Wikipedia!
How to Use
Maesil syrup is simultaneously sweet and sour. It works wonderfully in Korean food, such as:
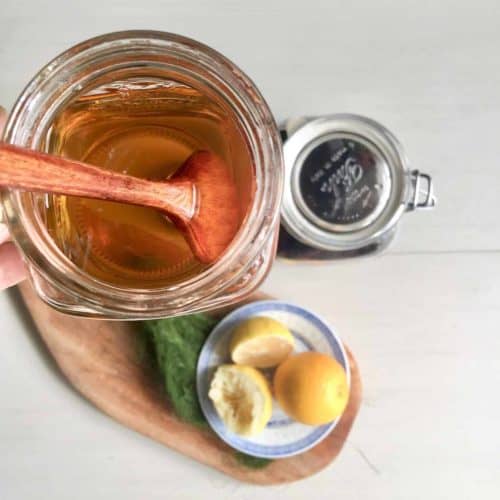
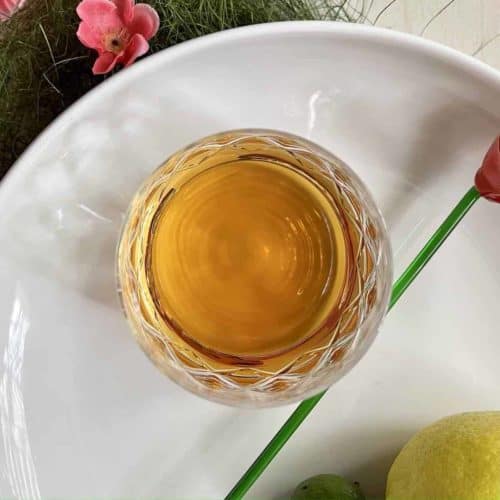
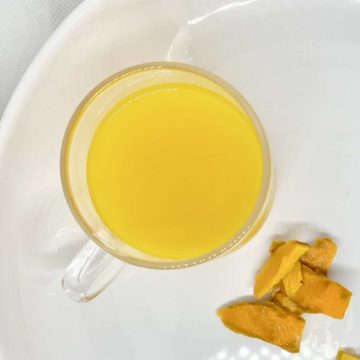
- Plum tea: add some of the maesil cheong to water.
- Plum soda: Switch it up and use cold carbonated water for a fizzy plum drink. Like cold brew matcha, this is super refreshing on a hot day!
- Cocktails!
- As a marinade or dipping sauce for meat: it helps to reduce the gamey smell
- Added to stir-fries
- Salad dressing
- Plum jellies: I recommend using konnyaku as the gelling agent due to its bouncy texture
Note: When using it as a sugar replacer, go slow and taste as you go due to its sourness!
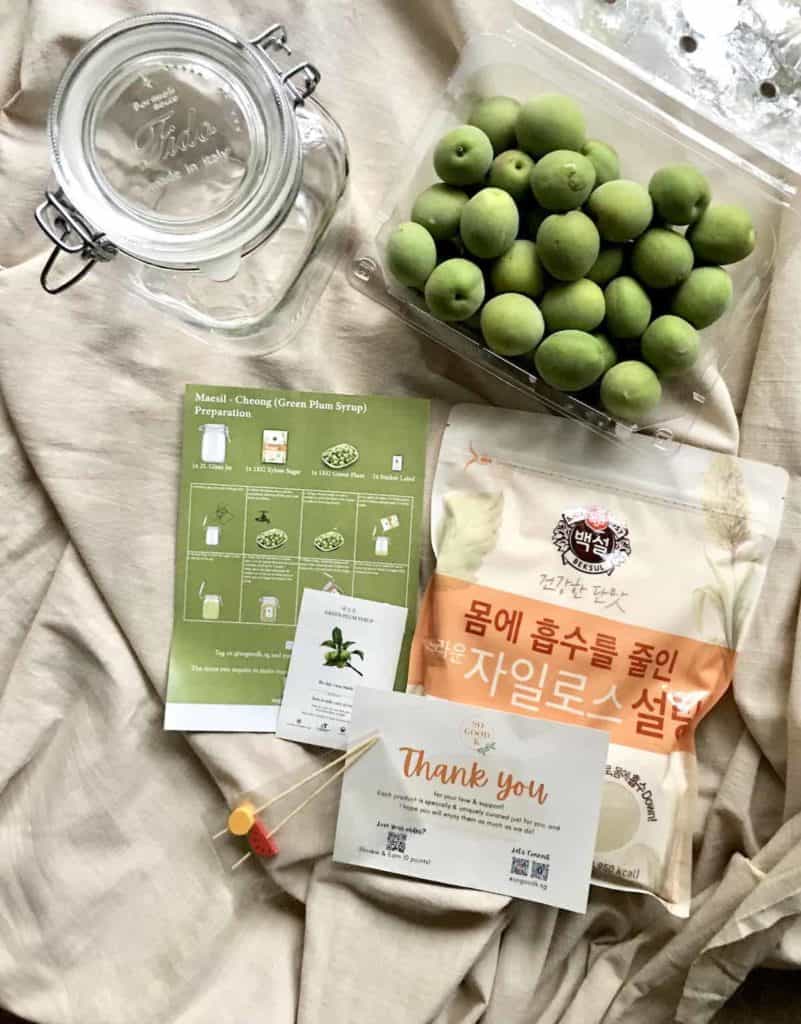
Ingredients
You will need:
- maesil green plums: If you're living in the US, you can buy this Korean ingredient from Maesilhood. However, Maesil is a seasonal product and you'll only be able to order it between May and June. (By June 17, maesil/ume isa already out-of-stock on all the Korean and Japanese sites in Singapore.) Depending on when you order it, you might get Korean green plums or hong-mei Korean plums with a touch of red on them. (Those are available later in the season, and will give you a slightly sweeter plum extract.)
- sugar: I used xylitol sugar but it's more expensive. Regular sugar and honey work too. (Alternatively, do as the Japanese do with their ume and use rock sugar (yellow/white are OK.)) You will need the same amount of sugar as maesil.
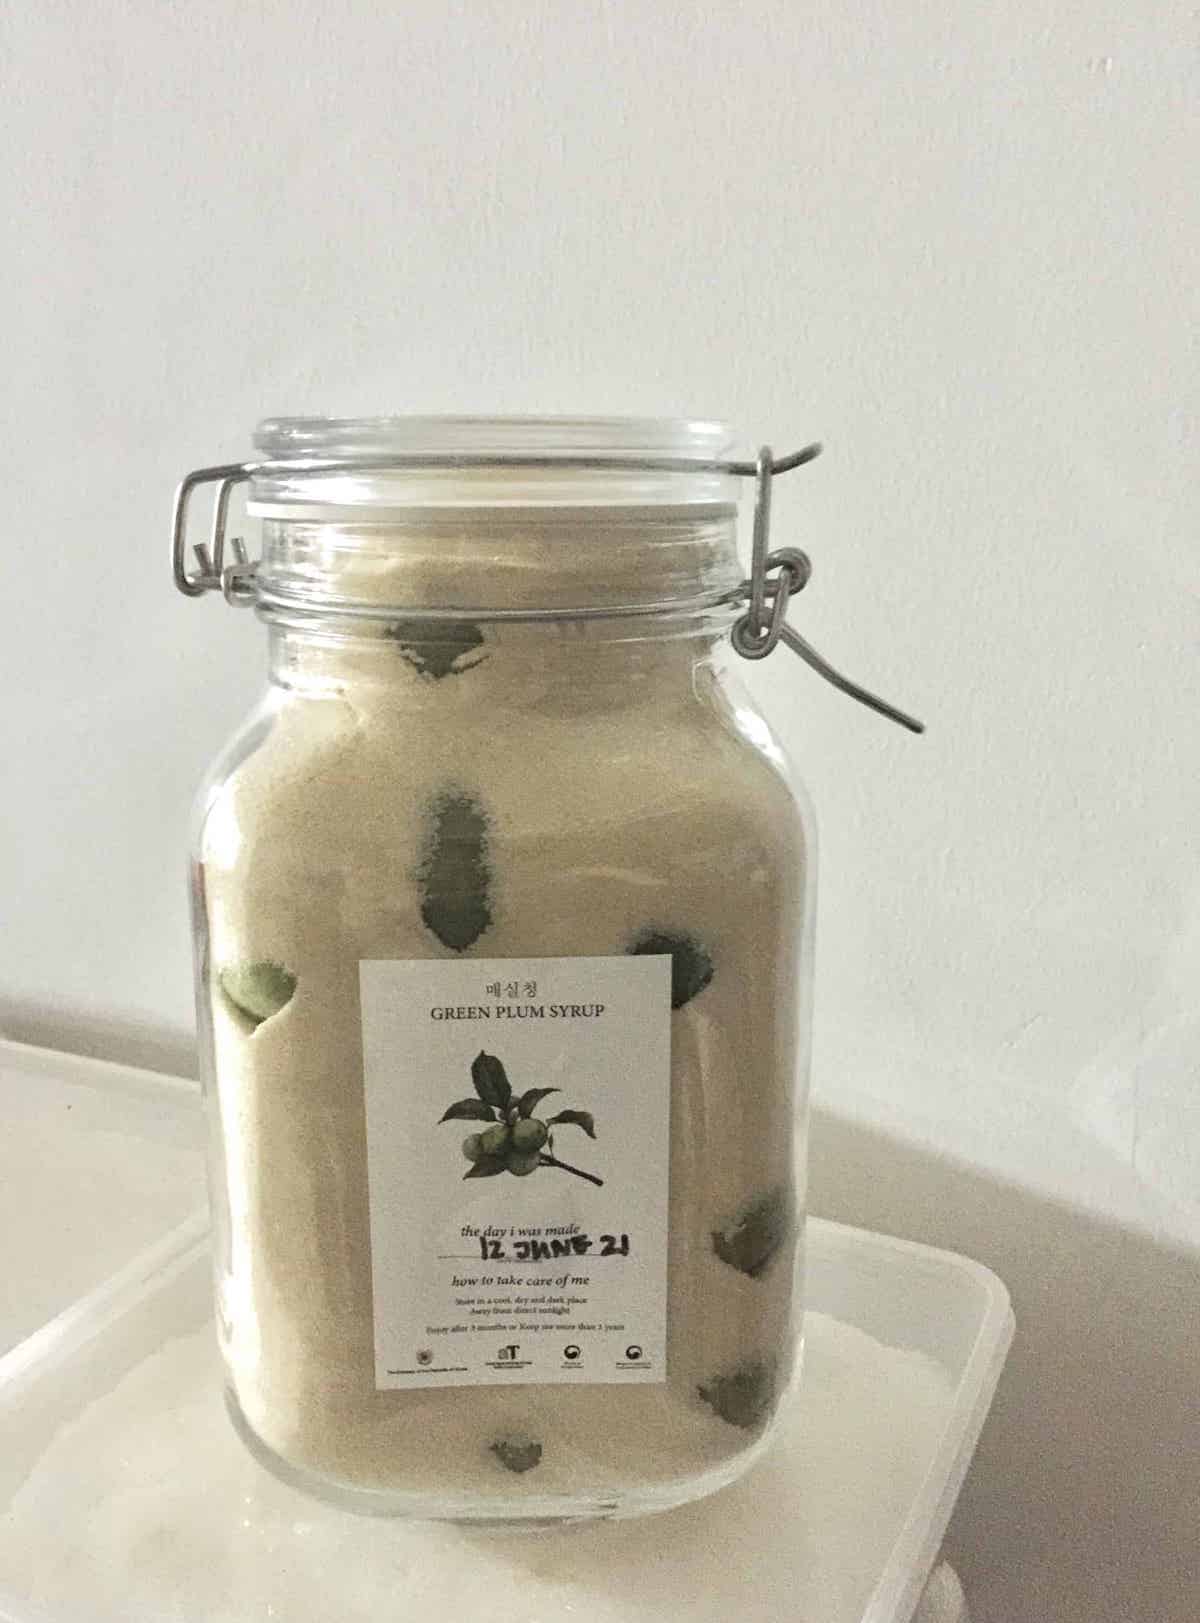
- glass jar: it must be large enough to hold all that fruit and sugar. For example, if using 1 kg of sugar and 1 kg of maesil plums, you'll need a 2-litre jar.
- toothpick: Or something sharp to prick the plums like a satay stick.
- wooden spoon: this is to stir the plum extract syrup. (Traditionally metal spoons are not used.)
Note 1: According to my Dentist friends, xylitol doesn't cause plaque, unlike regular sugar! For other sugar substitutes for drinks, click here.
Note 2: the seeds potentially have toxins
Step-by-Step Instructions
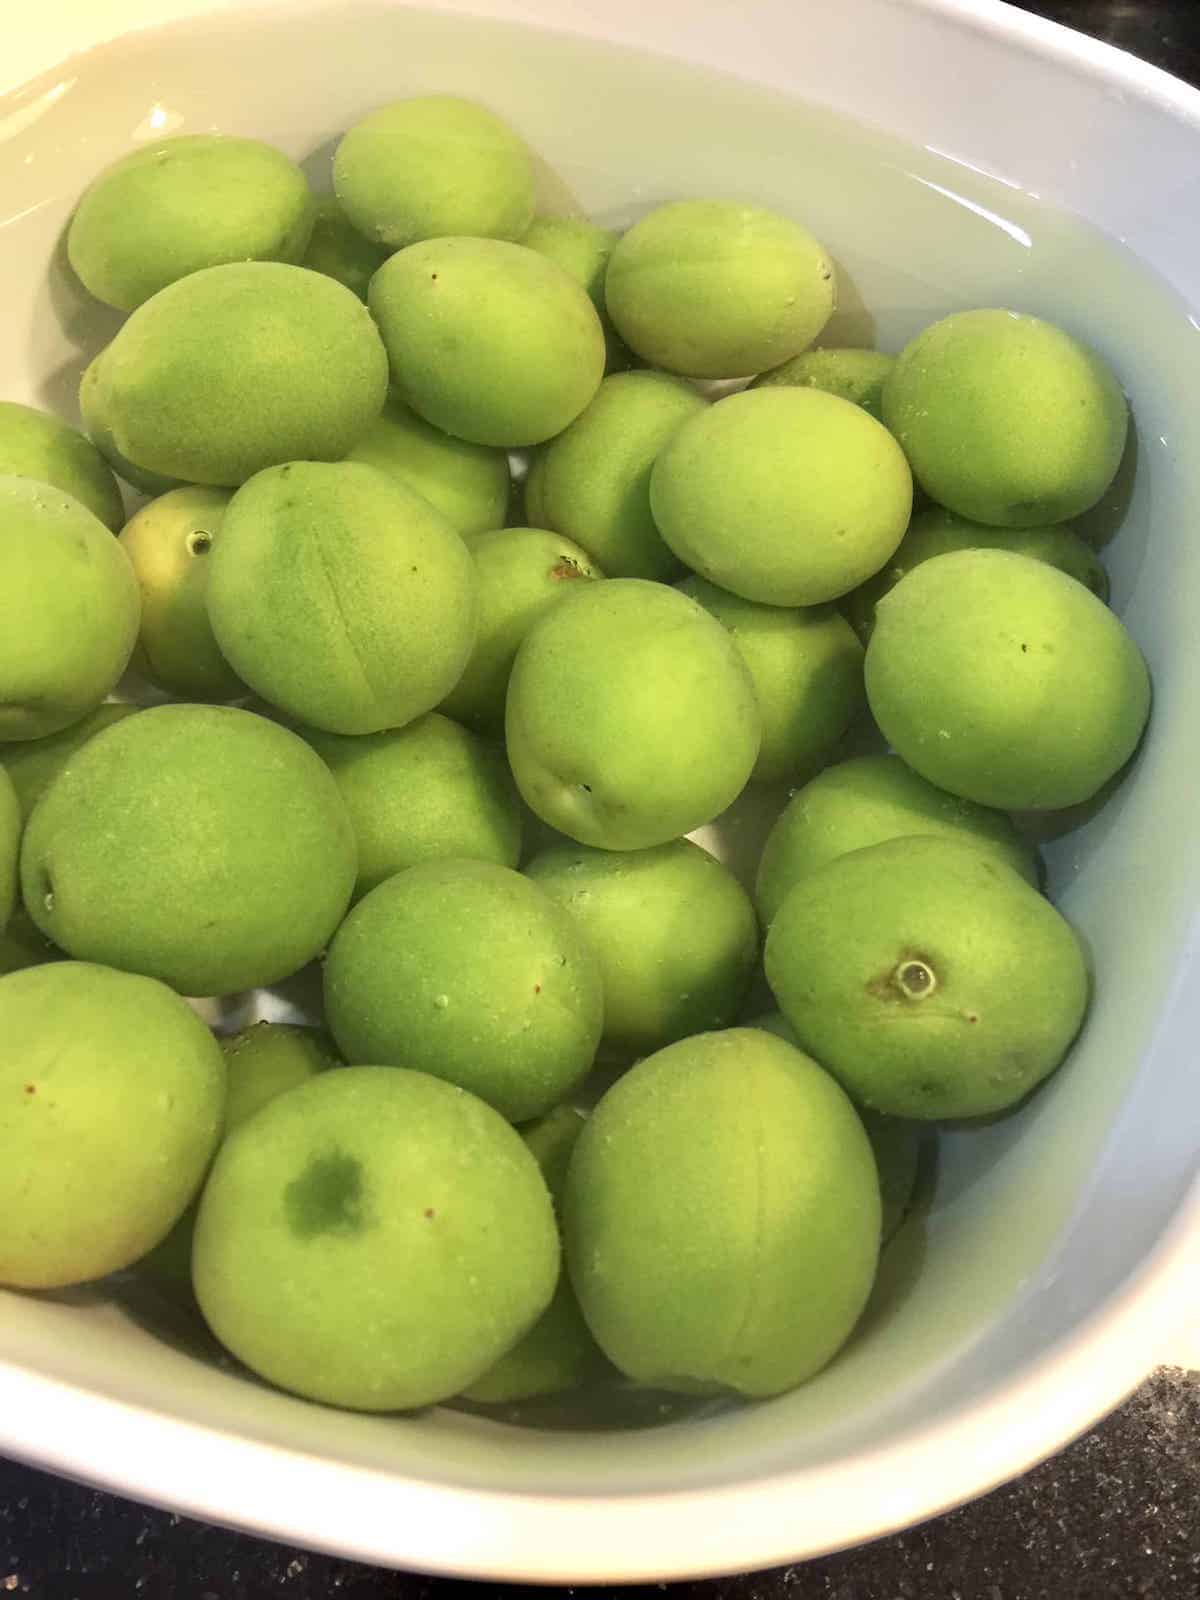
SOAK PLUMS AND STERILISE JAR
1a. Soak the plums in baking soda and water for 15 minutes. (Soaking fruit in baking soda for 15 minutes in a 1% solution can remove some of the pesticides on them.)
1b. Rinse the maesil well then dry the fruit very carefully. Any water in the ferment can lead to mold growing in your syrup (which you don't want!)
Note: Remove any stems- water likes to collect in the crevasses there so don't forget to dry that part well.
1c. Whilst the plums are soaking, sterilise the glass jar by pouring boiling water in it.
Tip: to prevent the glass jar from shattering, it needs to be the right type (e.g. canning jars.) In addition, you should pour some warm water into the jar first so that it isn't shocked by the boiling water. Note, the glass jar gets VERY hot to touch when you pour the boiling water in, so you may need oven gloves to pick it up.
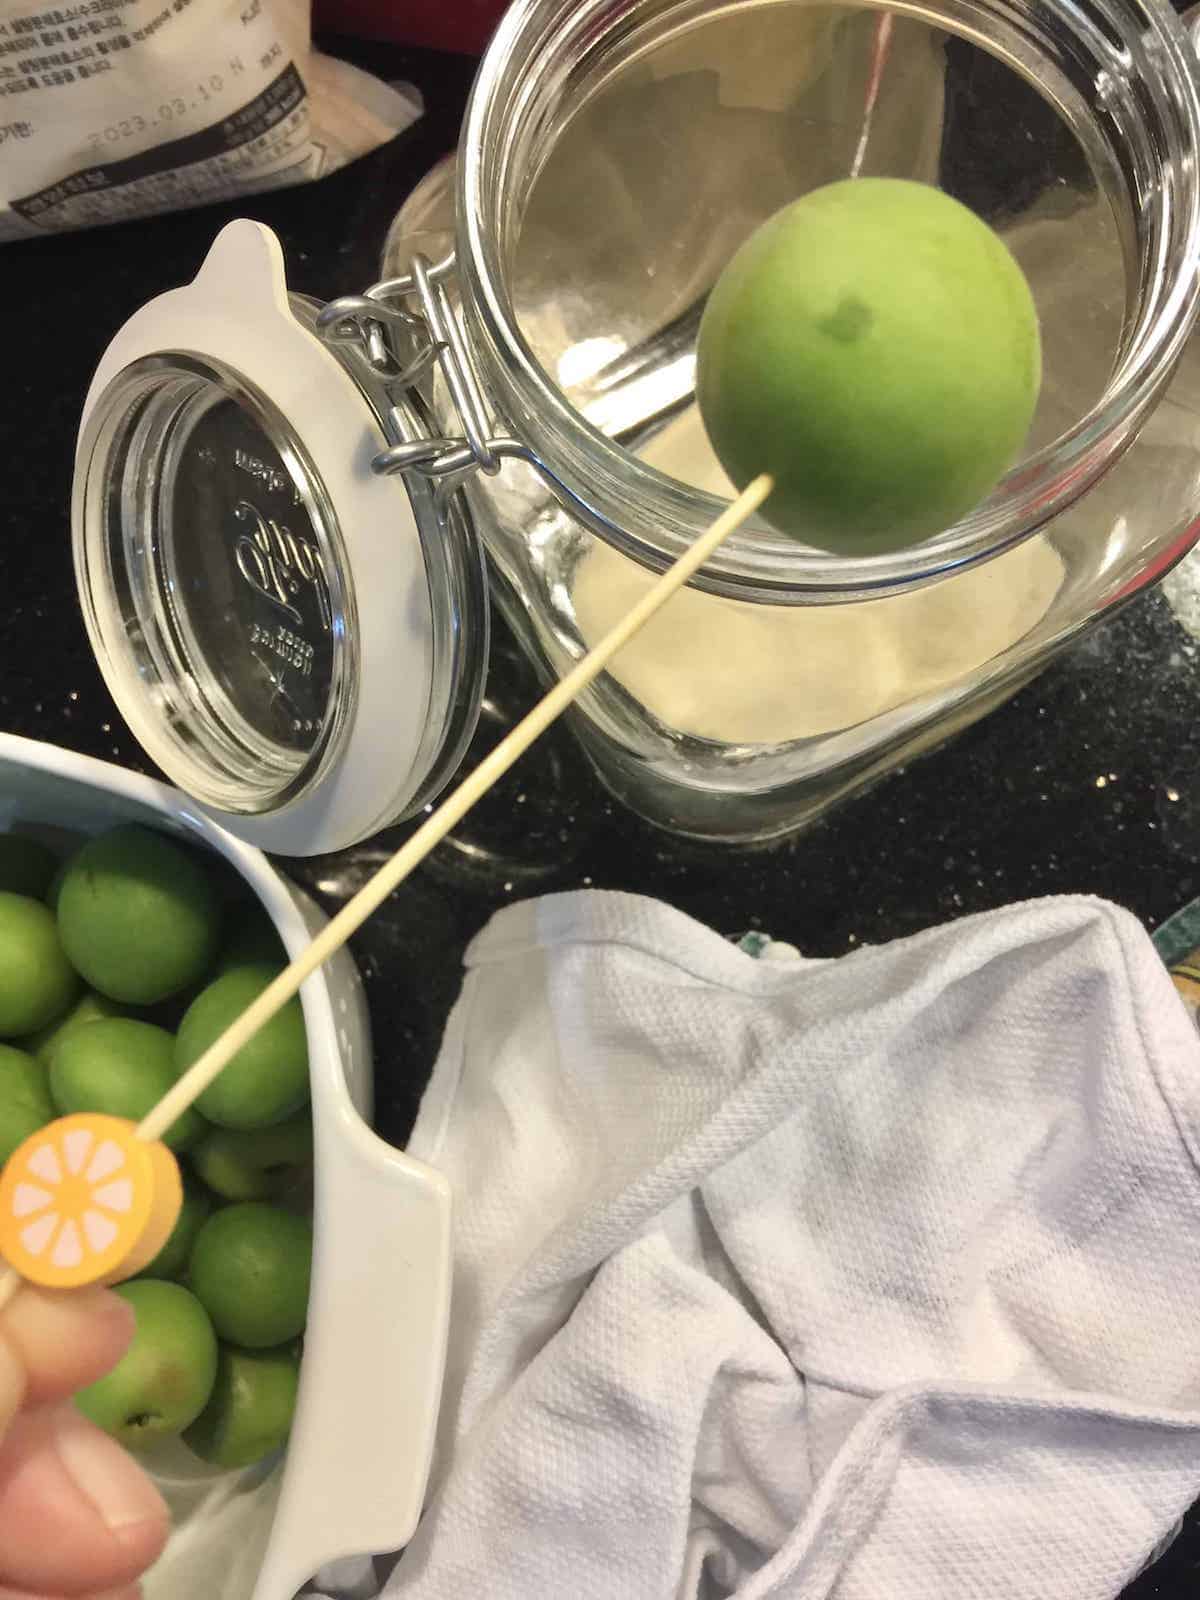
ADD PLUMS AND SUGAR TO STERILISED GLASS JAR
2a. After sterilising, dry the glass jar completely.
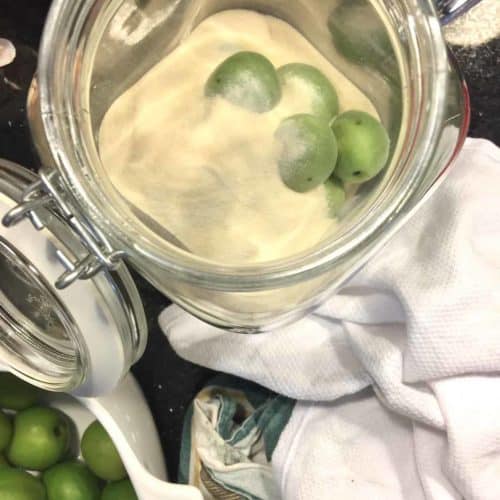
Now it's time to add the sugar and maesil. You want to add the maesil and sugar into the jar in batches- if you add everything at 1 go, it's hard to make sure all the plums are covered by the sugar evenly.
2b. Pour ⅓ of the sugar into the jar.
2c. Prick a few holes in each of the dry maesil- this helps it release its juices. Add ⅓ of the plums to the jar.
2d. Cover the plums with another ⅓ of the sugar, followed by another ⅓ of the plums.
2e. repeat till all the sugar and fruits are in the jar. The top layer should be a layer of sugar.
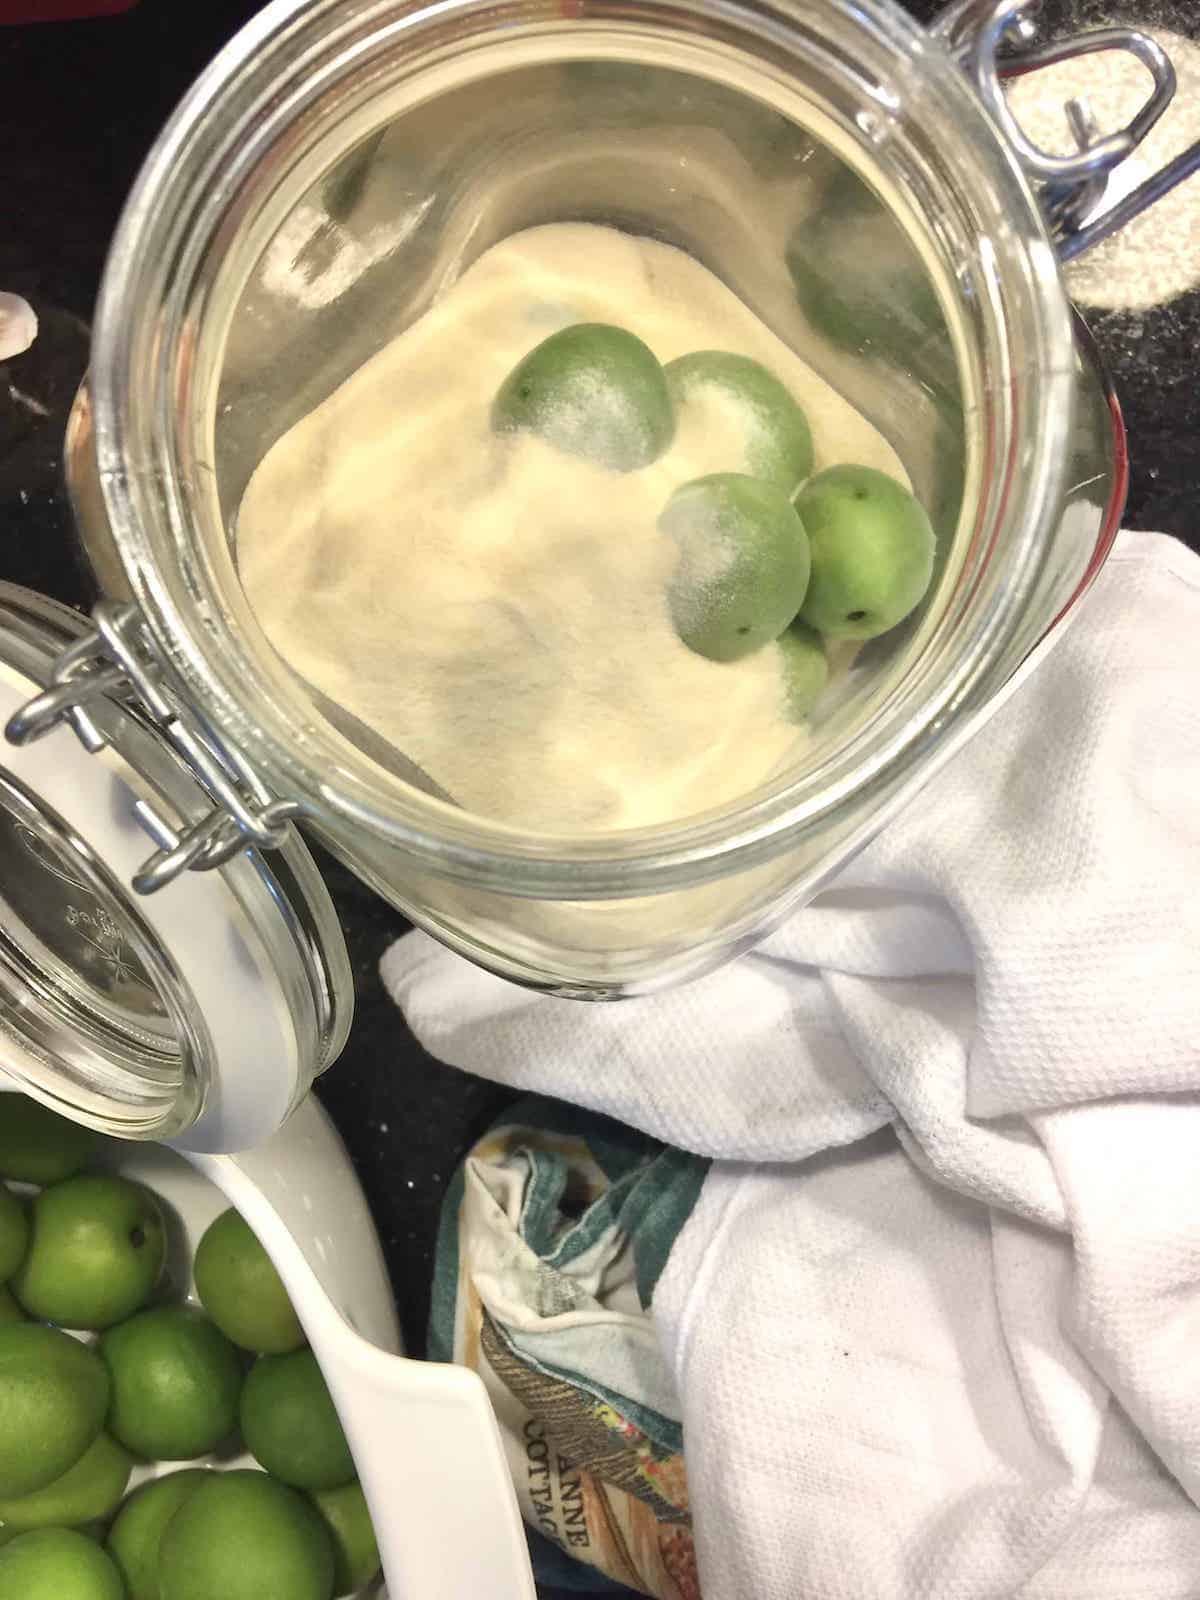
NOTE: If for some reason, not all the sugar can fit in the jar, just fill the sugar to the top of the jar. (You want to make sure all the plums are covered.)
3. In less than 24 hours, the plums will have released so much juice that the jar will be almost ⅓ empty. Add any unused sugar to the jar.
It is important that there is at least as much sugar as plums. (i.e. you can have more sugar than plums but not more plums than sugar, in terms of weight.)
LEAVE THE JAR IN A DARK PLACE FOR AT LEAST 3 MONTHS TO FERMENT
4a. The sugar and fruit liquifies very quickly. By day 2, almost ⅓ of the jar will have dissolved (if you live in a tropical climate.)
4b. On day 7, open the jar and use a sterilised wooden spoon to stir everything together till the sugar is all dissolved.
4c. Seal the jar again and replace it in its dark hiding place.
4d. From now till the end of the 3 months, burp the jar (open it to release air) every now and then to make sure it doesn't explode.
4e. After 3 months, strain and store the liquid plum syrup in the fridge. It's ready to be used now!
The leftover shrivelled plums aren't wasted! They can be used for other projects, as detailed below.
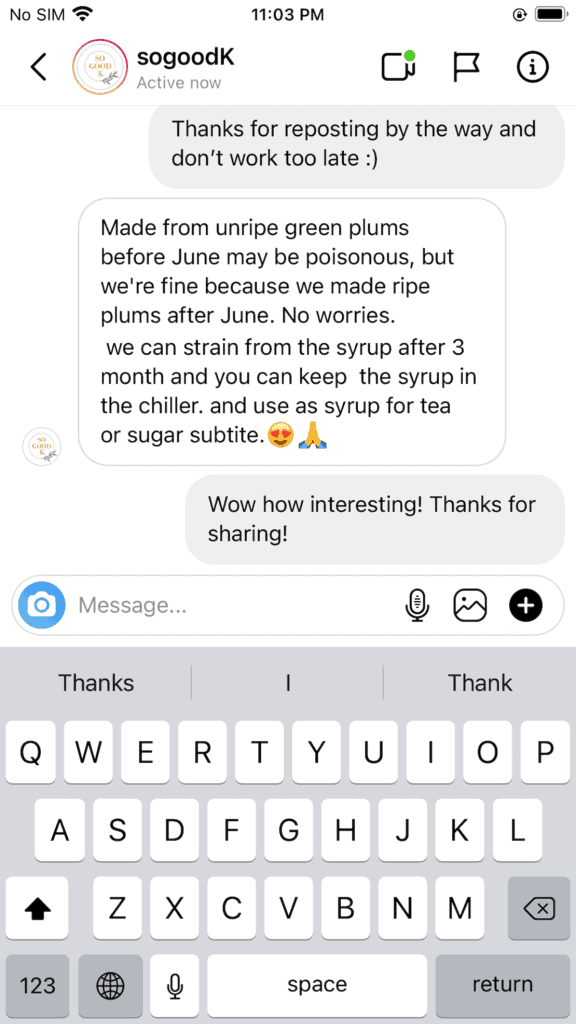
Note: according to some blogs, the green plums must be removed from the syrup after 3 months because the pits are poisonous. So I decided to check with the seller of the maesil.
However, if you ferment the syrup for over 1 year, this solves the problem- so either strain the syrup at 3 months, or wait for 1 year.
My kit doesn't mention anything about the poisonous pits- can anyone shed more light on this? is this an old wives tale or is there evidence backing up the claim?- but merely states that the plums can be fermented for 3 months to 3 years.
Update: I checked with my supplier and he says that the toxicity is related to the date: unripe green plums before June may be poisonous.
What To Do with the Leftover Plums
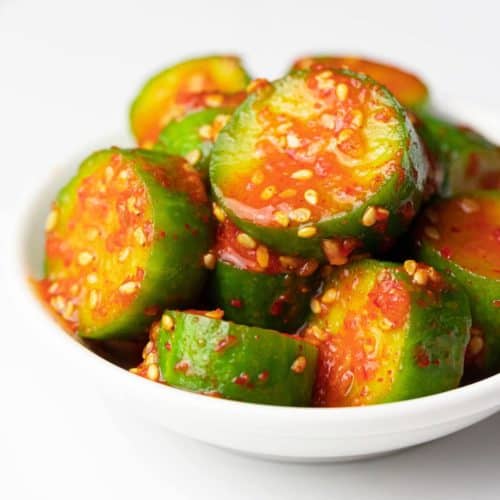
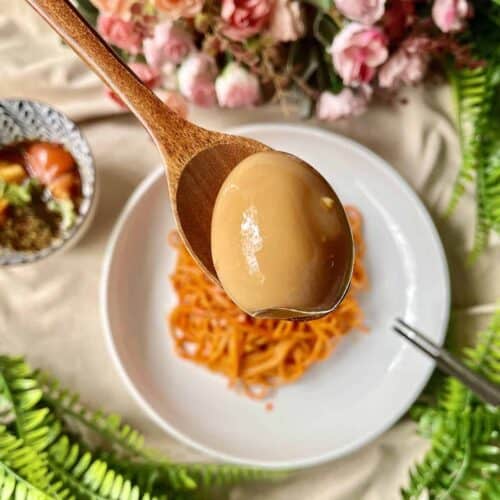
After fermenting maesil-cheong, you can use the remaining, wrinkly plums to make maesil-ju (plum liquor, similar to Ume-shu- no offence to any Koreans!) and then maesil-jangajji (maesil/ Korean green plums + gochujang).
Alternatively, you can use the leftover fruits to make plum vinegar. Do note you need a rice vinegar with sufficient acidity for this.
FAQs

Yes but not spoilt, rotten or moody ones.
There should be small air bubbles given out by the plums as the sugar liquifies - this indicates that the fermentation is ongoing. If you don't see any air bubbles after a few weeks, it's a sign that something may have gone wrong and you may want to toss it.
When I messaged SogoodK, they said that the Korean sweet plum syrup would only need to be stirred once (on Day 7) and would not need to be burped otherwise. However, most fermentation projects that I've seen do call for more frequent releasing of air. To be on the safe side- no one wants an exploding glass jar in the house, after all- burp the jar every now and then to release any built-up pressure.
In addition, there should not be any mold on the plums during the fermentation. (Sometimes the partially-liquified sugar can look like mold, so check carefully.)
Recipes that Use Cheong
Enjoyed this fruit cheong Recipe? Please leave a 5-star 🌟🌟🌟🌟🌟rating in the recipe card below! If you REALLY liked this Korean syrup, please consider supporting it by buying me a coffee! 🙂 (No obligation though!) Thank you and have a great day!
Maesil Cheong for Beginnners (Korean green plum syrup)
Equipment
- 1 2 litre Glass jar (Sterilised)
- 1 Toothpick Substitute: satay stick
- 1 Wooden spoon
Ingredients
- 1 kg maesil green plums You can also use ume from the Japanese store- it's the same fruit. Discard any moldy or spoilt plums, but bruised ones can be used.
- 2 teaspoons Baking soda To clean the plums
- 1 quart Water Plus extra for washing the fruit after soaking
- 1 kg sugar I used xylitol, but you can substitute with honey, granulated sugar or even rock sugar. (The Japanese like to use rock sugar when making Japanese plum tea syrup.)
Instructions
- Clean the plumsSoak the maesil in a baking soda and water solution for 15 minutes. You need a 1% solution (so 2 teaspoons of baking soda for 1 quart- 946 ml- of water.) Rinse and dry the maesil very well at the end of the 15 minutes.
- Sterilise the jar Whilst the plums are soaking, sterilise your heat-proof glass jar. First add some warm water to the jar to prepare it for the boiling water then pour the warm water out. Next, with the jar in the sink, carefully pour the boiling water into the jar then pour it out. You may need oven gloves for this as the jar will be very hot to the touch. Dry the jar thoroughly after sterilsing.
- Layer the sugar and plumsPrick 2-3 holes in each maesil, then add ⅓ of the sugar and ⅓ of the maesil into the jar, making sure the sugar and maesil are layered (i.e. 1 layer of sugar followed by 1 layer of maesil etc) Repeat twice with the remaining ⅔ of maesil and sugar. You should end with a layer of sugar.
- LeaveSeal and label the jar with today's date then store it in a dark and cool place. (I used the cupboard under my sink.)
- After 7 days, use a sterilised wooden stir to mix things up, ensuring that the sugar has all dissolved. Re-seal and place back in its dark hide-out. From now till day 90, open the jar every now and then to release any gas build up. (Refer to the section above the recipe card for signs that your maesil ferment is going well.)
- After 3 months (or up to 3 years if you are patient!), strain and store the syrup in a sterilised jar in the fridge. Use the leftover maesil for wine, vinegar or pickles (There's a paragraph above with more information about this- I will also be doing a separate post once my maesil syrup has fermented.)
- To reward yourself for your long wait, use your homemade Korean plum syrup extract to make yourself a nice cuppa plum tea!
Notes
Note: the nutritional information is an estimate automatically calculated using the WPRM recipe maker and I am not responsible for its veracity.
If you found this Ume recipe was helpful, maybe you'd like to sign up for my Asian recipes newsletter?

A says
Easy and delicious. Lloved it on picnics.
Zen says
Thanks A, so glad you liked it- plum tea is my favorite Korean drink!
Marcela says
Saludos desde Argentina. Me encanto la receta super fácil. Gracias por compartir!
Anonymous says
Is it necessary to use a wooden spoon? Would a metal spoon mess it up?
Zen says
Hello! Traditionally a wooden spoon was used and I don't like to mess with traditional fermented recipes so I've never tried, especially since Maesil is so expensive where I live 🙂 If I ever live somewhere I can get the plums more cheaply, I'll test it out and let you know!
The Teen Chef says
I cannot wait to try this. I started a batch of lemon-ginger Cheong when I was a bit under the weather and I've fallen in love. It's Autumn now, so I cannot wait for green plums to be in season again. Definitely will be saving+trying out this recipe. Thanks so much for the thorough recipe and emphasis on food safety! So important when working with fermentation :))
Zen says
So happy you found it useful! Do you make any other cheong? I was too busy to make maesil cheong again this year but I still have some left from last year so hopefully it'll last me till 2023!
Ren says
Hi, i was wondering if its ok that the sugar hasn't started to liquify even though its been 5 days?
Zen says
Hi Ren, thanks for stopping by. Did you make your plum syrup as per the recipe in my post? (Pricking holes in the plums, layering the sugar and plums, using the right sugar: plums ratio etc?) People often exclaim over how much sugar is needed to make cheong, but we do need a certain amount to make sure the fruits don't go bad! If you've not seen any mold, keep the jar of maesil for a few more days to observe first. If you see mold, unfortunately, it would be safest to toss and start a new batch!)
Mandy says
You MUST USE SUGAR! Using xylitol will result in a FAILED batch!! Sugar draws water out of the fruit in a process of osmosis. Xylitol DOES NOT interact with the fruit in the same manner, and will not draw out sufficient water!!!
Zen says
Thanks for stopping by Mandy. As mentioned in the post, I'm using a kit and instructions bought from a Korean company which was recommended by a Korean government agency- I understand that sugar is traditional, however the kit provided xylitol 🙂
Eve says
Hi Zhen
It’s finally green plum season! I tried making the green plum syrup with your post. May I know is it okay to add more sugar after 5-7days of fermenting? As I wasn’t able to fill in all the sugar required for the 1:1 ratio
Zen says
Hi Eve, thanks for coming back again! It's hard to say- it would depend on how little sugar you used the 1st time as it may have gone bad! I'm recommend being more careful when it comes to food safety 🙂
Delia says
So easy! Takes me right back to Korea! Thanks!
Zen says
Ahhh I miss Korea! Posting a Korean plum tea recipe next so stay tuned!
Kim says
Hi!
I have made some, but a few plums still had a tiny bit of water on them when I added the sugar. Will this be a problem for the recipe?
Thank you!
Zen says
Hi Kim, water promotes mold growth so it may lead to mold forming on the plum syrup (which you don't want!!). Since you've already made it, keep a close watch on the syrup to see if any mold forms. Fingers crossed it won't! 🙂
Hennessy says
This is fascinating! I need to try something like this soon!
Zen says
Pls so, it's so easy and delicious!