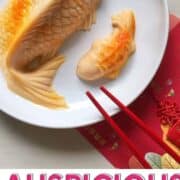
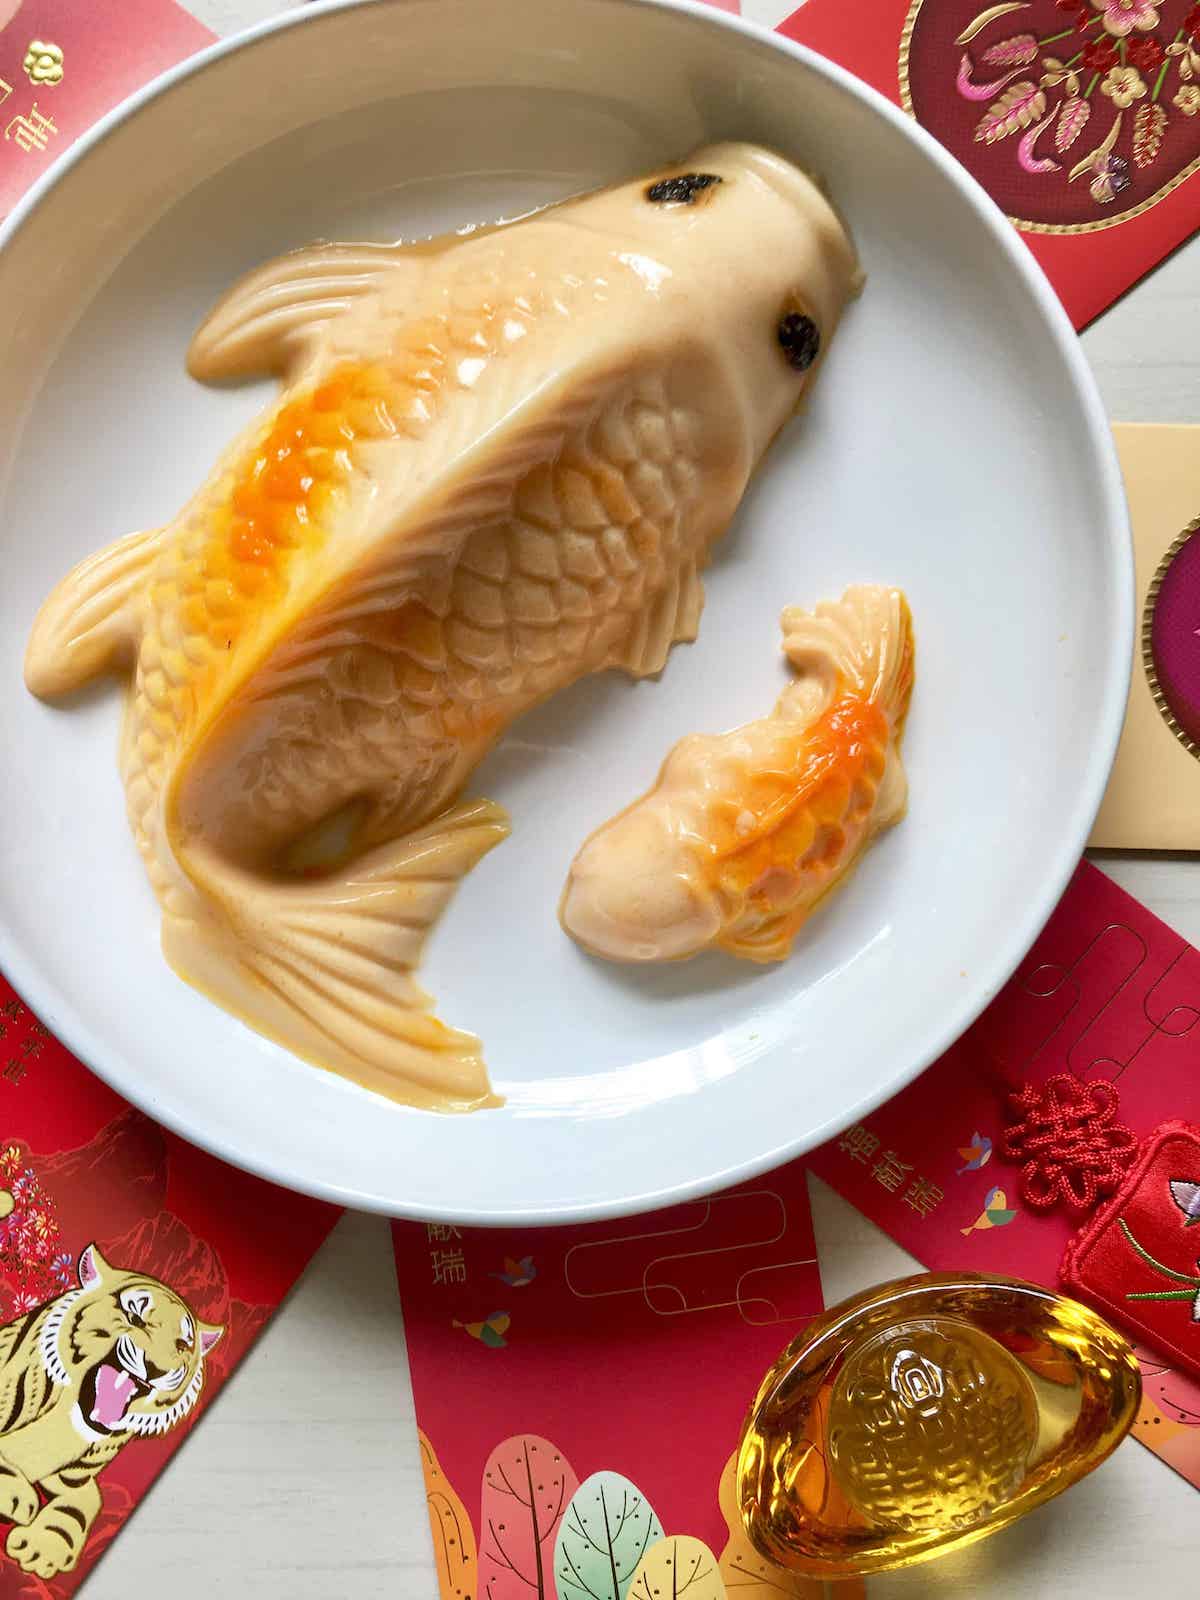
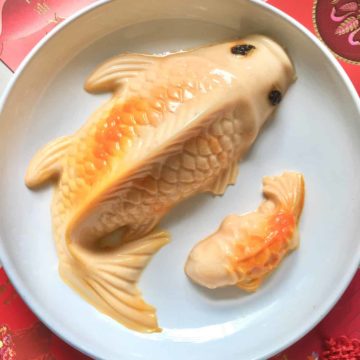
This EASY Chinese New Year koi fish jelly is a popular easy Chinese New Year Dessert- of course, you can make it anytime of the year!- because fish is a Chinese homonym for abundance and excess, and who doesn't want the New Year to bring them more good things than they need?
Jump to:
Why Make This
- Better for your wallet: Koi fish jelly is often seen during Chinese New Year in Singapore and Hong Kong. Like most Chinese desserts during CNY, the prices can be rather high. 5 medium-sized fish jellies cost S$100 from Robinsons, a mid-tier department store in Singapore, or $49.20 if you buy 1 piece from Regent Hotel (a 5-star hotel). However, it's super easy to make at home, and fun too! Painting the colours onto the fish is like creating a work of art!
- For luck: In Chinese culture, Koi Fish are seen as symbols of abundance. With these good luck sweet treats on your Chinese New Year table, your year should be a lucky one filled with wealth!
- Healthier: jellies are much better for you than a Chinese New Year cake (just don't go overboard with the sugar.) So instead of sponge cake or Nian Gao, why not serve this jelly at your new year celebrations?
So why not make this lucky delicious dessert for your Chinese New Year celebration at a fraction of the price? For other lucky Chinese New Year recipes, check out these longevity noodles and these golden foods.
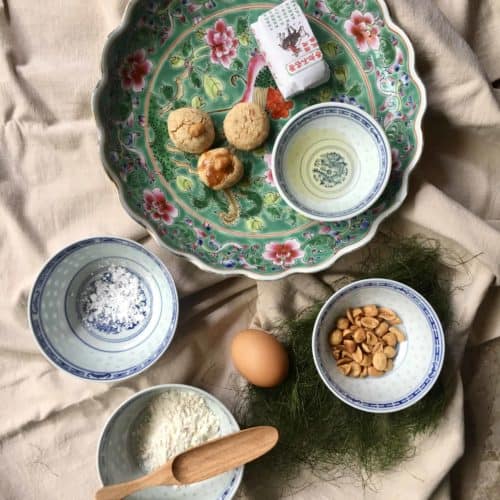
Ingredients & Substitutes
- Gelling agent: This is the main ingredient and you have 3 choices. For a vegan jelly, use Agar Agar (Kanten) or Konnyaku (Konjac.) My agar agar powder was pre-sweetened so I didn't have to add sugar. If yours isn't, add white granulated or caster sugar. (Do NOT use brown sugars like coconut sugar, palm sugar or regular brown sugar- your CNY koi fish jelly will become a rather murky brown.) Personally my fave is konjac jelly thanks to its bouncy, elastic texture but I recommend using agar agar if you're feeding the very young or elderly, as konnyaku has been involved in choking cases previously. Another possible substitute is gelatine (which is animal-derived so not vegan) but I've never tested it personally. Jello made from gelatin tends to be more wobbly, so may not hold the koi fish shape as well. Also, it needs to be refrigerated for it to set, so some of the steps will differ from my recipe (For example, you will need to chill the koi fish mold after painting the stripes, so that they set and don't merge into the rest of the fish later.)
- Evaporated milk and water: You can substitute with regular milk or plant-based milk. I used a ratio of 2 (evaporated milk): 3 (water) e.g. 200 ml of evaporated milk with 300 ml of water. If you use condensed milk, which already has a sweet taste, make sure your gelling agent doesn't already contain sugar as too much sugar can result in your jelly liquifying (after setting)
- Per fish: 2 raisins: This is for the eyes of the lunar new year dessert fish. Any small dark fruit would do. Alternatives are dried blueberries, blackcurrants, sultanas etc
- Yellow and orange (or red) food colouring: I would suggest using yellow and red/ orange for more contrast. I used red and orange in mine, and you can see the shades are quite similar so I didn't get as much contrast. If you don't mind more work, you could skip a colouring agent, and make 2-3 different jellies: 1-2 yellow, orange or red jelly and another white jelly (the original recipe below) e.g. a combination of orange, pineapple, mango or peach jellies for the yellow/ gold parts
- Optional: for an extra fancy Chinese New Year dessert, brush the koi fish jelly with some edible gold leaf or powder
Note: I've left my jelly as a simple milk flavoured one, but you can easily add other flavours e.g. boil with pandan leaves etc
Variations
Other flavour suggestions which complement the colours of the spring festival koi fish include:
- lychee and rose
- coconut milk jelly and mango
Note: I sometimes make this easy CNY dessert using osmanthus jelly- the gold colour of the osmanthus tea, and the red of the goji berries, mimic the koi fish colouring.
Balancing the Mold
The fish jelly molds are quite flimsy- and due to the shape of the fish, which has a curved back (sort of like a hump)- they can be tricky to balance. It's common for them to tip to one side whilst you're pouring the jelly in and upset your jelly, disrupting the koi fish shape.
There are 2 ways to get around that:
1. 100% level mold but may spill on way to fridge
For the 1st method, use 4 same-sized bowls to balance each corner of the mold.
As the bowls are the same height, this ensures that the mold is now totally level so that the jelly can fill the fish completely, instead of unequally. However, the jelly may still spill out when you're moving the mold to the fridge to set.
You can fix this by leaving the koi fish jelly in place to set for 1-2 hours then moving it into the fridge when it's more solid.
Unfortunately, only agar agar and konjac jellies can set at room temperature- if you're using gelatine, it'll need to go right into the fridge. If you're not certain you won't spill it, either don't fill the mold to the brim or use the 2nd method (below).
Note: the jelly liquid is super hot so make sure the mold is stable before adding the jelly. Also be careful when pouring it in and always make sure the koi fish mold is stable on the 4 bowls before pouring it in.
It'd be great if you could grab a helping hand in the kitchen to hold the mold steady whilst you fill it. If not, use one hand to hold the mold, and another to scoop the jelly in slowly.
2. Use Uncooked Beans or Rice
In the 2nd method- which is the one I used- you pour a lot of uncooked beans or rice onto ½ of a high-rimmed baking tray or large platter then push the mold into the beans/ rice to balance the hump of the fish- the beans/ rice will help to hold the koi fish mold steady.
However, it's hard to gauge how much adjustment you need to make for the fish to be 100% flat, so your liquid jelly may spill a little. You can always cut out the excess jelly later, but the jelly outline won't be as clean and beautiful.
Just make sure the baking tray/ platter can fit in the fridge- when I'm desperate, I just let the jelly solidify at room temperature.
As mentioned above, this only works for agar agar (kanten) and konjac jelly but not gelatine.
Expert Tips
Expert Tip #1: Dip the raisins/ black currants/ sultanas in the jelly before applying it to the mold and pressing down firmly. Let them dry before adding the rest of the jelly. This helps to make sure they stick firmly to the mold, instead of disappearing into the dessert, leaving you with a blind fish!
Expert Tip #2: Remove the jelly from the mold by bending the mold or, if firmly in place, use a knife to gently wiggle it out, paying extra care to the thin fins.
Expert Tip #3: Chill the koi fish jelly before serving for the best taste!
Other Chinese New Year Food recipes
Enjoyed this easy good fortune Chinese New Year jelly recipe? Please leave a 5-star 🌟🌟🌟🌟🌟rating in the recipe card below! If you REALLY liked this traditional Chinese dessert, please consider supporting it by buying me a bottle of agar agar powder! 🙂 (No obligation though!) Thank you and have a great day!
CNY Koi Fish Jelly (Easy Chinese New Year Dessert)
Equipment
- Pot
- Heat proof whisk
- Glazing brush Alternatively, use the back of a spoon
- Koi fish mold
- 4 equal sized bowls or cups Alternatively, use a baking tray/ high rimmed platter and uncooked beans/ rice to balance the mold
Ingredients
- 1 packet Pre-sweetened agar agar powder Check the back of your agar agar packet to make sure they don't have different instructions on their agar agar: water ratio- if they do, follow what's on the packet. If your agar agar doesn't contain a sweetener, add some white granulated or white caster sugar to give it some taste.) Substitute: Konjac powder or gelatine if not vegan
- 11.7 oz evaporated milk (333g) Substitute: regular milk or plant-based milk.
- 23.5 oz water (667g)
- Yellow, orange and/or red food colouring You only need a few drops
- 2 dried raisins/ blackcurrants/ sultanas per fish 1 litre of jelly could be used to make 3 koi fishes, based on my mold, but different molds have different sized fish so yours may be different.
- edible gold paint or glitter Optional
Instructions
- Add the evaporated milk and water to the pot, whisk whilst adding the agar agar powder- note the fire is NOT on at this point in time and the liquid should be cold/ room temperature.
- Once you've stirred the agar agar in, switch on the fire and bring the pot to the boil. Keep stirring till the powder is all dissolved, then reduce the heat to keep the agar agar warm (so that it won't set).
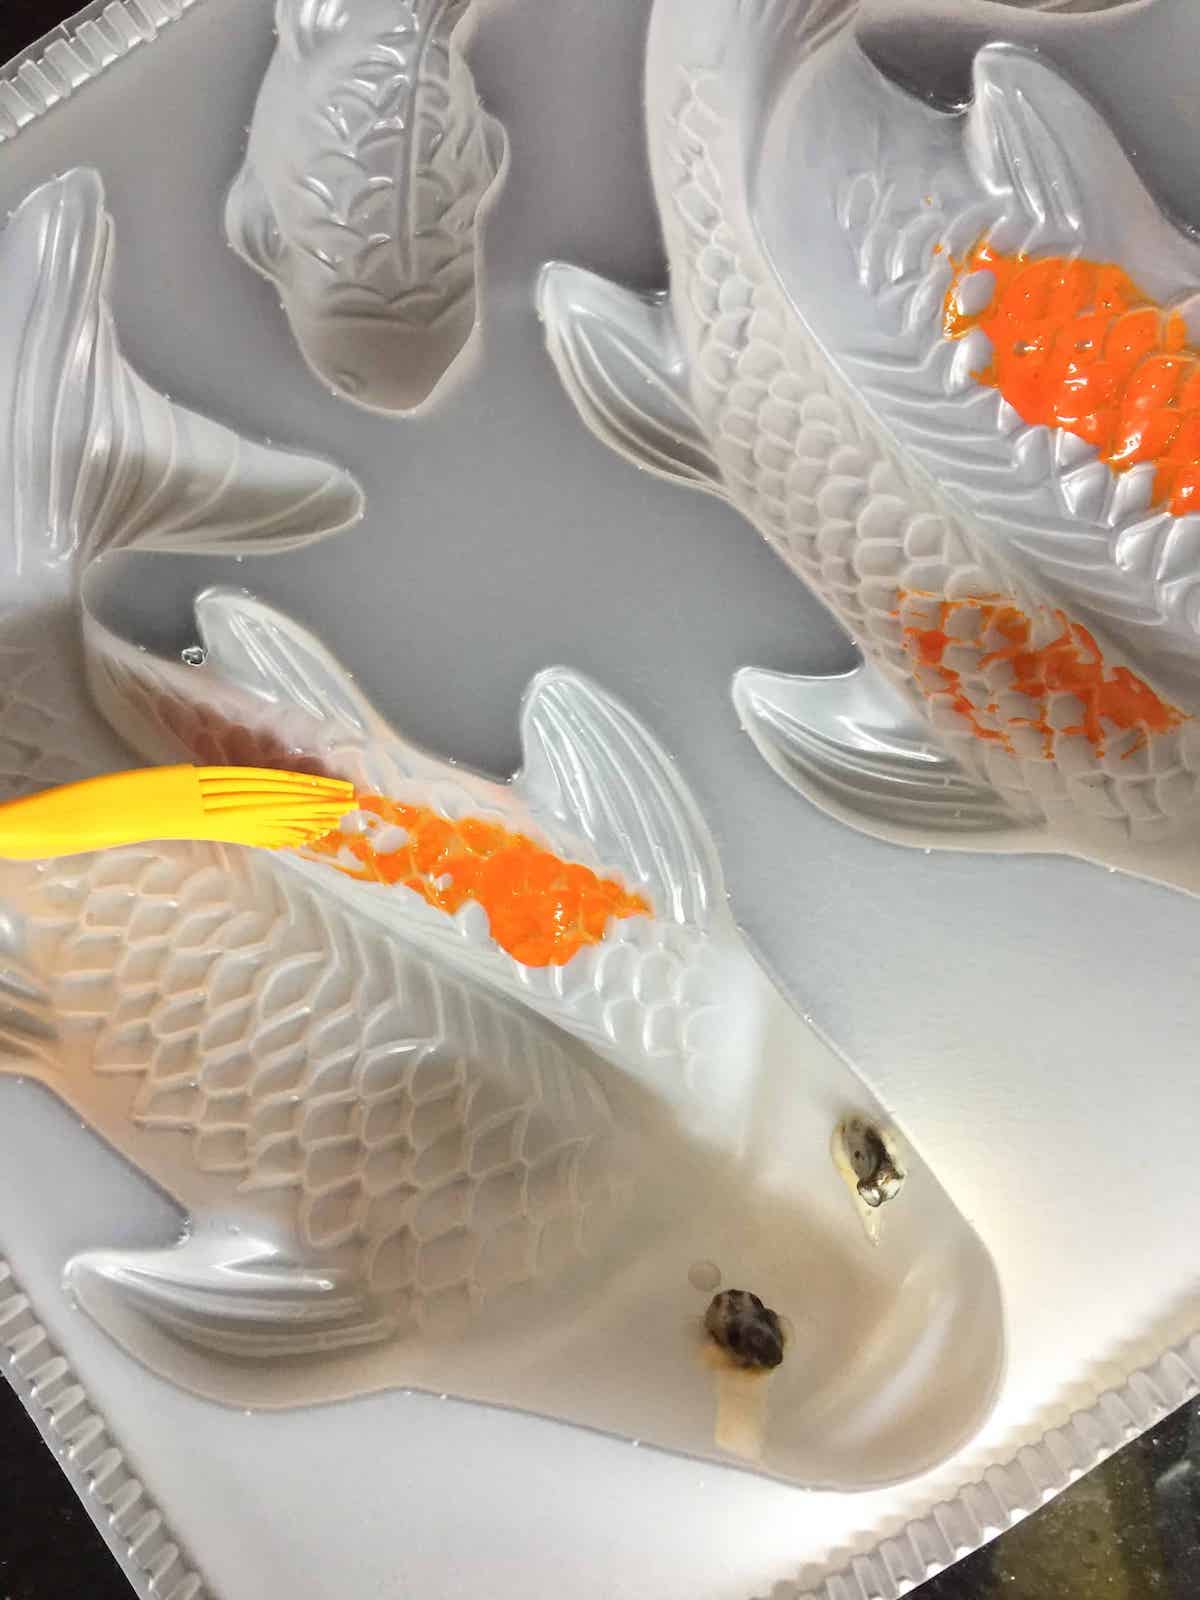
- Use your tweezers or chopsticks to dip the raisin into the agar agar then press it firmly to the mold, where the eye of the fish is, and hold it there till it's stuck to the mold. Repeat till all the eyes have been filled out.
- Scoop 2-3 tablespoons of agar agar liquid into 2 bowls, then add a few drops of food coloring to the bowls. (1 colour per bowl. If you're using 3 colours, you will need 3 bowls.) Mix the coloring and the liquid jelly well- use different spoons for each bowl and don't cross contaminate the colours!
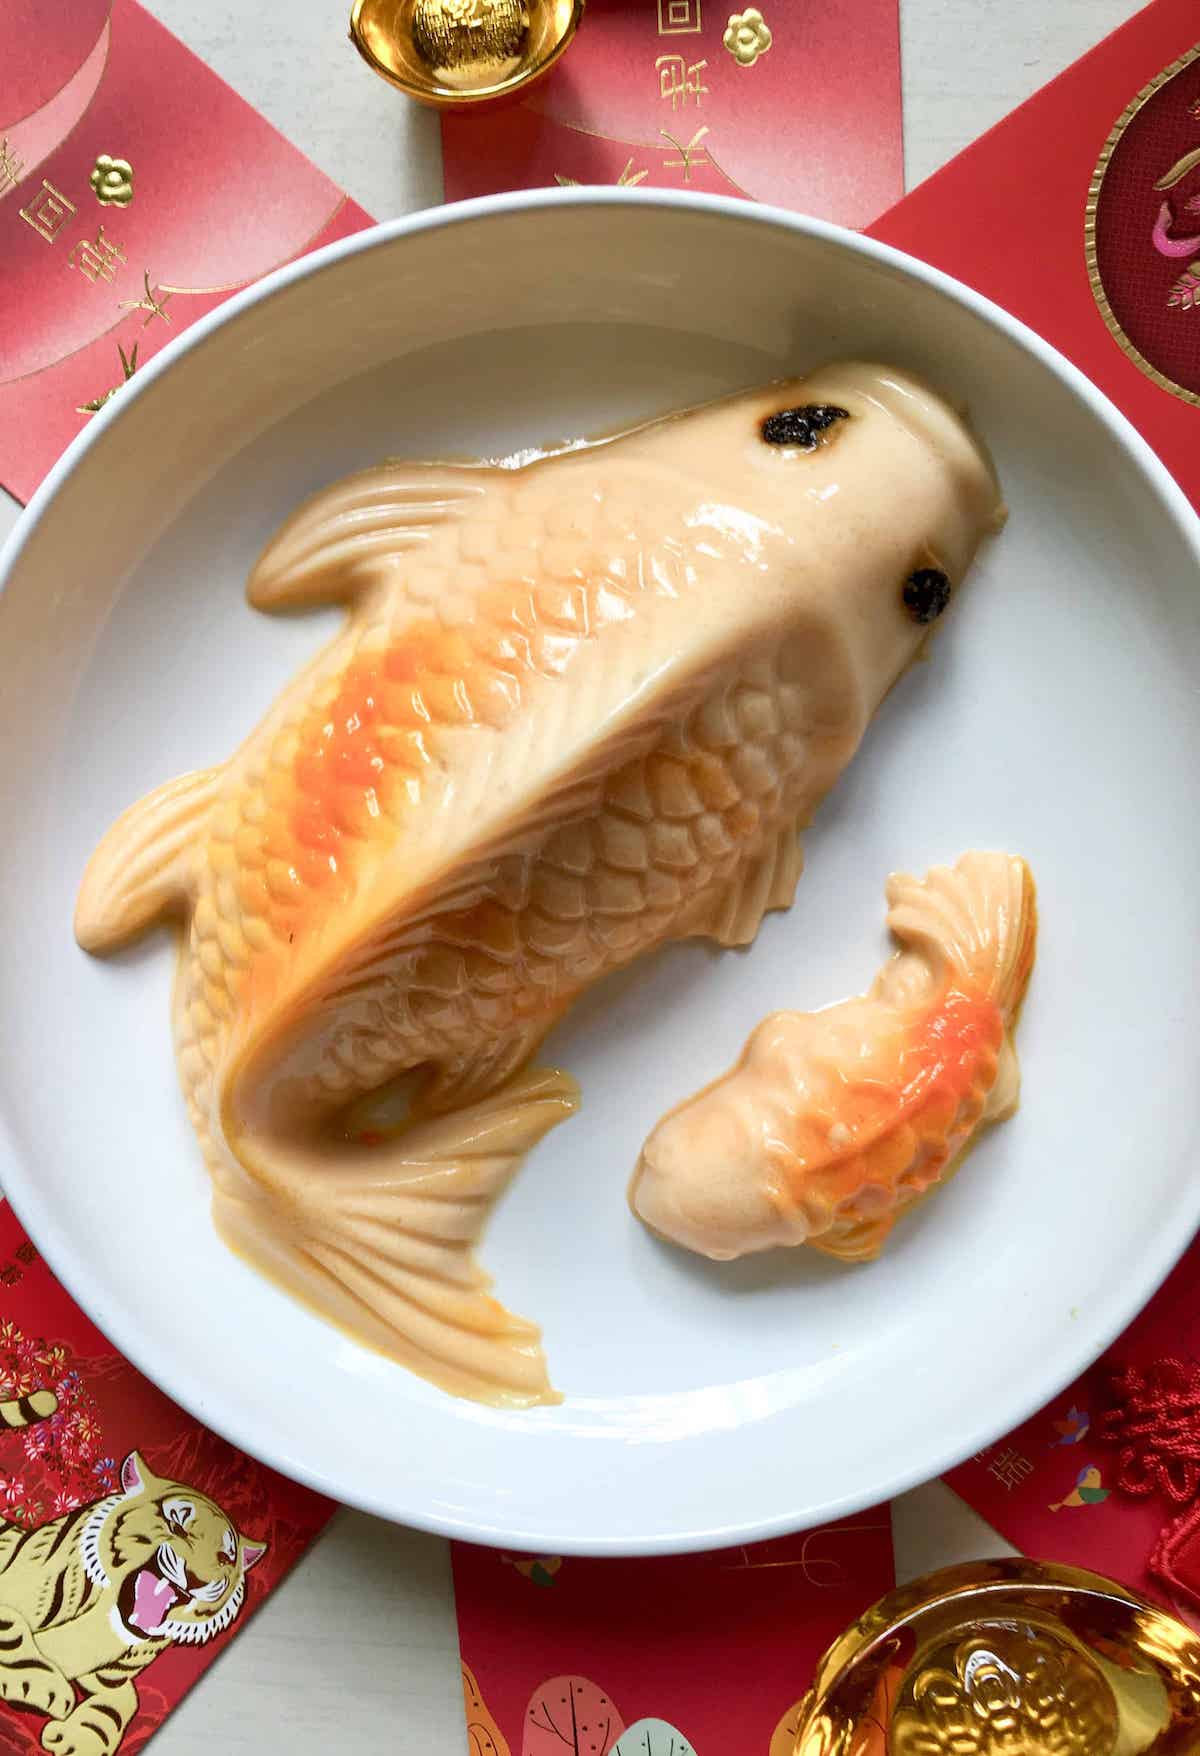
- Using a pastry glazing brush or the back of the spoon, thickly paint on some yellow/ orange/ red patterns onto the fish mold to mimic the strips of a koi fish (See the post for a photo)- start with the lighter colour then move on to the darker colour.
- Give the coloured stripes some time to set on the mold- you don't want it to melt into the hot jelly when you fill up the rest of the fish!
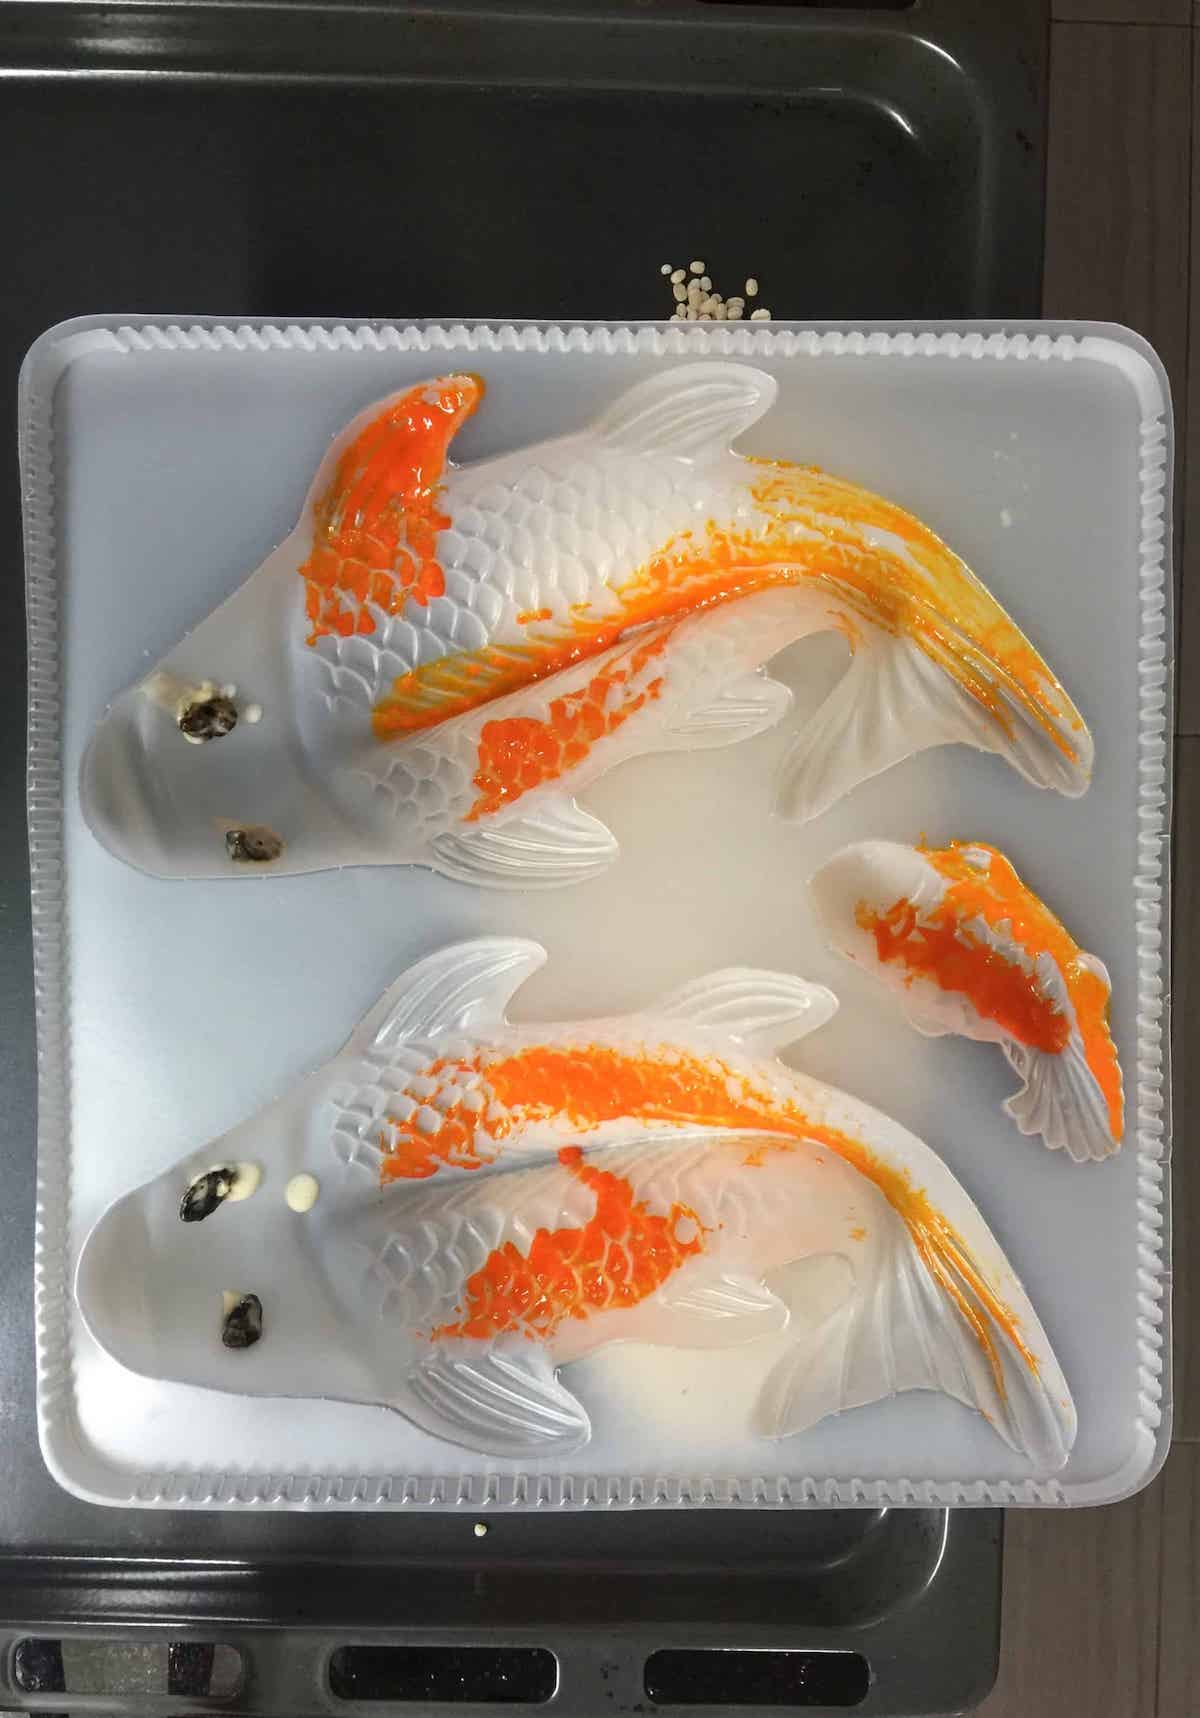
- Now either balance the mold on 4 same-sized bowls (1 bowl per corner) OR pour a lot of uncooked rice/ beans onto a baking tray and push the mold into them so that they hold it level (See post for the pros and cons of each method.) In this post, I used the 2nd baking tray method.
- After the mold is as level as u can make it, use 1 hand to hold the mold, and the other hand to stir the jelly to make sure it's still liquid, then slowly scoop the hot jelly into the molds. Make sure you don't burn yourself!
- Scoop till all the fish molds are filled then leave to set at room temperature for 1 hour till it's a little more solid then transfer to the fridge for another 2-3 hours. (I let it set before moving it to the fridge so that I can minimise spillage.)
- After 2-3 hours, the jelly has set, and you can remove it from the mold and plate it. You can either pop the mold to get the jelly out or if it's stuck, gently run a knife along the edges to help it out. Be very careful of the fins as they tend to be thin and break easily. Optional: brush some edible gold dust on the back of the fish!
- Best enjoyed eaten chilled. Happy Chinese New Year everyone!
Notes
Note: the nutritional information is an estimate automatically calculated using the WPRM recipe maker and I am not responsible for its veracity.
If this Chinese New Year dessert recipe was helpful to you this holiday season, maybe you'd like to sign up for my newsletter in which I send you more authentic Asian food?

nancy says
great job on these koi fish jelly - super cute.
Zen says
Thank you nancy, they were more popular than I thought they would be! So glad I shared the recipe
orry says
I tried making this last year and it was so difficult as I couldn't keep the mold flat- thanks for the 2 tips, definitely going to try them when I make this over the weekend, can already see how it'll make life so much easier!
Zen says
Glad this was helpful orry! Happy CNY!